
Contents:
About the Wireless Access PC Card, PCI Adapter, and Access Point
Network Configuration and Planning
Adapter Installation and Configuration for Windows 95*/98 FE*/98 SE/2000/NT/Me/XP
Navigating the Network Configuration Utility Tool and the Access Point Web Configurator
Product Specifications for Wireless Access PC Card and PCI Adapter
Product Specifications for Wireless Access Point
Wireless Access PC Card, PCI Adapter, and Access Point User Guide
Adapter Installation and Configuration for Windows 95*/98 FE*/98 SE/2000/NT/Me/XP
SYSTEM REQUIREMENTS
In order to install and use the Wireless PC Card or PCI Adapter, your PC system must meet the following requirements:
- An available PCI slot or Type II or Type III PCMCIA slot
- PCMCIA revision 2.10 compliant card and socket services
- 500 Kb free disk space for utility and driver installation
PCI Adapter Installation
Software Installation
Step One: Prepare for installation
Turn on your desktop computer. Type your password if you are prompted
to do so.
Note: It is very important that you have your serial number written down before you install the PCI Adapter. If you ever need to call our Technical Support department, you will need this number to receive assistance.
Note: Be sure to find out what letter your CD-ROM drive uses before you begin installing your new product. You will need to know this to properly install your software.
Step Two: Install your software
Note: You will need to install this software on all the PCs or laptops you plan to wirelessly network together.
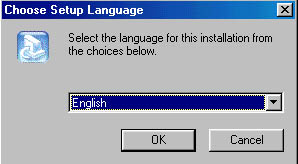
Insert your Installation CD-ROM into your CD-ROM drive. In the Choose Setup Language window, select your preferred language and click OK.
Note: If your CD-ROM does not automatically launch, click Windows Start, Run, and type D:\setup (or the appropriate letter of your CD-ROM drive) and click OK.
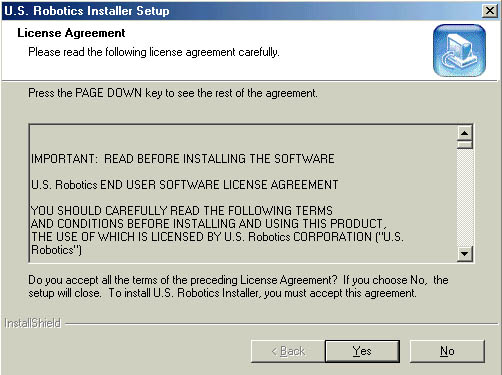
Some files will be copied to your system, and then you will be asked to read the license agreement. Read the agreement and click Yes.
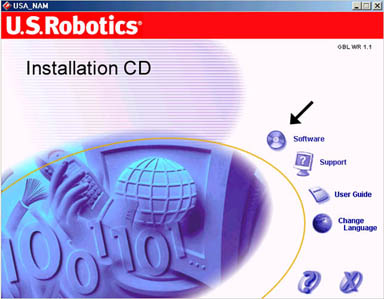
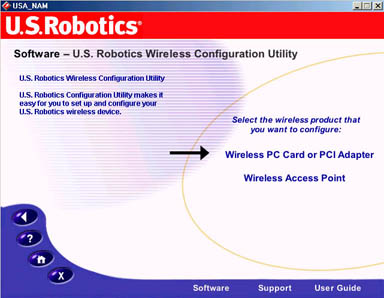
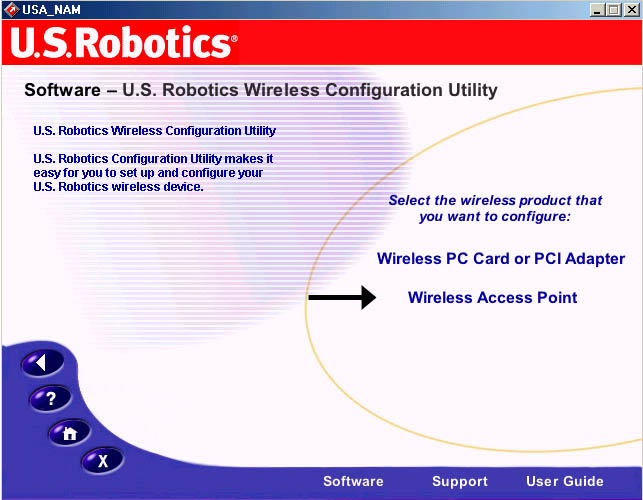
The Installation CD Graphic User Interface (GUI) will appear on your screen. Click Software.
Click the icon for the USRobotics Wireless Configuration Utility.
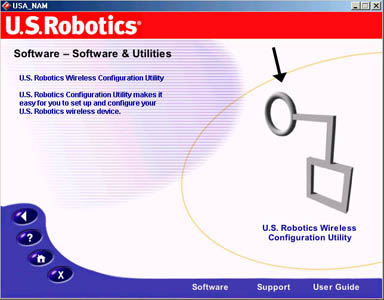
Click Wireless PC Card or PCI Adapter.
Follow the on-screen instructions and wait for some files to be copied to your hard drive. A window will appear showing you the files that have loaded onto your system. Close this window. The program window with the Configuration Utility icons will appear. Close this window.
Your software setup is complete. Click OK, and get ready to install your hardware. Do not remove the Installation CD from your CD-ROM drive. Shut down your computer.
Hardware and Driver Installation
Step One: Prepare for Installation
Unplug your computer and remove the computer's cover.
Step Two: Connect the PCI Adapter to your computer
Locate an available PCI slot and insert the PCI adapter. PCI slots are
typically white plastic lined with metal, and are 3.5 inches long. Use
the slot cover screw to secure the PCI adapter.
Note: It can be tricky getting the
PCI Adapter into the PCI slot. Use firm pressure to seat the card properly.
Some computers require you to remove the PC Card from the PCI Adapter
before you insert the PCI Adapter into the PCI slot. If necessary, pull
the PC Card out of the Adapter and set it aside. Insert the PCI Adapter
into the PCI slot, pressing firmly to seat it properly. Then slide the
PC Card through the slot and into the PCI Adapter. Inserting the PC Card
into the PCI Adapter in this manner can be awkward, so take your time.
Note: If you experience any problems installing the PCI Adapter, try installing it in a different PCI slot.
Step Three: Install your drivers*
Replace your computer's cover and turn on your desktop computer. You may
get a window saying the Configuration Agent couldn't connect to the Network
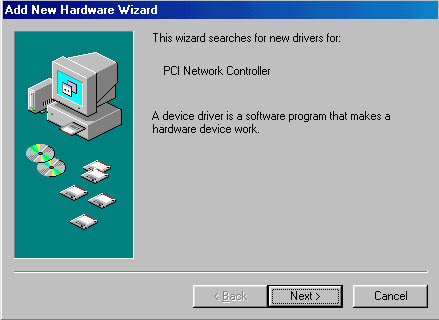
Agent. If you do, click OK. When Windows detects the new hardware,
click Next.
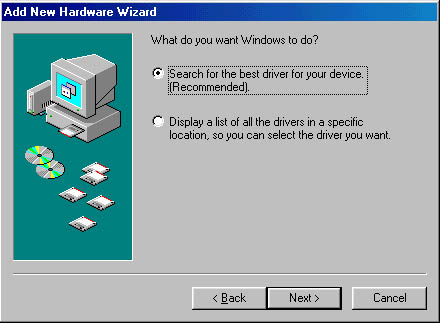
If Windows does not automatically begin searching for the correct drivers, select Search for the best driver for your device (Recommended) and click Next.
Select Specify a location. Type D:\drivers (or the appropriate letter of your CD-ROM drive instead of "D") and click Next.
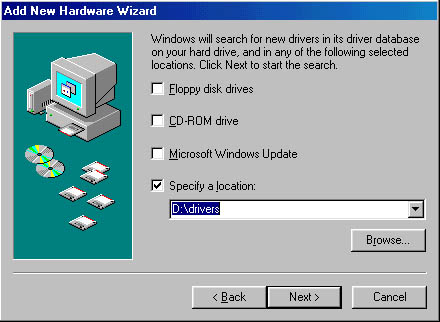
Click Next again.
Note: If you are prompted at any time for your Windows Operating System CD-ROM, remove the Installation CD-ROM and insert your Windows CD-ROM into the CD-ROM drive. When all the files are copied, remove the Windows CD-ROM, and reinsert the U.S. Robotics Installation CD-ROM.
When you see the USRobotics Wireless Access 802.11b PCI Adapter window, click OK. This will install the default settings.
Wait for the files to be copied. If you do not receive any prompts to
insert your Windows CD-ROM, simply click Finish.
Congratulations! You have finished installing your hardware and your drivers! Reboot your machine and you will now see a small icon for the Configuration Utility in the system tray by your clock.
The Configuration Utility is used to change or verify the configuration information that relates to your PC Card or PCI Adapter. It will be colored to indicate the status of your wireless network: red for disconnected, yellow for connected with poor quality, and green for connected with good quality.
You must now configure each computer that has a Wireless PC Card or a PCI Adapter in order to share Internet connectivity, files, and a printer. Refer to the User Guide on the Installation CD for this information.
802.11b AdHoc mode is used for peer-to-peer network configurations. Infrastructure mode is used to add a Wireless Access Point to the wireless network configuration for extended range and increased number of computers that can join the network. Each PC Card or PCI Adapter in the wireless network must have the correct mode selected within the Configuration Utility. The PC Cards and PCI Adapters are set to 802.11b AdHoc by default.
For Troubleshooting and Support information, refer to the Installation Companion Guide.
*A "Digital Signature Not Found" screen may
appear. Click Yes. Windows 2000 and Me will verify that your network
device is properly installed.
PC Card Installation
Software Installation
Step One: Prepare for installation
Turn on your laptop computer. Type your password if you are prompted to
do so.
Note: It is very important that you have your serial number written down before you install the PC Card. If you ever need to call our Technical Support department, you will need this number to receive assistance.
Note: Be sure to find out what letter your CD-ROM drives uses before you begin installing your new product. You will need to know this to properly install your software.
Step Two: Install your software
Note: You will need to install this software on all the PCs or laptops you plan to wirelessly network together.
Insert your Installation CD-ROM into your CD-ROM drive. In the Choose Setup Language window, select your preferred language and click OK.
Note: If your CD-ROM does not automatically launch, click Windows Start, Run, and type D:\setup (or the appropriate letter of your CD-ROM drive) and click OK.
Some files will be copied to your system, and then you will be asked to read the license agreement. Read the agreement and click Yes.
The Installation CD Graphic User Interface (GUI) will appear on your screen. Click Software.
Click the icon for the USRobotics Wireless Configuration Utility.
Click Wireless PC Card or PCI Adapter.
Follow the on-screen instructions and wait for some files to be copied to your hard drive. A window will appear showing you the files that have loaded onto your system. Close this window. The program window with the Configuration Utility icons will appear. Close this window.
Your software setup is complete. Click OK, and get ready to install your hardware. Do not remove the Installation CD from your CD-ROM drive.
Hardware and Driver Installation
Step One: Insert the PC Card into your computer
Locate an available PCMCIA slot and fully insert the Wireless Access PC
Card. PCMCIA slots are typically on the side of laptops. You should hear
a beep when the Wireless Access PC Card is fully inserted.
Step Two: Install your drivers*
When Windows detects the new hardware, click Next.

If Windows does not automatically begin searching for the correct drivers, select Search for the best driver for your device (Recommended) and click Next.
Select Specify a location. Type D:\drivers (or the appropriate letter of your CD-ROM drive instead of "D") and click Next.
Click Next again.
Note: If you are prompted at any time for your Windows Operating System CD-ROM, remove the Installation CD-ROM and insert your Windows CD-ROM into the CD-ROM drive. When all the files are copied, remove the Windows CD-ROM, and reinsert the U.S. Robotics Installation CD-ROM.
When you see the USRobotics Wireless Access 802.11b PC Card window, click OK. This will install the default settings.
Wait for the files to be copied. If you do not receive any prompts to insert your Windows CD-ROM, simply click Finish.
Congratulations! You have finished installing your hardware and your drivers! Reboot your machine and you will now see a small icon for the Configuration Utility in the system tray by your clock.
The Configuration Utility is used to change or verify the configuration information that relates to your PC Card or PCI Adapter. It will be colored to indicate the status of your wireless network: red for disconnected, yellow for connected with poor quality, and green for connected with good quality.
You must now configure each computer that has a Wireless PC Card or a PCI Adapter in order to share Internet connectivity, files, and a printer. Refer to the User Guide on the Installation CD for this information.
802.11b AdHoc mode is used for peer-to-peer network configurations. Infrastructure mode is used to add a Wireless Access Point to the wireless network configuration for extended range and increased number of computers that can join the network. Each PC Card or PCI Adapter in the wireless network must have the correct mode selected within the Configuration Utility. The PC Cards and PCI Adapters are set to 802.11b AdHoc by default.
For Troubleshooting and Support information, refer to the Installation Companion Guide.
*A "Digital Signature Not Found" screen may appear. Click Yes.
Windows 2000 and Me will verify that your network device is properly installed.
Wireless Access Point Installation
Step 1. Connect the Wireless Access Point
- Use the Ethernet port and the RJ-45 cable to connect the Wireless Access Point to one of the following devices: a cable or DSL modem with routing capabilities, a hub, a bridge, an existing Ethernet LAN, or a router.
- Attach the antenna to the Wireless Access Point.
- Attach the power supply to the Wireless Access Point.
Step Two: Install your software
Note: You only need to install
this software on the PC or laptop that was originally connected to your
modem, bridge, router, or hub.
Insert your Installation CD-ROM into your CD-ROM drive. In the Choose Setup Language window, select your preferred language and click OK.
Note: If your CD-ROM does not automatically launch, click Windows Start, Run, and type D:\setup (or the appropriate letter of your CD-ROM drive) and click OK.
Some files will be copied to your system, and then you will be asked to read the license agreement. Read the agreement and click Yes.
The Installation CD Graphic User Interface (GUI) will appear on your screen. Click Software.
Click the icon for the USRobotics Wireless Configuration Utility.
Click Wireless Access Point.
Follow the on-screen instructions and wait for some files to be copied to your hard drive. A window will appear showing you the files that have loaded onto your system. Close this window. The program window with the Configuration Utility icons will appear. Close this window.
Note: Infrastructure mode is used to add a Wireless Access Point to the wireless network configuration for extended range and increased number of computers that can join the network. 802.11b AdHoc mode is used for peer-to-peer network configurations. Each PC Card or PCI Adapter in the wireless network must have the Infrastructure mode selected within the Configuration Utility when a Wireless Access Point is present
Step 3. Verify the detection of the Wireless Access Point
Your Utility Tool should automatically detect the new Wireless Access
Point. If your Utility Tool does not automatically detect the Wireless
Access Point, refer to the Troubleshooting section of the Companion Installation
Guide. The LAN Utility program icon in the system tray will change from
red to green when a Wireless Access Point is detected.
The Wireless Access Point has five LED status indicators. The function of each indicator is described in the following table and graphic:
|
LED
|
Status
|
Description
|
|
Power
|
ON/Red
|
Indicates that power is being supplied
|
|
Wired Link Indicator
|
ON/Green
|
Indicates that the Wireless Access Point Ethernet
Cable is connected to your LAN.
|
|
Wired Activity
|
Blinking/Yellow
|
Indicates that the Wireless Access Point is transmitting
or receiving data on the 10 Mbps Ethernet LAN.
|
|
Wireless Link Indicator
|
Blinking/Green
|
Indicates that the PC Card or PCI Adapter is connecting
to the Wireless Access Point.
|
|
Wireless Activity
|
Blinking/Yellow
|
Indicates that the Wireless Access Point is transmitting
data to or receiving data from a PC card or PCI Adapter.
|
Step 4. Configuration of the Wireless Access Point
After the Wireless Access Point is installed, click Windows Start,
Programs, and WLAN Access Point Utility to launch the Access
Point Configuration Utility. Click AP in the toolbar and then click
Scan.
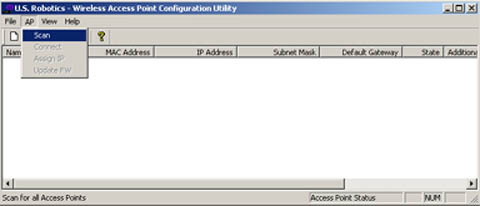
This will search for the Wireless Access Point in the network. If a Wireless Access Point is detected, the Utility program will display the Wireless Access Point information.
If you are using multiple Wireless Access Points, you must know the MAC address of the Wireless Access Point you are currently configuring. The MAC address is located on the bottom of the Wireless Access Point case and in the Utility tool in the State field. Locate the correct Wireless Access Point in the list that appears. If the listed Wireless Access Point does not match the MAC address on the bottom of the correct Wireless Access Point, you are too far away. Move closer to the correct Wireless Access Point and perform the Scan function again. Repeat this procedure until the MAC address appears for the correct Wireless Access Point.
Double-click the correct Wireless Access Point in the list.
If the Wireless Access Point receives an IP address from your network, the WLAN Access Point Utility will automatically link to the Login page of the Access Point Web Configurator server using the Windows default browser.
If the Wireless Access Point does not receive an IP address, the following message window will appear informing you that the Wireless Access Point did not receive an IP address.
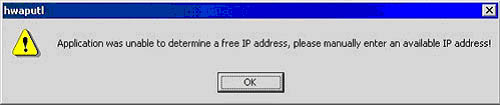
The following dialogue box will appear that will allow you to assign a temporary IP address to the Wireless Access Point. This must be done the first time since there is no IP by default.
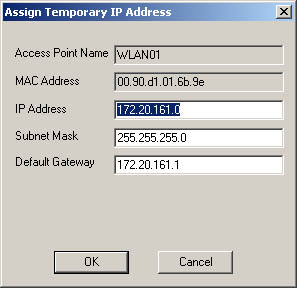
The IP address that you assign to the Wireless Access Point must match
the IP address of the previously configured PC Cards or PCI Adapters.
You must enter an IP address and Subnet mask that are valid for the current
network. After you have entered an IP address, enter a value in the Subnet
Mask and Default Gateway fields and click OK. Click OK in
the next box that appears in order for the temporary settings to take
effect.
.
Enabling file and print sharing.
Windows 95/98FE/98SE/ME Users: Click Windows Start, Settings, and then Control Panel. Double-click Network and then click the File and Print Sharing button. Select both boxes in the File and Print Sharing window and then click OK. File and print sharing is now enabled.
Note: If your computer is connected directly to the Internet, there is a security risk if you are not using a firewall program or some form of hardware firewall.
Windows 2000/NT Users:
Note: After the wireless network card is installed in Windows NT, you should run the Service Pack that came with Windows NT. You will need to restart your computer.
File and print sharing are automatically enabled in Windows 2000 and NT.
Enabling Internet sharing.
*Windows 95 and 98FE Users: Go to the following website to download the necessary drivers for Internet sharing: http://www.usr.com/wireless
Windows 98 SE Users: Click Windows Start, Settings, and then Control Panel. Double-click Add/Remove Programs and then click the Windows Setup tab. Select Internet Tools and then click Details. Select Internet Connection Sharing and click OK. Click Apply, and the Internet Connection Sharing Wizard will launch. Click Next, select the network adapter to connect to the Internet and click Next. Click Next to create a Client Configuration Disk, insert a blank disk into the 3.5 inch disk drive, and click OK. This disk will be used to configure Internet sharing in Window 95, 98FE, and 98SE. Click Finish to complete the configuration of Internet Sharing. You will need to restart your computer.
Windows 2000 Users: There must be two NIC cards installed in order to use Internet sharing. Click Windows Start, Settings, and then Network and Dial-up Connections. Right-click the LAN connection and click Properties. Click the Sharing tab. Click the box in this window to enable Internet sharing and click Apply. Right-click the LAN connection in the list and click Properties. Select Internet Protocol and click Properties. Click the DNS tab, write down the DNS address that is listed, and return to the Networking and Dial-up Connections window. Right-click the wireless adapter in the list and click Properties. Select Internet Protocol and click Properties. Click the DNS tab and enter the same DNS address as the one listed under the LAN connection.
Windows ME Users: Click Windows Start, Settings, and then Control Panel. Double-click Add/Remove Programs and then click the Windows Setup tab. Select Communications and then click Details. Select Internet Connection Sharing and click OK. Click Apply and the Home Networking Wizard will launch. Click Next then select Yes this computer uses the following:. Select the direct connection to the Internet from the drop-down menu and click Next. When prompted, create a Home Networking Setup disk to be used for the configuration of Internet sharing in Windows 95, 98FE, 98SE, and ME. After you have created the disk, click Next. Click Finish to complete the configuration of Home Networking. You will need to restart your computer.
![]()