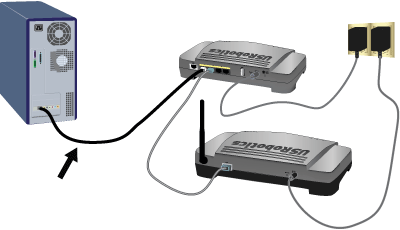
Using a networking cable and the same computer that you were using when the upgrade failed, connect the computer directly to the same networking device as the access point. Do not try to use a wireless connection for this procedure.

Windows users:
If you do not know the IP address of the access point, run the Network Device Locator to find the IP address.
Locate the folder that contains that firmware file that you downloaded.
Open a command prompt as follows:
Windows Vista:
Click Windows Start.
In the Search box, type Command Prompt and press ENTER.
-
In the resulting list, right-click Command Prompt and select Run as Administrator.
All other Windows operating systems:
Click Windows Start > Run.
In the Run dialog box:
Windows XP, 2000, and NT: Type cmd and click OK.
Windows Me, 98, and 95: Type command and click OK.
Macintosh and Linux users:
If you do not know the IP address of the access point, find it as follows:
- Using a computer that has a wired connection to the network, open a terminal.
- Use the following command to ping the network:
ping -b 192.168.x.255
where x is the subnet of the router connected by Ethernet to the access point - Press CTRL-C to stop the ping command.
- Issue the following command:
arp -a
- In the resulting list, find the IP address associated with the LAN MAC address of the access point. The LAN MAC address is located on the bottom of the access point.
Type cd followed by the path to the firmware file. Use quotation marks around the pathname as shown in the following example:
cd "C:\networking\usr"
and then press ENTER.
Type the following command (but do not press ENTER):
tftp -i xxx.xxx.x.x put .usr where xxx.xxx.x.x is the IP address of the access point.
Disconnect and then reconnect the power supply of the access point.
Press ENTER.
You should see a message in the command window stating that the image was transferred.
Wait for the upgrade to finish. When the wireless LED ![]() turns on, the upgrade is done.
turns on, the upgrade is done.