From the LAN page, you can view and modify the Local Area Network (LAN) settings of the router. These settings apply only to your local network.
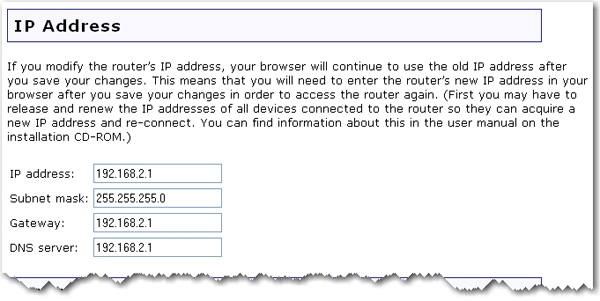
Your router automatically has its IP address and Subnet Mask configured. If you need change these values, enter your new IP Address, Gateway, DNS Server, and Subnet mask and click Save at the bottom of the page.
When you change the IP address of your router, you may need to release and renew the IP addresses of your clients after the router reboots with its new IP address.
Note: The default LAN IP address of the router is 192.168.2.1 and default Subnet Mask is 255.255.255.0.

The DHCP server can automatically assign IP addresses to wired and wireless clients that connect to the router.

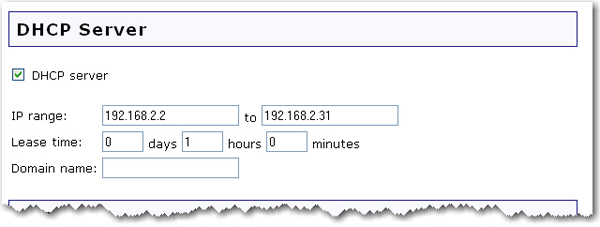
DHCP server: When selected, the router will automatically assign IP addresses to clients that connect to the network. By default, this feature is enabled.
IP range: The IP range of DHCP server also depends on the LAN subnet mask of the router. The default range is 192.168.2.2 to 192.168.2.31.
To specify a different range for IP addresses, select IP address range and enter the starting and ending IP address.
Lease time: You can set the Lease time for the assignment of IP addresses to network clients. This determines how long a client is allowed to use an assigned IP address. If a client is not active for a period of time and the lease expires, the IP address will be released and can be used for another client. The expired client will then have to send a request for an IP address the next time it attempts to connect to the network. You can change the length of the lease depending on how long you think a client should have an IP address. There is no need to change this setting unless you have a large network and you are short on available IP addresses to be assigned.
Domain name: Specify the local network domain name which the router will use. Each host which receives an IP from the router's DHCP server will belong to this domain.

The 802.1d spanning tree protocol is a management protocol that allows bridges within a network to communicate with each other to prevent loops within the network. This is enabled by default.

If you connect the router to an existing network as the primary gateway to the Internet, or connect another router to this router, you may need to establish Static Routes. This will allow the clients that are not directly connected to the router to access the network resources of the router's LAN.
Note: The default LAN IP address of the router is 192.168.2.1 and default Subnet Mask is 255.255.255.0.
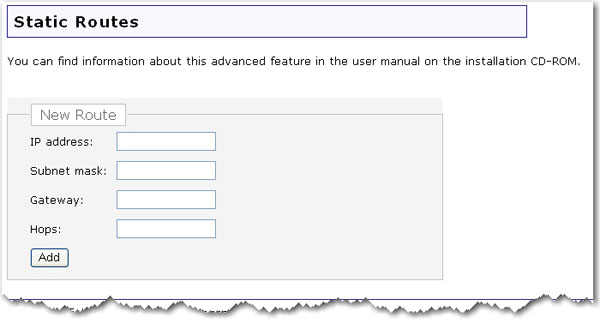
Enter the IP address of the destination network/host in the IP address field.
Enter the Subnet mask for the destination host or network in the Subnet mask field. If you are adding a static route for a single host, this should be 255.255.255.255.
Enter the Gateway the router will use to send traffic to the destination network/host in the Gateway field.
Enter the number of routers that this router must connect through in order to connect to the other network in the Hops field.
The number of hops is determined by how many routers are between your router and the respective network.
Example: If there is another router connected to the router's LAN port, you would enter 1 for the number of hops between the router's LAN port and any client connected to the second router.
Note: You need to click Save to save all your new settings and reboot the router after you have completed all your changes.