Access the router configuration pages by opening a Web browser and typing 192.168.2.1 and pressing ENTER.
Enter your Login and password when prompted, then press Ok.
Click the Wireless tab.
Scroll down to the Bridge Mode section.
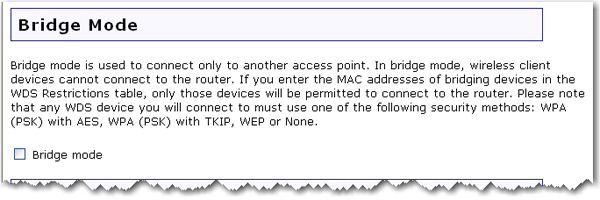
Select Bridge mode.
To allow other WDS devices to connect to the network while the router is in Bridge mode, scroll down to the WDS Restrictions section.
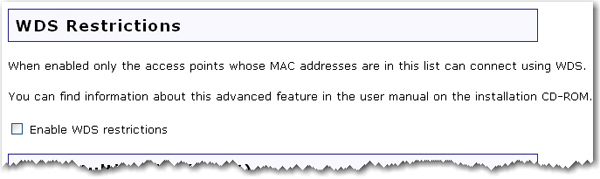
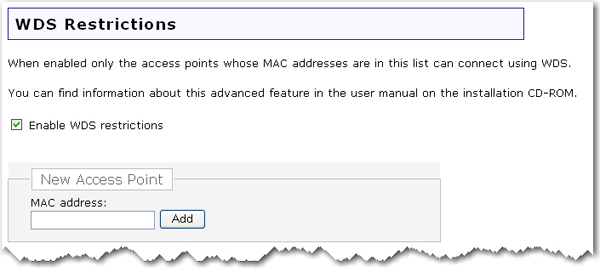
Select Enable WDS restrictions.
Enter the MAC addresses of the wireless routers or access points that will connect to this router and click the Add button.
It is recommended that all WDS devcies connect to the router using WPA (PSK) with TKIP encryption.
The Pass phrase (which is also commonly called a Network key, key, or Personal shared key) you entered for the wireless security on your router will be also used as the Personal Shared Key (PSK) for WDS connections. However, all wireless clients connecting to the router should continue to use the same security method and encryption type that you configured on your router.
Click Save to apply all your new settings and reboot the router after you have completed all your changes.