
Contents:
Navigating the Web Configuration Utility
Navigating the Bi-Admin Management Utility
Product Specifications for USB Print Server
USB Print Server User Guide
Navigating the Web Configuration Utility
Web Configuration Utility
The following section describes the various functions of the Web Configuration Utility. This utility provides quick access to all the settings of the USB Print Server.
You can access the Web Configuration Utility by opening a Web browser and typing the IP address of the USB Print Server. If you do not know the IP address of the USB Print Server, print a copy of the diagnostic page. The IP address is among the information provided in the diagnostic page.
When the Web Configuration Utility has opened, you will see menu options on the left-hand side. There are eight options: Server Status, Printer Status, Configure Server, AppleTalk, NetBEUI, TCP/IP, Internet Printing, and Logical Printers.
Server Status
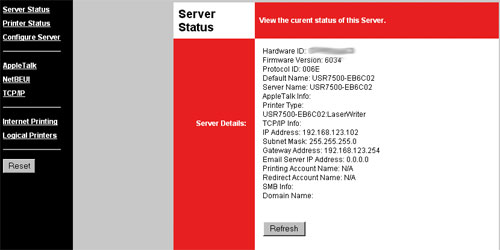
Within the Server Status area, you can view the network information for the USB Print Server. Included in this information is the Default Name, the Server Name, the IP address, the Domain Name, etc.
![]()
Printer Status
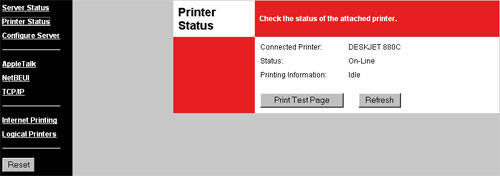
Within the Printer Status page, you can see the type of printer that is attached to the USB Print Server, the status of the printer, and the activity information of the printer. At the bottom of this page you can also click the Print Test Page button to verify that communication is being passed to and from your printer.
![]()
Configure Server
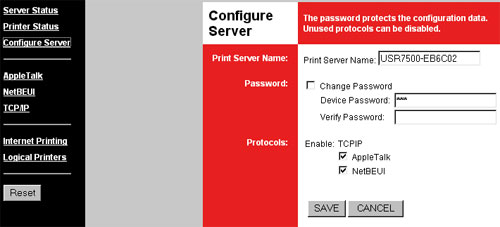
In the Configure Server page, you can modify the settings of the USB Printer Server. If you make any changes in this area, you must click Save at the bottom of the page in order for the changes to take effect.
The first thing you can change is the name of the Print Server. The new name cannot contain any blank spaces.
Next, you can click the checkbox to either enable or change the password. If you enable or change the password, you will need to enter the password in the Change Password field and in the Verify Password field.
The last thing you can do on this page is click the checkboxes to either enable or disable AppleTalk and NetBEUI. If the boxes are checked, these features will be enabled.
![]()
AppleTalk
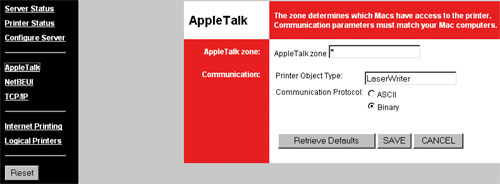
In this area you can determine what Apple systems can access the printer by entering them in the AppleTalk Zone.
You can also view and change the Printer Object Type, which describes the printer driver that is used for the established printer port.
The last thing you can change in this area is the Communication Protocol. You can select either ASCII or Binary.
If you make any changes in this area, you must click Save at the bottom of the page in order for the changes to take effect. You can also click Retrieve Defaults to restore the default settings for this area.
![]()
NetBEUI
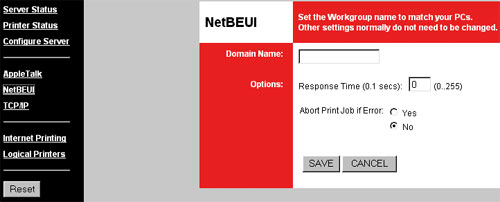
In the NetBEUI area, you can enter the Domain Name for your network.
You can set the Response Time for between 0 and 255 seconds. This determines how fast print jobs are sent to the printer.
You can also select Yes or No for Abort Print Job if Error. This will set whether or not a print job will be cancelled if any errors are encountered.
If you make any changes in this area, you must click Save at the bottom of the page in order for the changes to take effect.
![]()
TCP/IP
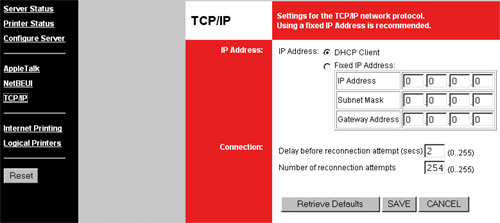
In this area, you can select either DHCP Client or Fixed IP Address. Select DHCP Client if you are connecting the USB Print Server to a network device that can assign IP addresses. If you need to manually assign an IP address for the USB Print Server, select Fixed IP Address and then enter the information for the IP Address, the Subnet Mask, and the Gateway Address.
You can also modify the Connection information.
You can set the Delay before reconnection attempt to a value between 0 and 255 seconds. This will determine how long the USB Print Server will wait before attempting to reconnect to a lost TCP/IP connection.
You can set the Number of reconnection attempts to a value between 0 and 255. This will determine how many times the USB Print Server will attempt to reconnect to a lost TCP/IP connection.
![]()
Internet Printing
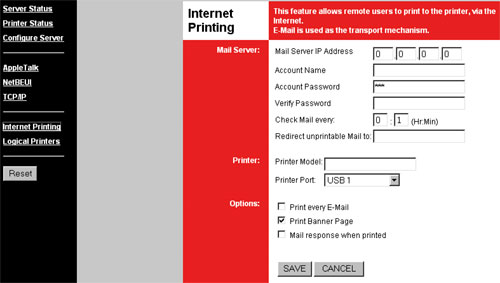
By using Internet Printing, a print job can be sent via e-mail in order to print remotely. In order to use this feature, you will need to enter the following information:
- Mail Server IP Address
- Account Name
- Account Password
- Verify the Account Password
- How often in hours and minutes you want the e-mail account to be checked for print job
- Where you want unprintable mail to be redirected to
You will also need to enter the Printer Model and the Printer Port. For options, you can also select if you want every e-mail to be printed, if you want banner pages printed, and if you want an e-mail response to be sent when a remote print job is successfully completed.
![]()
Logical Printers
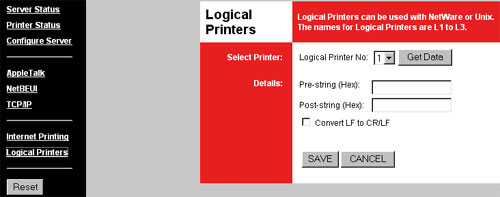
The USB Print Server can be used with Netware and Unix if the printer is set up as a logical printer.
Select the Logical Printer Port you wish to configure. You can choose either L1, L2, or L3. Click the Get Data button to show the current data for the selected logical printer.
Pre-string is the printer control string in hexadecimal characters to be sent to the printer before each print job. This string cannot exceed 15 characters.
Post-string is the printer control string in hexadecimal characters to be sent to the printer after each print job. This string cannot exceed 15 characters.
![]()