Contents:
Hardware Installation >
Broadband Router User Guide (Windows 95, 98,
2000, NT, Me, XP, and Macintosh)
Hardware Installation
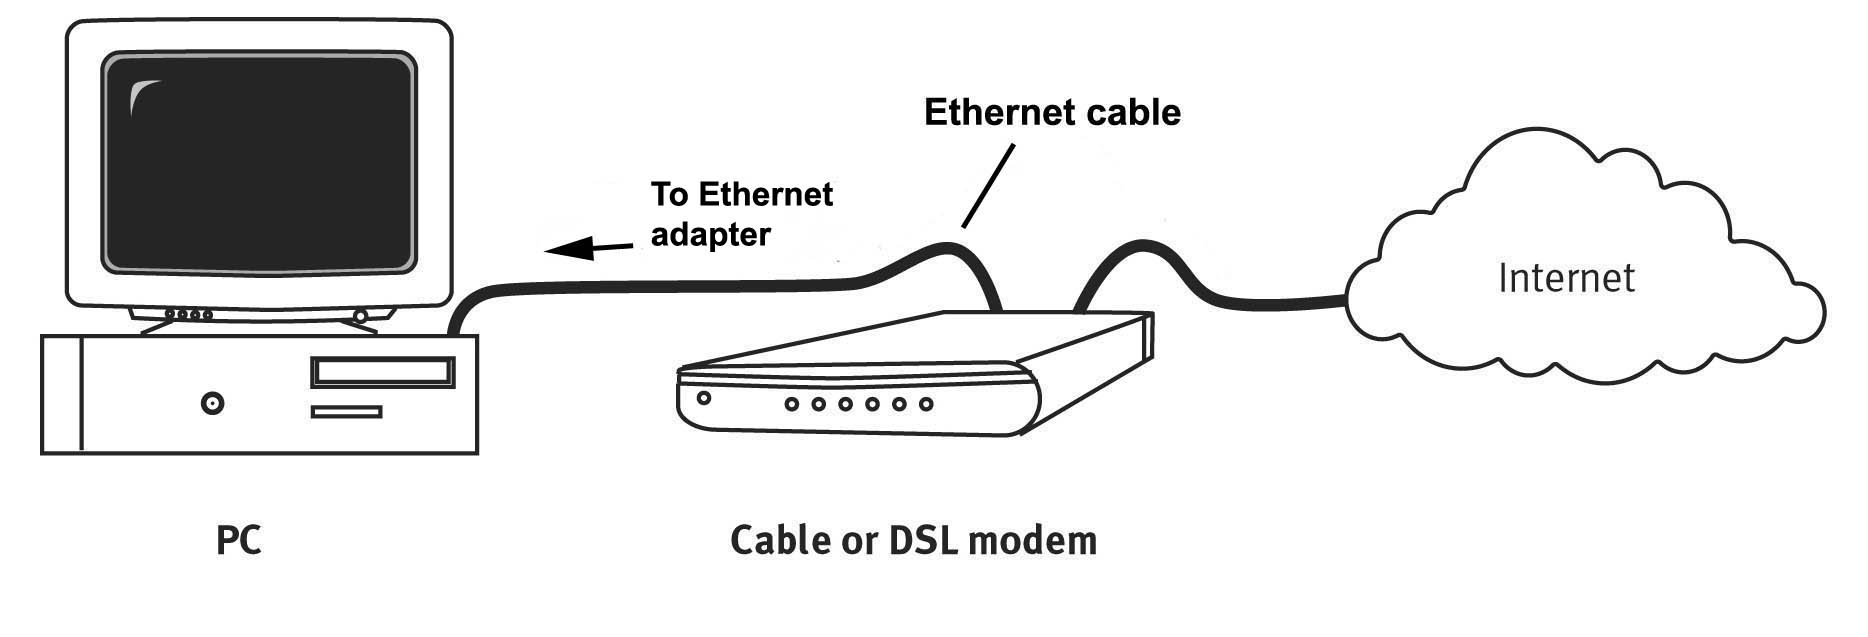
Connecting a Cable modem to the Broadband Router
The following graphic is a representation of your system topology before
the installation of the
Broadband Router.
- Turn off your PC and your Cable modem.
Note: If your Cable modem is connected to your PC using a USB cable, disconnect the
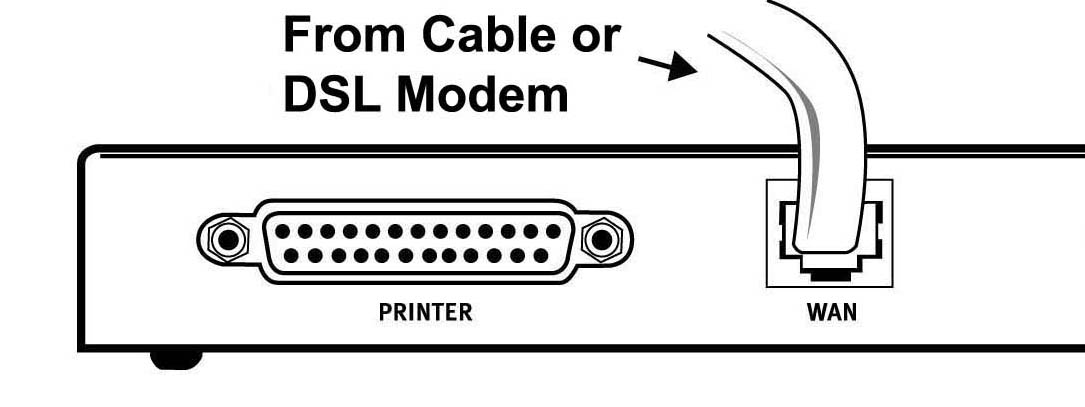
USB cable from both your PC and from your Cable modem.Locate the Ethernet cable from your Cable modem that is connected to your PC’s
Ethernet adapter. Disconnect that Ethernet cable from your PC’s Ethernet adapter.
Connect that Ethernet cable to the WAN port on the rear of the Broadband Router.
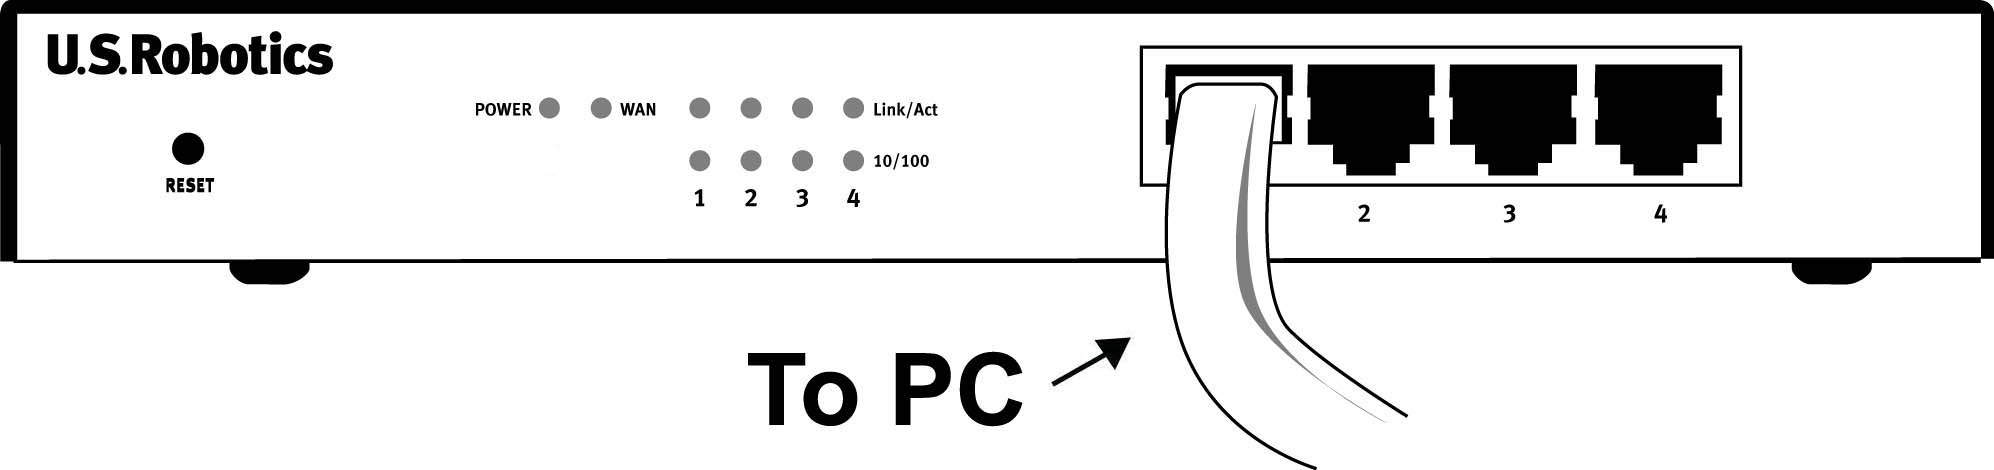
- Connect one end of the supplied Ethernet cable to your PC's Ethernet
adapter. Connect
the other end to one of the LAN ports on the Broadband Router.
- Turn on your Cable modem. Connect the included power cord to the power
jack on the
Broadband Router. Plug the power cord into a standard power outlet. The Broadband Router
will automatically enter the self-test phase. After the self-test phase is complete, turn on
your PC.
Note: When the Broadband Router is in the self-test phase, the Power LED may flash rapidly
and all four LAN LEDs will light for approximately five seconds. Finally, the Power LED will
continuously be lighted to indicate that the Broadband Router is operating normally and the
self-test phase is complete.
- To configure the Broadband Router for your specific ISP, launch a
Web browser and type http://192.168.123.254 to access the Configuration
Utility. There is no default password for
the Broadband Router, so just click Login. Click Setup and follow the on-screen instructions
. You will need any network connection information you collected earlier.Note: If you collected any network information earlier, you will need to enter this information
into the Setup WAN configurations screens.
- After the self-test phase finishes and you have performed the configuration
steps, the
installation procedure is now complete. You should now have secure and shared Internet
access. To verify your connection, launch a Web browser and go to www.usr.com. If the
page loads, you are finished with the installation procedure. If the page does not load,
proceed to the Troubleshooting section of this Guide.Note: It is recommended that you write down the settings for your Broadband Router for
future reference. You can view the settings in the Broadband Router Configuration Utility
by logging in at http://192.168.123.254.
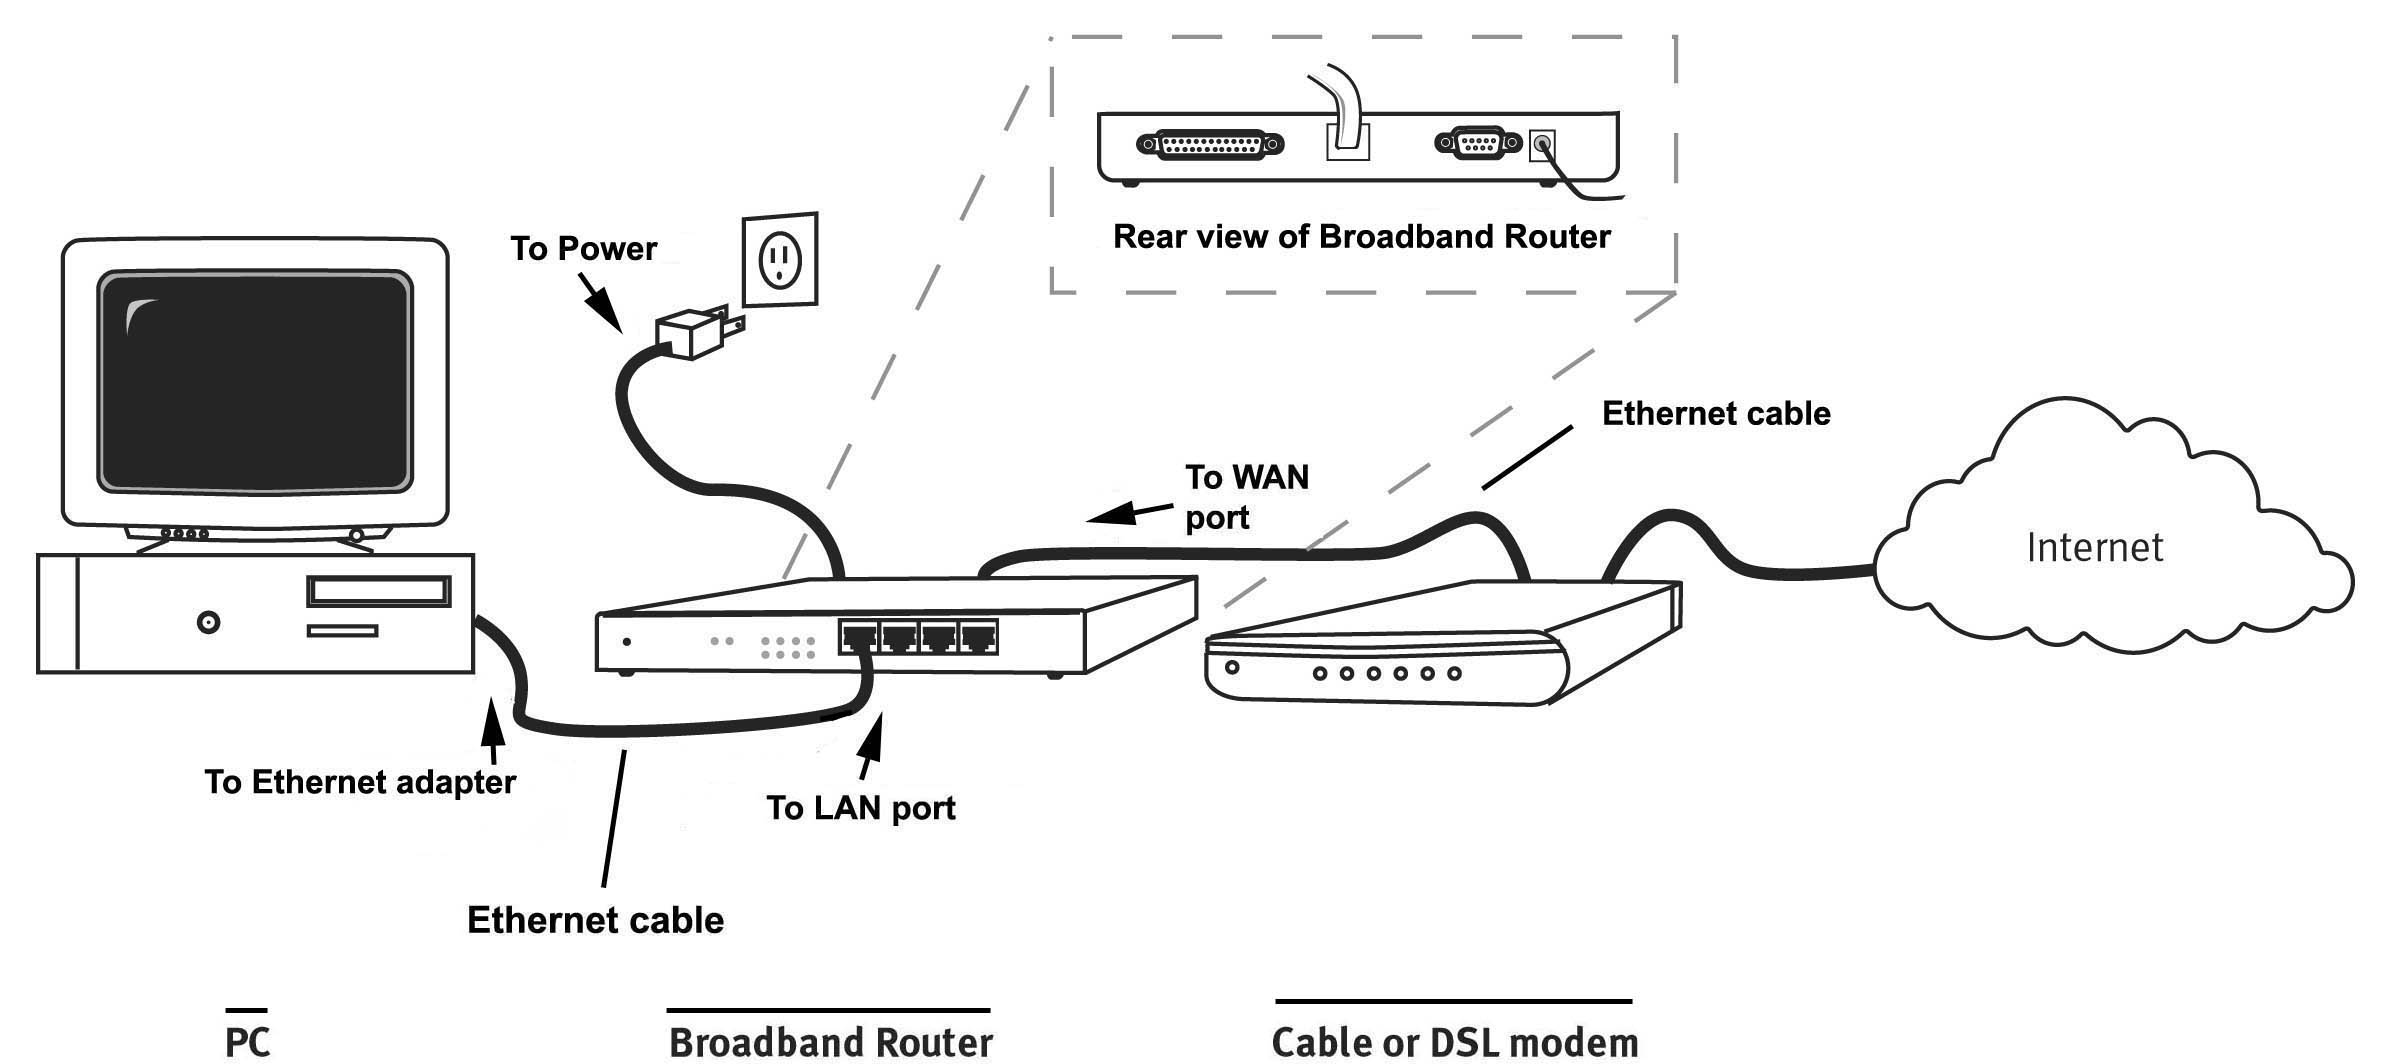
The following graphic is a representation of your system topology after
the installation of the
Broadband Router.
Connecting a DSL modem to the Broadband Router
The following graphic is a representation of your system topology before
the installation of the
Broadband Router.
- Turn off your PC and your DSL modem.
Note: If your Cable or DSL modem is connected to your PC using a USB cable, disconnect
the USB cable from both your PC and from your DSL modem.Locate the Ethernet cable from your DSL modem that is connected to your PC’s Ethernet
adapter. Disconnect that Ethernet cable from your PC’s Ethernet adapter. Connect that
Ethernet cable to the WAN port on the rear of the Broadband Router.
- Connect one end of the supplied Ethernet cable to your PC's Ethernet
adapter. Connect the
other end to one of the LAN ports on the Broadband Router.
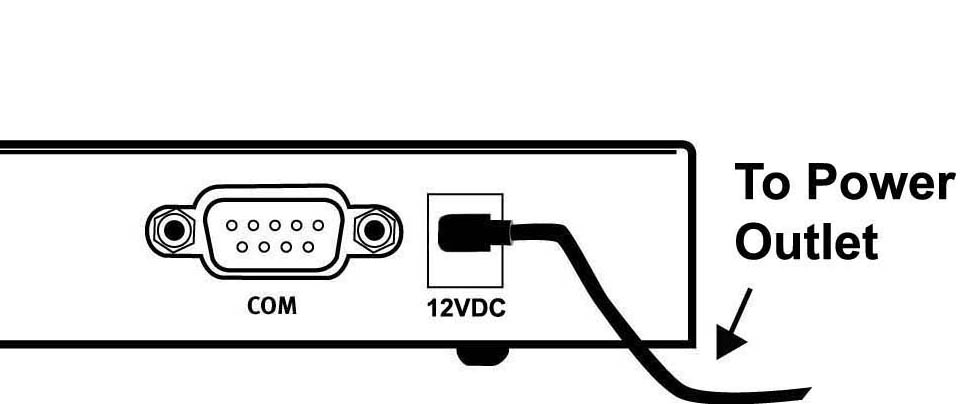
- Turn on your DSL modem. Connect the included power cord to the power
jack on the
Broadband Router. Plug the power cord into a standard power outlet. Turn on your PC.
Note: When the Broadband Router is in the self-test phase, the Power LED may flash rapidly
and all four LAN LEDs will light for approximately five seconds. Finally, the Power LED will
continuously be lighted to indicate that the Broadband Router is operating normally and the
self-test phase is complete.
- To configure the Broadband Router for your specific ISP, launch a
Web browser and type http://192.168.123.254 to access the Configuration
Utility. There is no default password for
the Broadband Router, so just click Login. Click Setup and follow the on-screen
instructions. You will need any network connection information you collected earlier.Note: If you collected any network information earlier, you will need to enter this information
into the Setup WAN configurations screens.
- After you have performed the configuration steps, the installation
procedure is now complete.
You should now have secure and shared Internet access. To verify your connection, launch a
Web browser and go to www.usr.com. If the page loads, you are finished with the installation
procedure. If the page does not load, proceed to the Troubleshooting section of this Guide.Note: It is recommended that you write down the settings for your Broadband Router for future
reference. You can view the settings in the Broadband Router Configuration Utility by logging in at http://192.168.123.254.
The following graphic is a representation of your system topology after
the installation of the
Broadband Router.
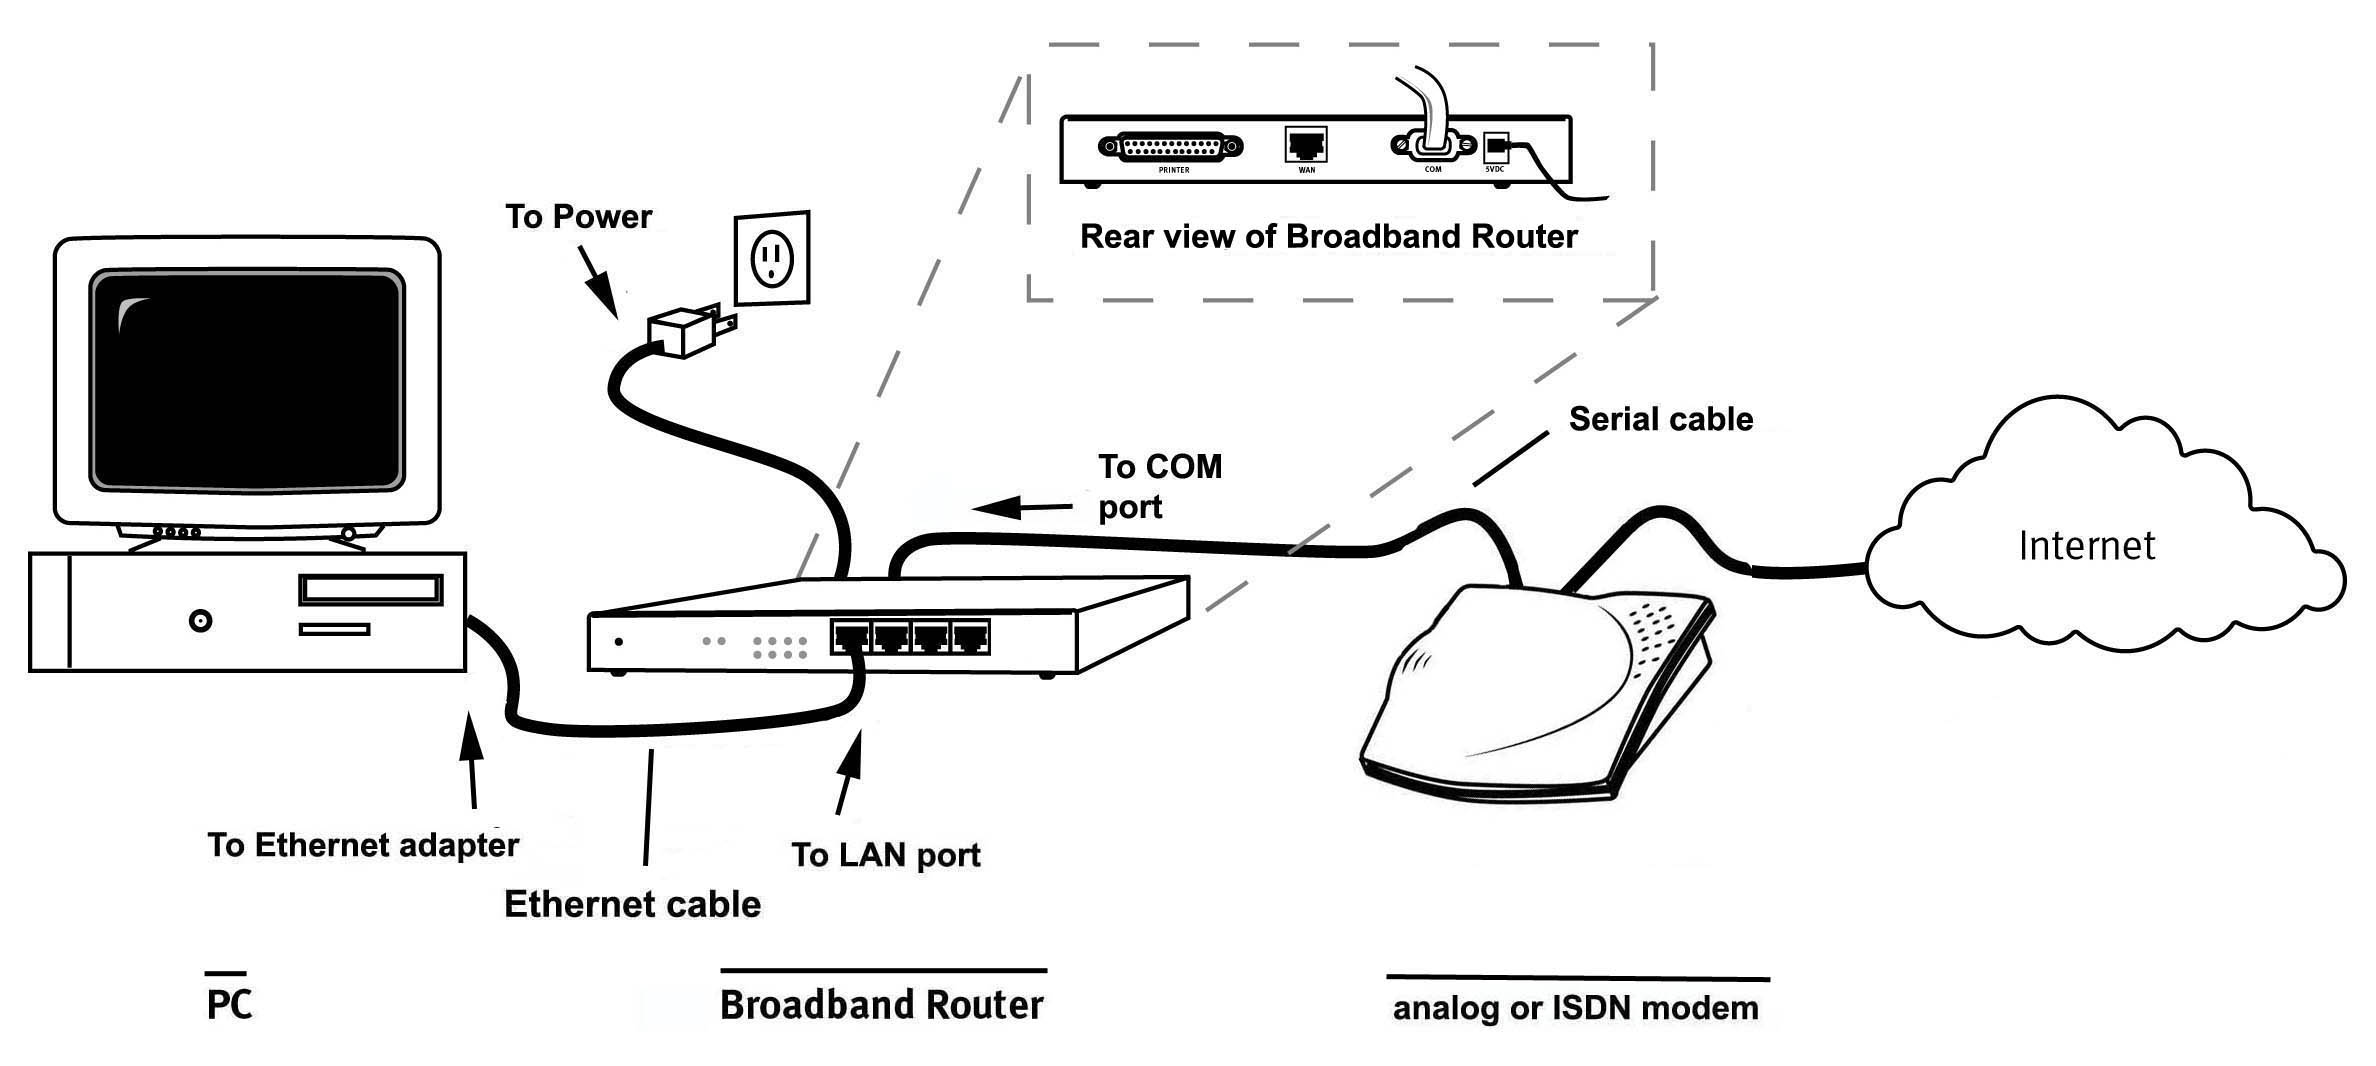
Connecting an Analogue or ISDN modem to the Broadband
Router
There are two main reasons why you would want to use either an analogue
or ISDN modem
with the Broadband Router:
You use Dial-up Internet service instead of Cable or DSL Internet service.
You have Cable or DSL Internet service but want to have an analogue or
ISDN backup in case
your broadband Internet service is unavailable.
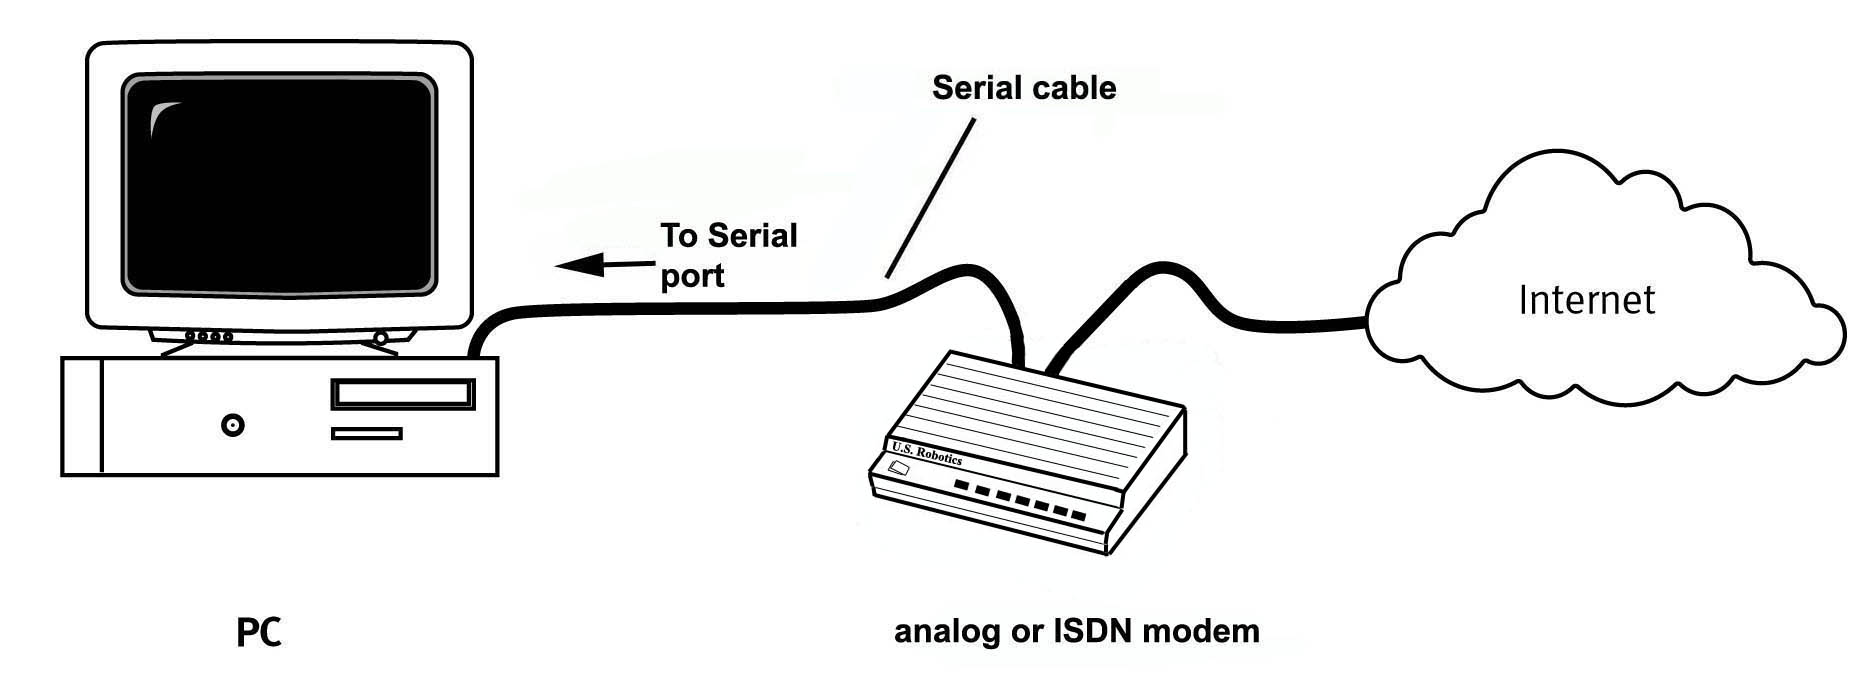
The following graphic is a representation of your system topology before
the installation of the
Broadband Router.
Perform the following steps to connect an analogue or ISDN modem, manually
change the WAN
type, and properly configure the Broadband Router:
- Turn off your PC and your analogue or ISDN modem.
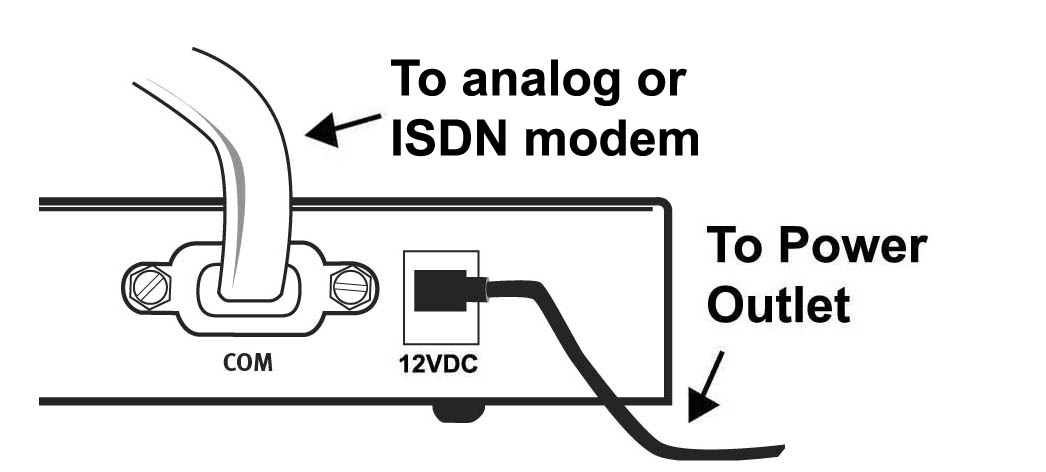
Note: If your analogue or ISDN modem is connected to your PC using a USB cable, disconnect the USB cable from both your PC and from your analogue or ISDN modem.Connect a serial modem cable to your analogue or ISDN modem and to the COM port on the Broadband Router.
- Connect one end of an Ethernet cable to your PC’s Ethernet adapter.
Connect the other end to one of the LAN ports on the Broadband Router.
- Connect the included power cord to the power jack on the Broadband
Router. Plug the power
cord into a standard power outlet. The Broadband Router will automatically enter the self-test
phase. Turn on your PC and your analogue or ISDN modem.
Note: When the Broadband Router is in the self-test phase, the Power LED may flash rapidly
and all four LEDs will light up for approximately five seconds. Finally, the Power LED will
continuously be lighted to indicate that the Broadband Router is operating normally and the
self-test phase is complete.
- In the location or address line of your Web browser, type http://192.168.123.254
to access
the Configuration Utility. There is no default password for the Broadband Router, so just click
Login. Click Setup and follow the on-screen instructions. You will need any network
information you collected earlier. When prompted, select the WAN type as Dial-up Modem
and continue to follow the on-screen instructions.
- Click Connect to initiate a dial-up session with your ISP.
The Status page status will display
whether or not the call was successful. If the settings are correct, the analogue or ISDN
modem can be used to connect to the Internet. If the connection fails, verify that you
entered the correct values.
The following graphic is a representation of your system topology after
the installation of the
Broadband Router.