
Contents:
Overview of the Web-based Management
Using the Connection Wizard >
USR8200 Firewall/VPN/NAS User Guide
Network Connections
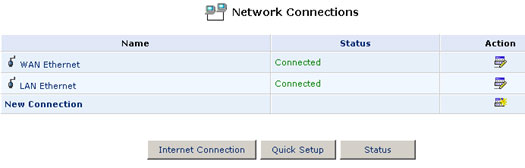
To access the Connection Wizard, click the Network Connections icon on the side bar. The Network Connections screen will appear, listing all current connections. On the Network Connections screen, you can create, view, or modify the network connections of the USR8200 Firewall/VPN/NAS. Within this area, you can create or modify four types of network connections:
WAN Ethernet Connection
Click WAN Ethernet to view the information for your WAN connection.
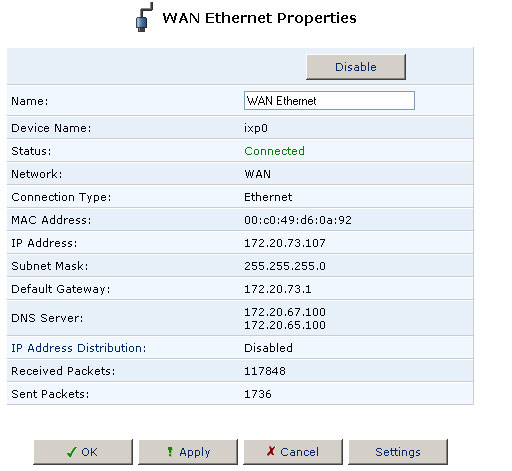
If you need to modify any of the settings for WAN connection, click Settings.
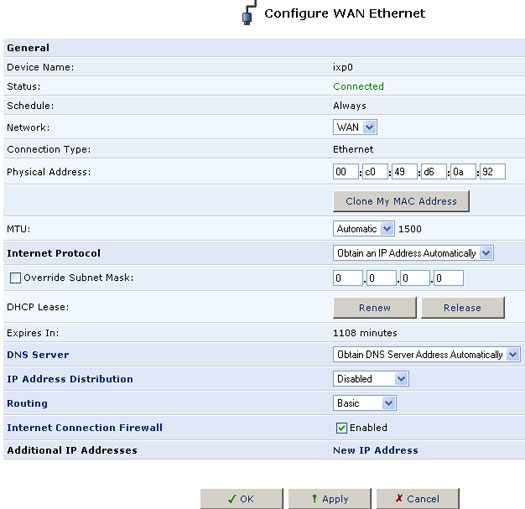
When you are finished modifying any of the settings, click Apply and then click OK.
LAN Ethernet Connection
Click LAN Ethernet to view the information for your LAN connection.
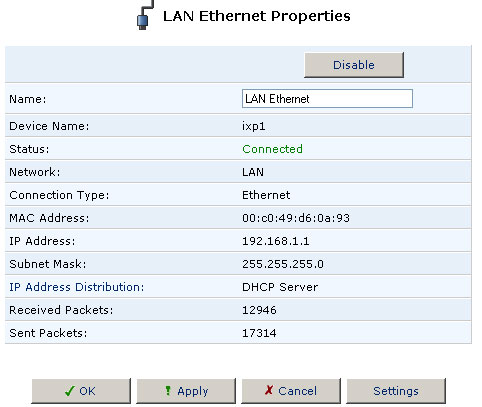
If you need to modify any of the settings for your LAN connection, click Settings.
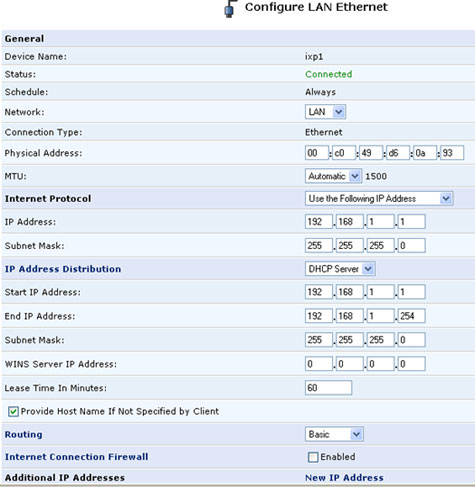
When you are finished modifying any of the settings, click Apply and then click OK.
New Connection
Click New Connection on the main Network Connections screen if you need to create a new network connection. Along each step of the way, you will be presented with explanations of the choices at hand. In some cases, you will be required to specify networking parameters, so make sure you have your network information available. Check with your network administrator if you have any questions about your network configuration.
In the New Connection window, you will need to select the type of network connection you want to create. Click Next when you have selected one.

Follow the on-screen instructions and enter the appropriate information for the type of network connection that you need to create. When you are finished, the new network connection will appear under either WAN Network or LAN Network, depending on what type of network connection you created.
Creating Advanced Connections
This section is intended for the advanced user and assumes intermediate computer networking proficiency.
Creating a Point-to-Point Protocol over Ethernet (PPPoE) Connection
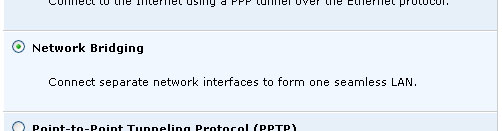
Creating a Network Bridge Connection
Creating a Point-to-Point Protocol over Ethernet (PPPoE) Connection
Some ISPs require the use of PPPoE to connect to their services. This is generally used for DSL connections. Contact your ISP for more information.
To create a PPPoE connection, perform the following steps:
- Select Point-to-Point Protocol over Ethernet (PPPoE) as your
advanced Internet connection type and click Next. The Network
Bridging screen will appear.

- Select either WAN Ethernet or LAN Ethernet, depending on the type
of underlying device that will be used for the PPPoE connection. You
will most likely need to select WAN Ethernet in order to establish a
connection with your DSL server.
If you will connecting to a DSL server that exists on a network, you will need to select LAN Ethernet. If you have any questions about which choice to make, contact your network administrator.
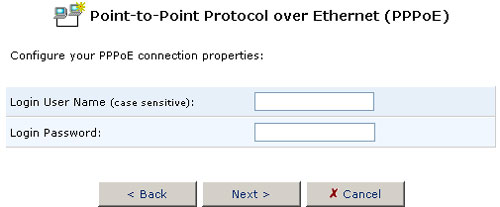
- You will need to supply the Service Name of your ISP, your Login User
Name, and your Login Password. After supplying this information, click
Next.
Note: Contact your ISP if you have any questions regarding this information.
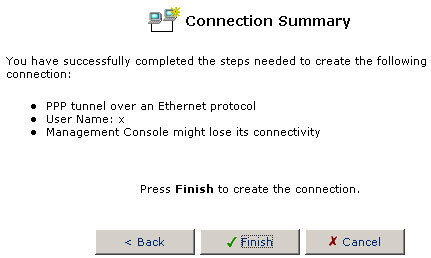
- The wizard will display a summary of the connection parameters. Click
Finish to create your PPPoE connection.
Creating a Network Bridging Connection
A Network Bridge enables you to connect network segments. It offers increased flexibility by allowing a mixture of media types and by automating the difficult configurations that are normally associated with mixed media networks. The Network Bridge creates a software connection linking different types of network connections and creating a single subnet for the entire network.
To create a Network Bridging connection, perform the following steps:
- Select Network Bridging as your advanced Internet connection
type and click Next. The Network Bridging screen will
appear.
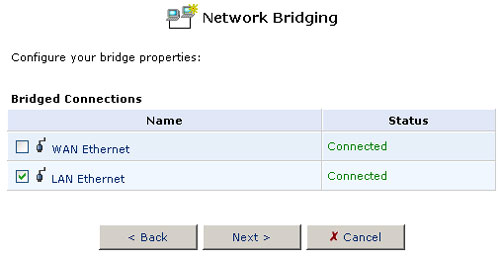
- To create a Network Bridge between two or more network connections,
select the check boxes next to the connections you want to bridge and
then click Next.
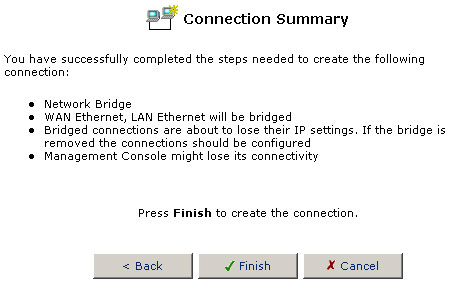
- The wizard will display a summary of the connection parameters. Click
Finish to create your Network Bridge.
Creating a Virtual Private Network (VPN) Connection
A Virtual Private Network (VPN) allows the home or SOHO user to establish a secure and cost-effective communications path over the Internet, linking a local network to a remote computer or site. Widely used VPN technologies such as IPSec and PPTP allow users to safely and securely access a company intranet from a remote location or connect to the home/SOHO network when traveling. The USR8200 Firewall/VPN/NAS's three modules, IPSec, PPTP Server, and PPTP Client, enable computers on the local network to communicate over VPN connections with remote computers without needing to run any additional VPN software. Pass-through support allows computers on the local network to establish direct VPN connections with remote servers passing through the gateways Firewall and NAT.
There are four types of VPN connections you can create: Point-to-Point Tunneling Protocol, Point-to-Point Tunneling Protocol Server (PPTP Server), Layer Two Tunneling Protocol (L2TP), and Internet Protocol Security (IPSec).
Layer Two Tunneling Protocol Connection
Creating a PPTP Client Connection
Point-to-Point Tunneling Protocol (PPTP) is an extension of the Internet's Point-to-Point Protocol (PPP) that allows two computers to establish a Virtual Private Network (VPN) for themselves over the Internet by creating a virtual serial link. PPP encapsulates data from the Network layer (e.g.: IP, IPX) into the HDLC format, this data is encapsulated into the GRE protocol format and is sent over the public network.
Your gateway can act both as a PPTP server, enabling external users (clients) to access the LAN and as a PPTP client, enabling users within the LAN to access a remote LAN. The PPP authentication protocols include: PAP, CHAP, MS-CHAP, and MS-CHAPv2. The PPP encryption protocols include: MPPE40, MPPE128, and MPPE-STATELESS.
To create a PPTP client connection, perform the following steps:
- Select Point-to-Point Tunneling Protocol (PPTP) as the protocol
to be used in this connection and click Next.

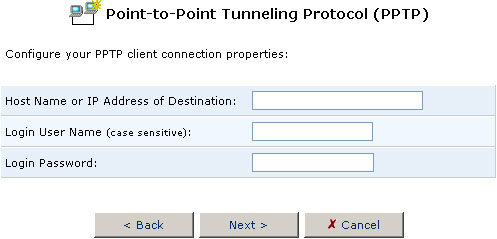
- Configure the following PPTP connection properties and click Next. Note that these parameters must be supplied by your VPN server:
- Host Name or IP Address of Destination
- Login User Name
- Login Password
- The wizard will display a summary of the connection parameters. Click
Finish to create your VPN PPTP client connection.
Creating a PPTP Server Connection
To create a PPTP server connection, perform the following steps:
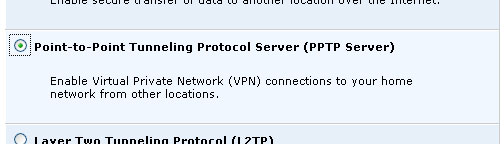
- Select the Point-to-Point Tunneling Protocol Server (PPTP Server)
as the protocol to be used in this connection and click Next.
- Specify the users that will be authorised to access your VPN server
and click Next.
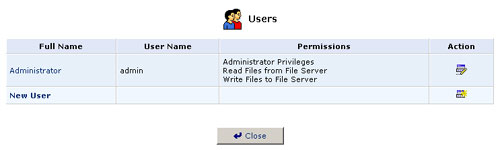
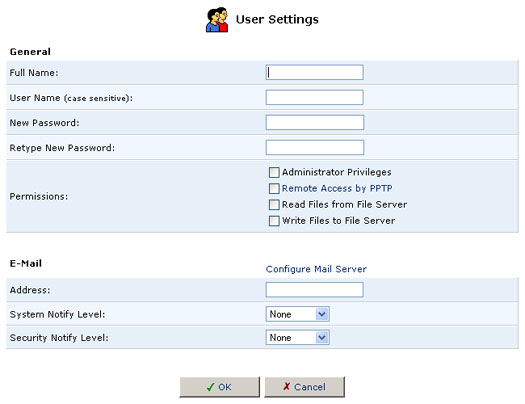
You can add, edit, and delete users. When adding a user, you need to specify the following parameters: - Full Name: The remote user's full name.
- User Name: The name a remote user will use to access your home network.
- New Password: Type a new password for the remote user. If you do not want to change the remote user's password, leave this field empty.
- Retype New Password: If a new password was assigned, type it again to verify it.
- Permissions: Select the remote user's privileges on your home
network.
- Administrator Privileges: Grants remote system setting modification via Web-based management or Telnet.
- Remote Access by PPTP: Grants access with no system modification privileges.
- E-Mail Address: The remote user's e-mail address.
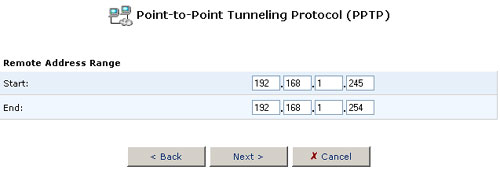
- Define the IP address range that an authorised user can assume when
accessing your home network and click Next.
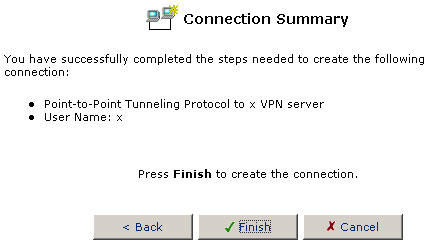
- The wizard will display a summary of the connection parameters. Click
Finish to create your VPN PPTP server connection.

Note: Changing any of the user parameters will prompt the connection associated with the user to terminate. For changes to take effect, you should activate the connection manually after modifying user parameters.
Layer Two Tunneling Protocol Connection
To create a Layer Two Tunneling Protocol connection, perform the following steps:
-
Select Layer Two Tunneling Protocol (L2TP) in the New Connection window and click Next.
- Enter the following information for your connection:
- Host Name or IP Address of Destination
- Shared Secret
- Select or deselect the Use IPSec checkbox
- Login User Name
- Login Password
- After you have entered the necessary information, click Next. You will then see a screen which will confirm the IP address and User Name you entered. If they are correct, click Finish. If they are not correct, click Back to change the entries.
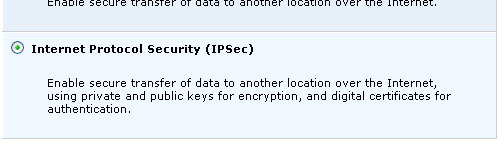
IPSec is a series of guidelines for the protection of Internet Protocol (IP) communications. It specifies procedures for securing private information transmitted over public networks. The IPSec protocols include:
- AH (Authentication Header) provides a packet-level authentication service.
- ESP (Encapsulating Security Payload) provides encryption plus authentication service.
- IKE (Internet Key Exchange) negotiates connection parameters, including keys, for the other two services.
Services supported by the IPSec protocols (AH, ESP) include confidentiality (encryption), authenticity (proof of sender), integrity (detection of data tampering), and replay protection (defense against unauthorised resending of data). IPSec also specifies methodologies for key management. Internet Key Exchange (IKE), the IPSec key management protocol, defines a series of steps to establish keys for encrypting and decrypting information; it defines a common language on which communications between two parties is based. Developed by the Internet Engineering Task Force (IETF), IPSec and IKE together standardise the way data protection is performed, thus making it possible for security systems developed by different vendors to interoperate.
To create an IPSec client connection, perform the following steps:
- Select Internet Protocol Security (IPSec) as your connection
type and click Next.
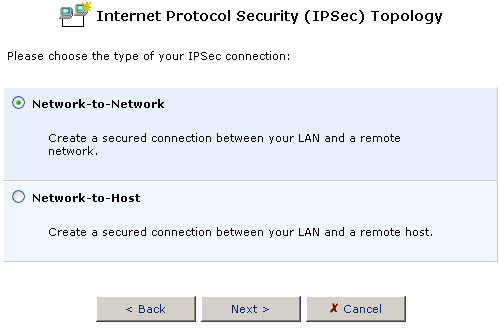
- You will then need to select either Network-to-Network or Network-to-Host.
After selecting one of the options, click Next.
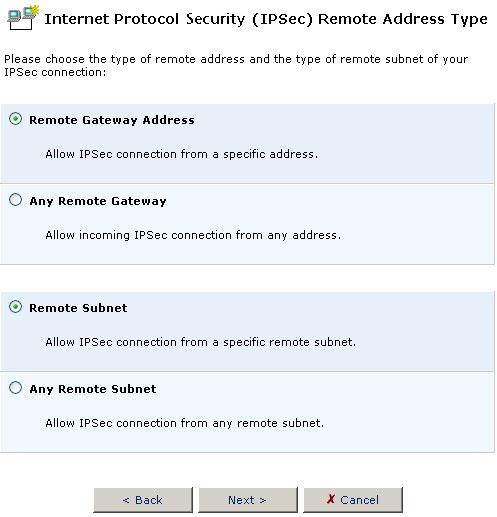
- If you chose Network-to-Network, select either Remote Gateway Address
or Any Remote Gateway for the type of remote address. Select
either Remote Subnet or Any Remote Subnet for the type
of remote subnet. After you have selected one for each section, click
Next.
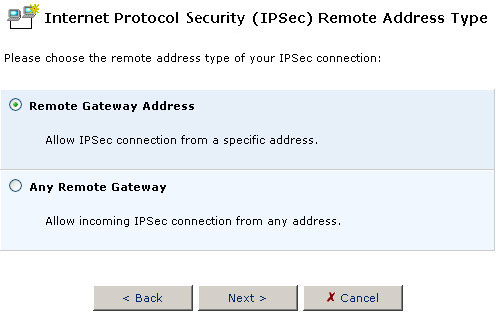
If you chose Network-to-Host, select either Remote Gateway Address or Any Remote Gateway for the type of remote address. After you have selected one, click Next.
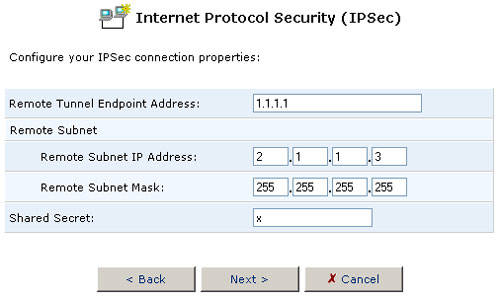
- Depending on what you chose on the Topology screen and the Remote Address Type screen, you will need to enter some or all of the following information:
- Remote Tunnel Endpoint Address
- Remote Subnet IP Address
- Remote Subnet Mask
- Shared Secret
Note: These parameters must be supplied by your VPN server.
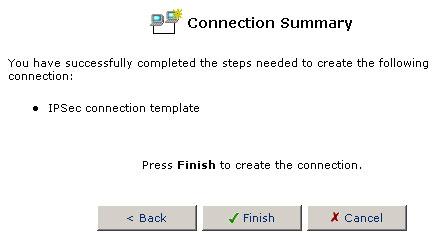
- The wizard will display a summary of the connection parameters. Click
Finish to create your VPN IPSec client connection.
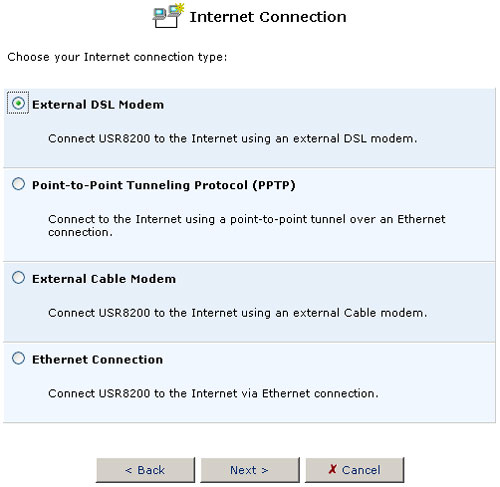
Internet Connection
If you need to setup your connection to the Internet, click Internet Connection.
Select your Internet Connection type and click Next.
Enter the appropriate information for your Internet Connection and follow the on-screen instructions. When you are finished, you should have a secure connection to the Internet.
