These are the options available in the LAN menu:
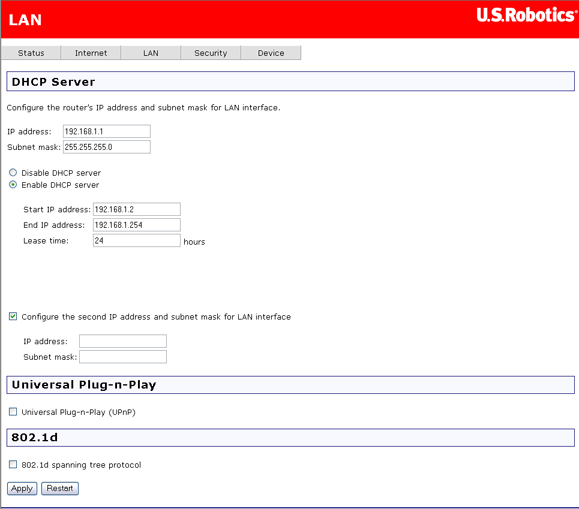
In this page, you can use DHCP (Dynamic Host Configuration Protocol) to control the assignment of IP addresses on your local network (LAN only).
If you make any changes, click Apply to save them. They do not take effect, though, until you restart the device, which you can do by clicking Restart.
| Item | Description |
| IP address | This is the IP address that other devices on your local network will use to connect to the router. |
| Subnet mask | This defines the size of your network. The default is 255.255.255.0. |
| Disable / Enable DHCP server | The DHCP server assigns an IP addresses from a pre-set pool of addresses upon request from DHCP client (e.g. your computer). Do not disable the DHCP server unless you wish to let another device handle IP address issuance on the local network. |
| Start / end IP address | This is the beginning and ending range for the DHCP server addresses. |
| Lease time | The amount of time before the IP address is refreshed by the DHCP server. |
| Configure the second IP address and... | Use this feature to create a public network on your local LAN, accessible from the Internet. By assigning an address to this interface and then statically setting your LAN clients to the same network, the LAN clients are accessible from the public network (e.g. FTP or HTTP servers). |
| Universal Plug-n-Play | Universal Plug and Play© is a Microsoft standard for devices to identify themselves to a Windows system for automatic installation and configuration. |
| 802.1d spanning tree protocol | This resolves multiple bridged paths in a network. Only advanced users should enable this feature. |
| DHCP server relay | If NAT is disabled and the PVC is the IPoA or static MER type, this item allows you to inform the router of another DHCP server on your LAN. To do this, disable the DHCP server on the router. Then input the IP address of the current DHCP server. Click Apply and restart the router. |
Use this page to re-direct ATM traffic to a specific Ethernet port or group of ports. An application such as multicast streaming of video data to set-top boxes requires this interface. Do not create a bridge group without dedicated ATM service from your Internet Service Provider.
You would use this feature if you have at least one Bridge-mode PVC that you want to map to a particular Ethernet port and a second PVC (PPP, IPoA, or MER type) that will be mapped to the remaining Ethernet port(s). For example, you could use the bridge PVC for video streaming and a second PVC, with the firewall and NAT supported, for regular data transfer and Internet traffic. Check with your Internet Service Provider to see if they would support this.
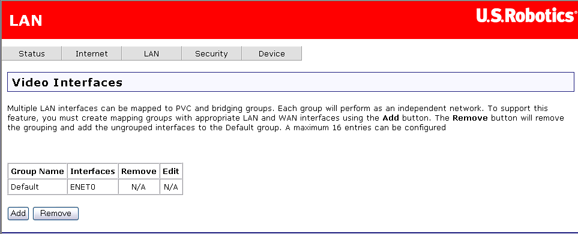
Click on Add to create a new bridge group.
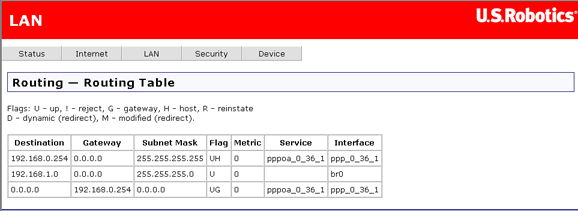
The routing table shows the IP addresses or address routes for the computers connected to the router to reach different destinations, such as the local network, the router, or the outside world beyond the router (i.e., the Internet). Here is an example of how it might look:
This table describes each row in the above example.
Row |
Description |
1 |
This row shows how the router gets to the ISP's router, using the pppoa_0_36_1 interface. |
2 |
This shows how the router communicates with the LAN interface, using the br0 interface. |
3 |
This data shows how the router accesses the Internet, using the pppoa_0_36_1 interface and the ISP's router at address 192.168.0.254. |
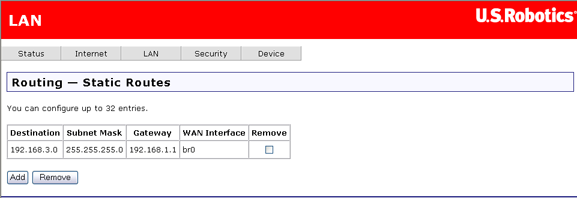
This page lets you set up static routes to connect machines not on the router's local network. A system is not on this local network if the third number in its IP address does not match the third number in the router's IP address (for example, if you haven't changed the router's IP address from 192.168.1.x, a machine whose address does not have 1 as the third number is not on the local network).
The page looks like this when no static routes have been defined:
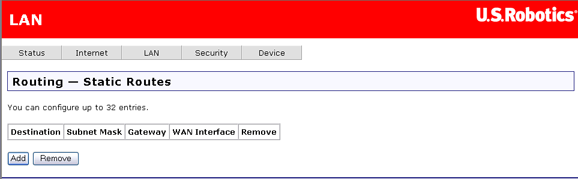
To define a static route, click Add. Another page opens:
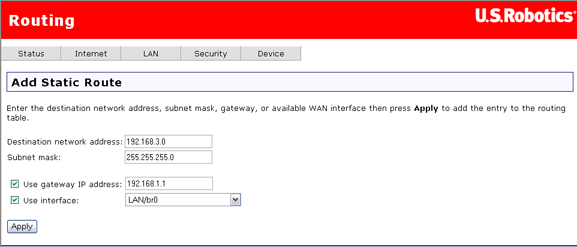
Specify settings and click Apply when done. This returns you to the previous page, which now shows the new static route data.
If you connect another gateway or router to your ADSL 4-Port Router, the RIP feature helps the two devices share their routing tables. The router supports RIP versions 1 and 2.
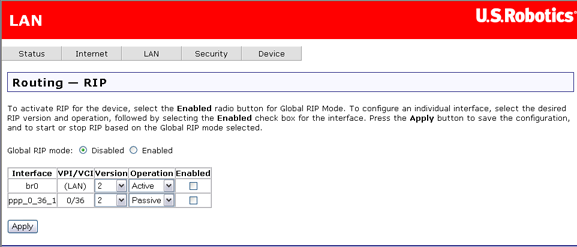
Under Operation, Active means that this router sends its routing table data to other gateways and routers, and Passive means that it receives this data from other devices but does not send it.
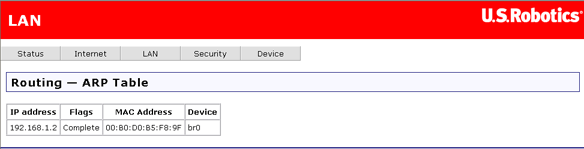
The ARP table shows the IP and MAC addresses for all computers that have transferred data to the router.
Note: This table is not saved when you restart the router.
The DHCP client page shows the system name, MAC address, IP address, and the amount of time until session expiration for all computers connected to the router. The lease time is a maximum session length assigned by the router's DHCP server whenever a system logs on to it. This page shows how much of that time is still left (Lease Time Remaining).

The Quality of Service feature is useful when some of the traffic handled by the router has higher importance than other data being handled at the same time. For example, you might set up your computer to make telephone calls over the Internet. If you have a voice conversation while your computer is also downloading a file, you would want the voice conversation to take precedence over the file download, since delays in transmitting voice messages would cause signal dropouts and poor sound quality.
The QoS feature would help you if all of the following conditions are met:
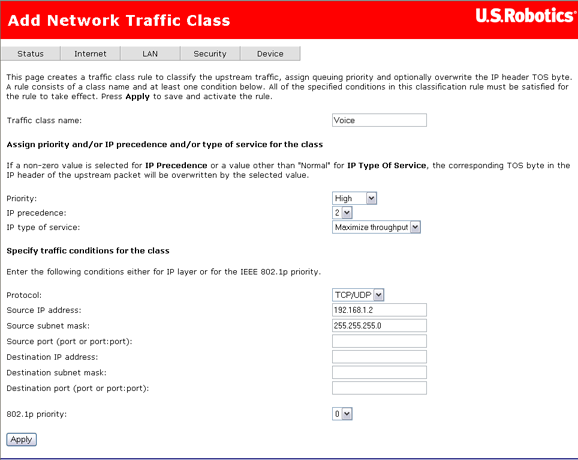
QoS classifies traffic according to classification rules you define. Each rule may contain a combination of the following conditions: protocol (TCP/UDP/ICMP), source IP address/subnet mask, destination IP address/subnet mask, source port (one or range), destination port (one or range). Any session that matches a classification rule receives a certain priority (high, medium, low) and a type of service (normal service, minimum cost, maximum reliability, maximum throughput, or minimum delay).
The priority of the matching rule determines which ATM TX queue to send over the PVC if the packet is routed to this PVC. ATM picks packets to process according to these priorities:
QoS only works for QoS-enabled PVCs. If data is routed to a regular QoS-disabled PVC, it will receive the same priority level as the low priority of a QoS-enabled PVC in the same ATM service category.
To enable the QoS feature, follow this procedure:
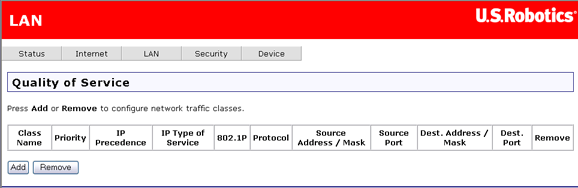
To set up QoS, you define one or more classes of data traffic. This is how the page looks if there are no QoS classes:
Define a class by clicking Add and entering class parameters.
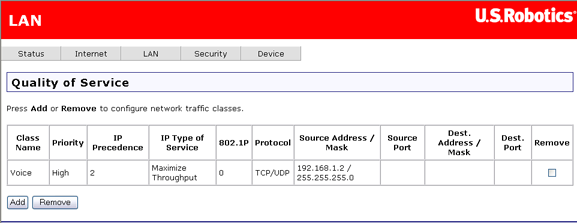
When you click Apply, the new class appears in the table.
For a tutorial on configuring the QoS feature, please click here.