
These are the options available in the Internet menu:
The WAN setup page allows you to edit or remove your ISP configuration that you set up either in EasyConfigurator or the quick setup wizard. Click Edit to modify the existing Internet connection, or Add to define a new one. You will then see a series of pages for entering networking parameters. The last page will have an Apply button to store the changes in your gateway. Click Finish to save.

To remove a Permanent Virtual Circuit (PVC) from this table, click the Remove checkbox for the particular VPI/VCI to delete, then click the Remove button.
The Wireless MAXg ADSL Gateway supports the following five ISP network operating modes over gateway ADSL interface:
The ISP network operating mode depends on the service provider's configuration on the Central Office side and Broadband Access Server (BRAS) for your ADSL line.
Your ISP should be able to provide the following, if needed:
The following configuration considerations apply:


The Connection Type page allows you to select the type of network protocol over the ATM PVC supported by the Internet Service Provider.
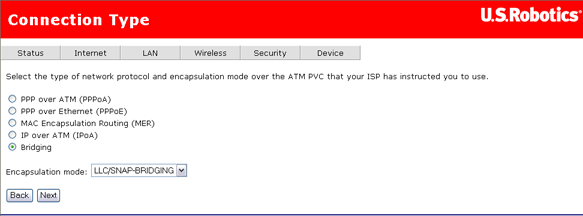
Select the protocol as assigned by your ISP and proceed to the matching sections in this manual for further instructions.
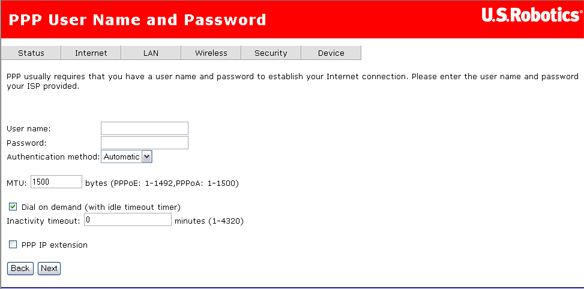
The page provides fields to enter the User name and the Password. The user interface allows a maximum of 256 characters in the user name and a maximum of 32 characters in the password. For PPPoE, there is a PPPoE service name that can be blank unless your Internet Service Provider gives you a value to enter.
Authentication method is default to Automatic. It is recommended that you leave the Authentication method in Automatic, however, you may select PAP or CHAP if necessary. The default value for MTU (Maximum Transmission Unit) is 1500 for PPPoA and 1492 for PPPoE. Do not change these values unless your ISP asks you to.
The gateway can be configured to disconnect if there is no activity for a specific period of time by selecting the Dial on demand check box and entering the Inactivity timeout. The entered value must be between 1 minute to 4320 minutes.
The PPP IP Extension is a special feature deployed by some service providers. Unless your service provider specifically requires this setup, do not select it. If you need to select it, the PPP IP Extension supports the following conditions:
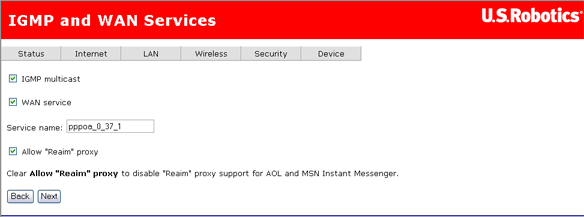
This page allows you to enable IGMP multicast, enable WAN service, specify a service name, and enable a "Reaim" proxy. After verifying and entering your settings, click Next.
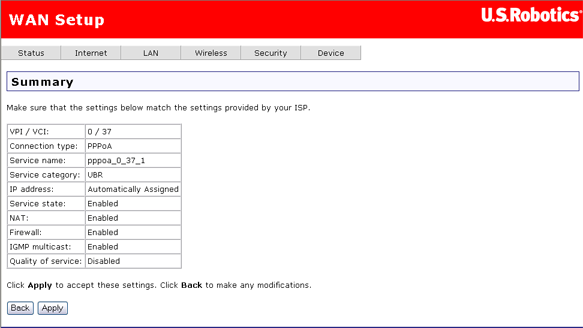
After clicking Apply, the gateway saves the configuration to the memory and reboots. The WUI will not respond until the system is brought up again.
If you selected PPP IP extension above, you need to release and renew the IP address for the computer connected to the router. Then you should be able to browse the Internet.
To configure MER, do the following:
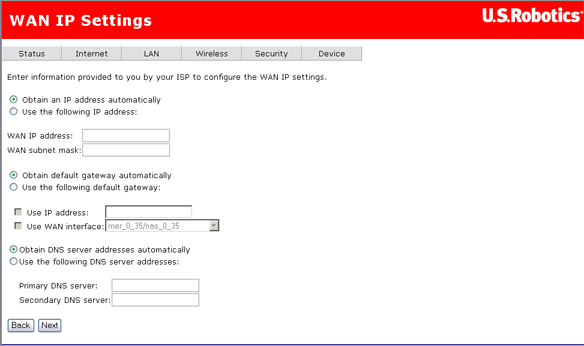
The values should be provided by your ISP.
If you can get a Default Gateway address automatically through the DHCP client, select Obtain default gateway automatically. Otherwise, select Use the following gateway, check Use IP address and enter the gateway address provided by your ISP, and check Use WAN interface.
If DNS server addresses can be obtained automatically through the DHCP, select Obtain DNS server addresses automatically; otherwise, enter the preferred DNS server address and the optional alternative DNS server address and click Next. The following page appears:
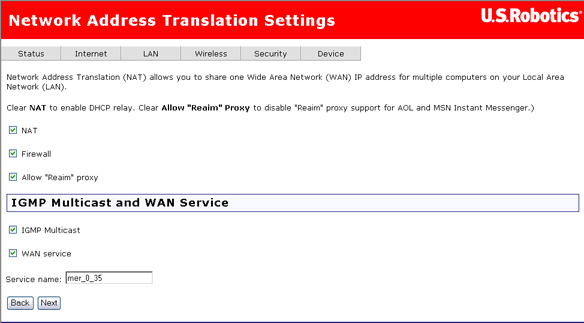
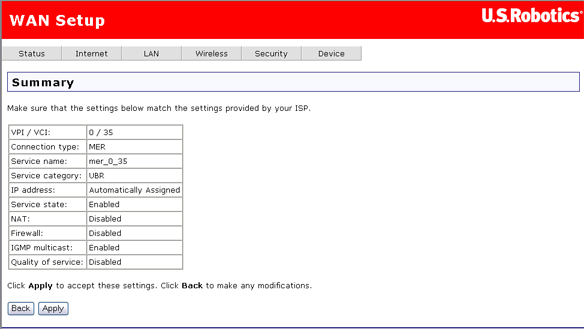
The summary page presents the entire configuration summary. Click Apply to complete the configuration (which requires about 1 minute to complete) or Back to change any of the settings.
To configure IP over ATM (IPoA), do the following.
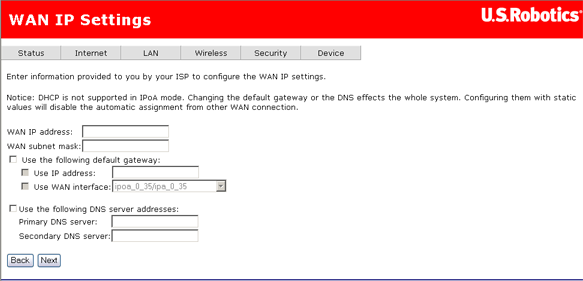
If you want to set the default gateway, enable Use the following default gateway and enter an IP address and/or select an interface.
If you want to set a DNS server address, enable Use the following DNS server addresses and IP addresses for a primary and optional secondary DNS server.
Click Next to continue.
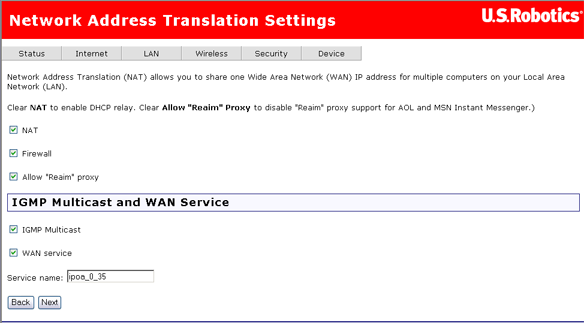
Click Next to continue.
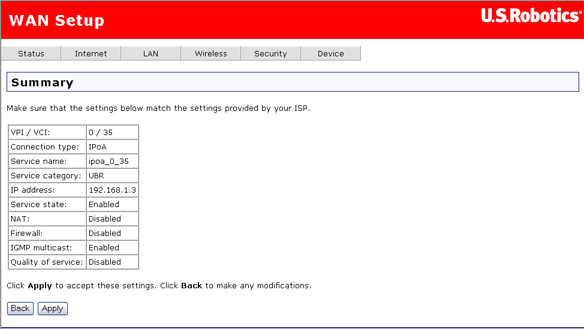
Select the bridge operating mode if your ADSL service provider tells you that you should.
To configure bridging, do the following:

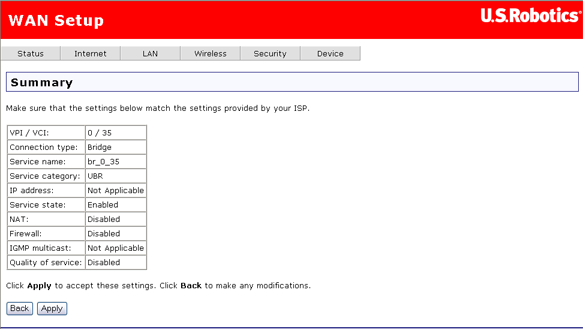
After completing the setup process, you need to release and renew the IP address for the computer connected to the gateway. Then you should be able to browse the Internet.
You can use this page to enable or disable ADSL standards for interoperability with your ISP's ADSL network. In most cases, your connection will use G.DMT (an ITU-T DSL specification). However, if you experience poor performance or DSL link disruptions, uncheck all but T1.413 and click Apply. You can also contact your ISP for more information or instructions.
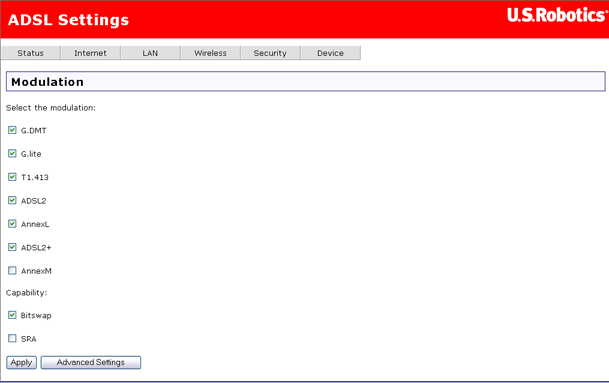
The DSL Advanced Settings page allows you to select a test mode, which you will generally only do when requested by your Internet Service Provider.
Warning!! Running tests in this page may make your DSL service inoperable. Do not use it unless your ISP asks you to. These tests are designed for use by a Service Provider technician only.
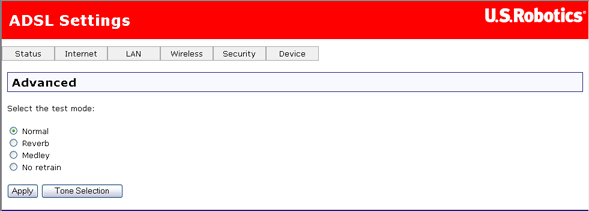
If you click on the Tone Selection button from the previous page, this window opens.
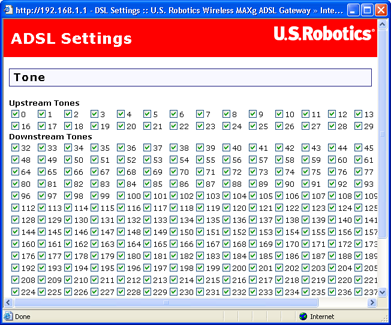
Warning: Do not change these settings unless you are instructed to do so by your Internet Service Provider.
You can check or clear all checkboxes by clicking Check All or Clear All; then click Apply.
In this page, you enter data for the default gateway that your Wireless MAXg ADSL Gateway connects to — in other words, your ISP's machine that your ADSL Gateway communicates with to access the Internet.
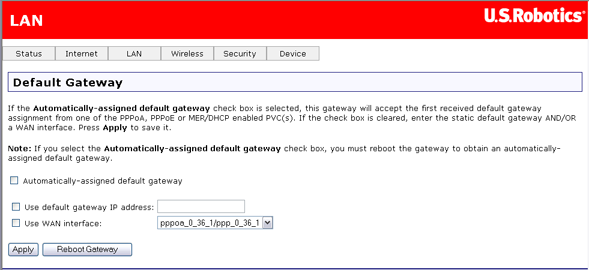
If you want to automatically get the IP address of the ISP's gateway, or if you are using a PPP connection, enable Automatically-assigned default gateway. This makes the user-assigned fields disappear. If you select Automatically-assigned default gateway, the change does not take effect until you restart the device, which you can do by clicking Apply, then Reboot Gateway.
If you are configuring your ADSL Gateway for either Routed Mode (IPoA) or Static MER Mode, you should both enter a static default gateway IP address for the ISP's gateway and select the appropriate WAN interface.
Note: You should have both Use default gateway IP address and Use WAN interface selected at the same time, as they are compatible with each other.
In this page, you can tell the gateway how to select a domain name service (DNS).
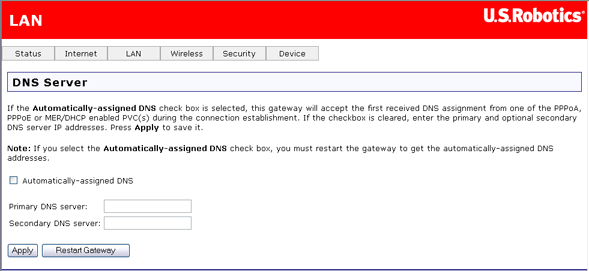
If you enable Automatically-assigned DNS, the gateway uses the DNS IP address provided by your Internet Service Provider during account verification, and the user-defined fields disappear. To manually specify one or more domain name services, disable Automatically-assigned DNS and enter the IP addresses of a primary and optionally a secondary DNS.
If you are configuring your gateway for either routed mode or static MER mode, you will need to manually assign a DNS address in the Primary DNS server field. You could also optionally enter a secondary DNS server.
These settings will take effect only after you click Apply. Then restart the gateway.
This page lets you control access to the gateway's Web user interface device management functions. You can enable or disable access to these functions by IP addresses on your local network. To add an IP address to the list, select Add. To remove an IP address from the list, select the appropriate checkbox in the Remove column and click the Remove button.

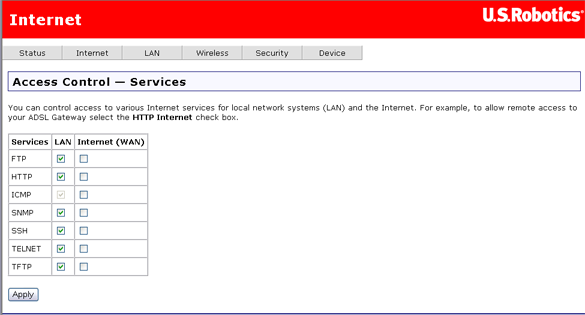
In this page you can enable or disable access to various Internet services for systems connected to the gateway (in the LAN column) and machines on the Internet (the WAN column). Click Apply to save changes.
A DNS (Domain Name Service) resolves an Internet address such as www.usr.com into an IP address. A dynamic DNS service allows you to assign a Web name like myUSRrouter.dynDNS.com to your gateway, making it accessible from the Internet without having to know the gateway's IP address assigned by the service provider.
In this page, you can set parameters that will allow the domain name services to find your gateway. You would use this to bypass the dynamic nature of WAN IP addressing, to have a consistent host name accessible from the Internet.
Note: You will need dynamic DNS service provided by a third part to use this feature.
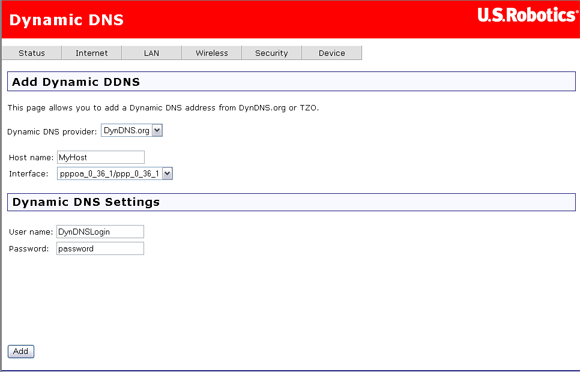
Enter dynamic DNS information and click Add. This page appears with the data you entered:
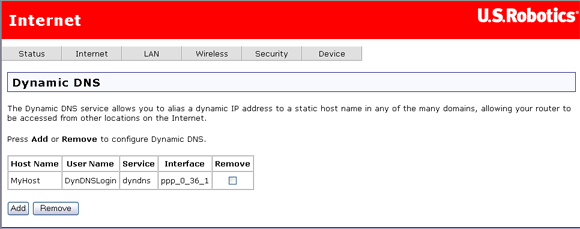
To remove a dynamic DNS assignment, select the appropriate Remove check box and click the Remove button.