
Contents:
Hardware Installation >
Network Settings and Software Installation
Broadband Router User Guide
R24.0031.00
(Windows 95, 98, 2000, NT, Me, and Macintosh)
Hardware Installation
Installation Procedure
- Turn off your PC or Macintosh and unplug the power cord.
- Connect one end of an Ethernet cable to your PC's Ethernet adapter. Connect the other end to one of the LAN ports on the broadband router.
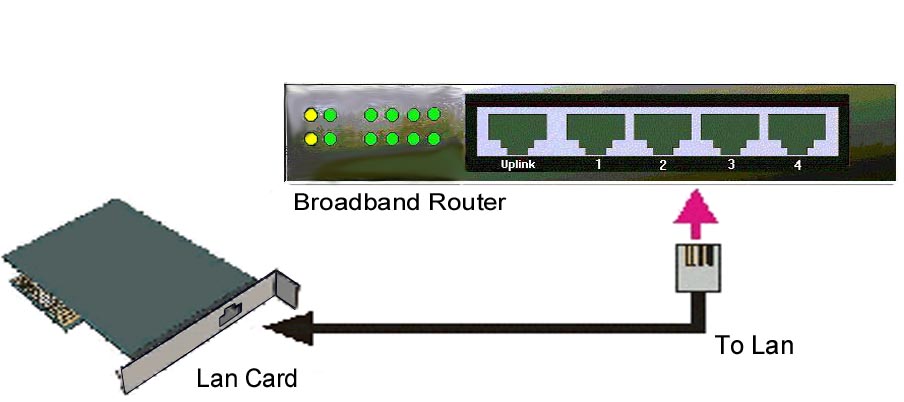
Figure 2-1 Setup of LAN connections for this product.
- Connect one end of an Ethernet cable to the WAN port on the broadband router. Connect the other end to the LAN port on your modem.
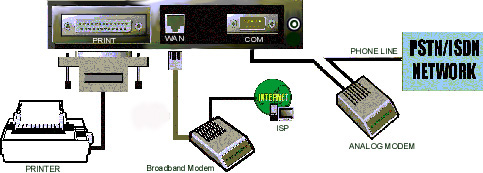
Figure 2-2: Setup of WAN and Printer connections for the broadband router.
- Connect the power cord to the power adapter. Connect the power adapter to the power jack on the broadband router. Plug the power cord into a standard power outlet. The broadband router will automatically enter the self-test phase. When it is in this phase, the Power LED will light up for approximately five seconds, then flash three times to indicate that the self-test operation is complete. Finally, the Power LED will continuously flash once per second to indicate that this product is operating normally.
- Plug in the power cord for your PC or Macintosh and turn your computer on.
- If you want to share a printer across the network, connect the cable from the printer to the PRINTER port on the rear of the broadband router. Refer to the Console Mode section of this manual for instructions on enabling the print server.
![]()