If using Windows NT 4.0, Microsoft TCP/IP Printing Support must be installed.
If it is already installed, add a TCP/IP Remote Printer, as described below.
If it is not already installed, install TCP/IP printing support, then add a TCP/IP Remote Printer.
Adding TCP/IP Printing Support
Windows XP, 2000, and NT Users:
Click Windows Start > Control Panel > Network.
Windows Me, 98, and 95 Users:
Click Windows Start > Settings > Control Panel > Network.
Click the Service option and ensure that Microsoft TCP/IP Printing is enabled. If it is not enabled, click Add and enable it as usual.
If you added services in step 2, reboot the computer for the changes to take effect.
Adding a TCP/IP Remote Printer
Windows XP, 2000, and NT Users:
Click Windows Start > Printers and Faxes.
Windows Me, 98, and 95 Users:
Click Windows Start > Settings > Control Panel.
Within Control Panel, click Printers and Faxes.
Launch the Add Printer wizard.
When prompted with This printer will be managed by, select My Computer and click Next.
Select Add Port… and then select LPR Port. Click New Port.
In the Name of Address of server providing lpd: dialogue box, enter the Wireless USB Print Server's IP address.
In the Name of printer or print queue on that server dialogue box, enter the appropriate logical printer number (e.g. L1) as previously configured on the Wireless USB Print Server.
By default, L1 is port 1, and L2 is port 2 if the Wireless USB Print Server has 2 printer ports.
Click OK. When returned to the Printer Ports window, select Close and then install your printer driver as usual.
When prompted whether or not the printer will be shared, select the Sharing button.
In the Shared dialog box, enter the shared printer name. (The shared name is how other users will see this printer.) Click OK to save and exit. Client computers can now be configured.
Windows 2000/2003 Server
Launch the Add Printer Wizard, select Network Printer, then click Next to browse for the Wireless USB Print Server.
Locate and double-click the Wireless USB Print Server, select the desired port, and click Next.
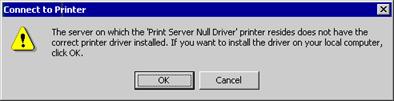
A message like the following will be displayed:
Click OK and select the correct Manufacturer and Model for this printer.
Follow the prompts to complete the installation.
In the Printers folder, right-click the new printer and select Sharing.
Select Shared As: and enter an appropriate name for this printer. Users will see this name when browsing for the printer during installation.
If desired, click Additional Drivers and install printer drivers for other versions of Windows, such as Windows 98. This will assist users during the installation process.
Click OK to close this Window. Configuration is now complete. Client computers can now be configured.