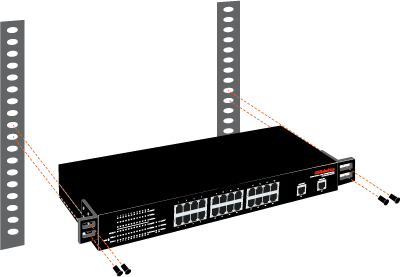
Attach a bracket to each side of the switch, and secure the brackets with the provided screws:

Use screws provided with the equipment rack to mount the switch in the rack:
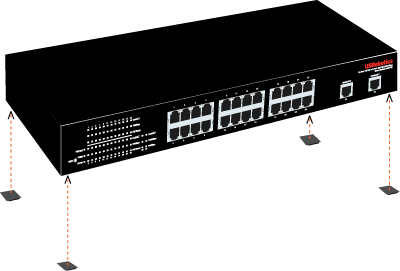
The switch can be mounted on a flat surface or on an equipment rack.
Attach the rubber feet to the bottom of each . Install the switch on a sturdy, level surface that can support its weight:
You can mount the switch on an EIA standard-size, 19-inch rack.
Attach a bracket to each side of the switch, and secure the brackets with the provided screws:
Use screws provided with the equipment rack to mount the switch in the rack:
Use an Ethernet cable to connect any Ethernet port on the switch to the Ethernet port on a computer. The computer will be used to set the switch's IP address.
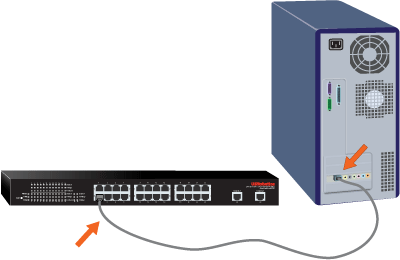
Connect the power cord to the 100-240VAC port on the switch, then plug the power cord into a standard power outlet:

Assigning the switch an IP Address in the same subnet as the computer enables the computer to reach the of the switch for further configuration.
If you are using an operating system other than Windows, assign an IP address to the switch by following the instructions For Non-Windows Users.
The is the easiest way set up the switch's basic configuration (for information about other features available in the utility, see Configuration Utility). First, you need to install the utility; then you can use it to assign an IP address to the switch.
Insert the USRobotics Installation CD-ROM in the CD or DVD drive.
If the CD doesn't start automatically, start it manually as follows:
Windows XP: Click Windows Start > My Computer.
Windows 2000: On the desktop, double-click My Computer.
Double-click the CD drive.
Follow the on-screen instructions to install the .
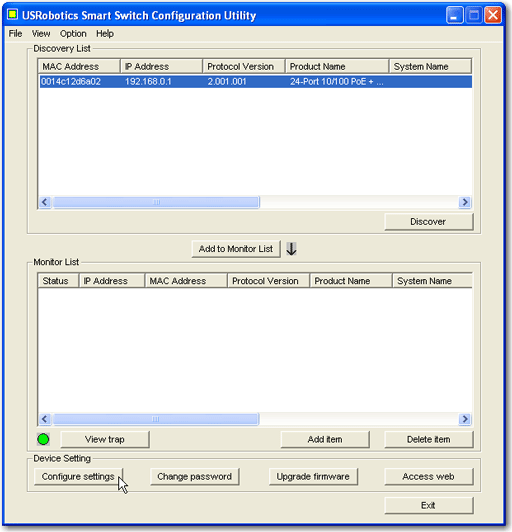
Click Windows Start > Programs > USRobotics > as shown below:

Click Discover to find the .
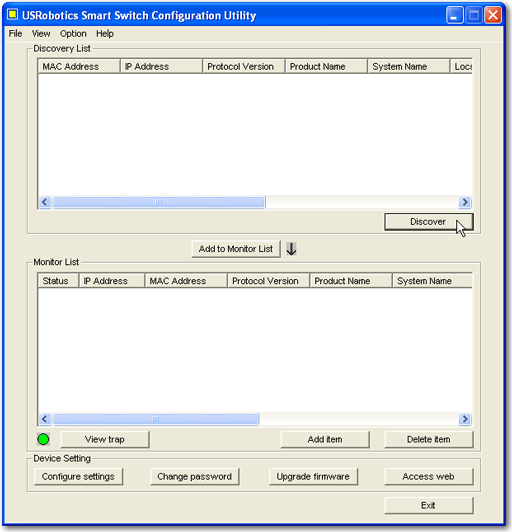
Click the entry to select it; then click Configure settings
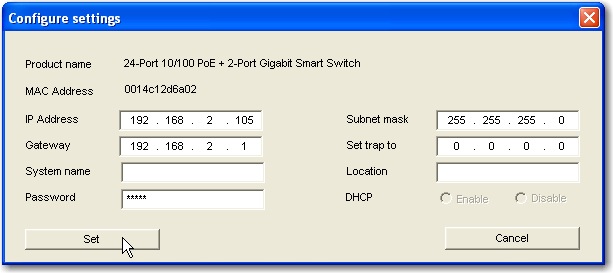
The Configuration settings window appears:

Set the IP address of the switch as follows:
Enter an IP Address in the same subnet as the computer.
Enter a Gateway address in the same subnet as the computer.
In Password, enter ; click Set:
The utility confirms the configuration of the switch:
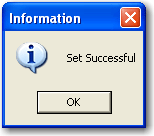
The switch is now accessible at its new IP address.
USRobotics recommends that you change the password on the switch before you connect it to your network. Changing the password helps to prevent unauthorised access to the . Use the to change the password as follows:
Click Windows Start > Programs > USRobotics > to start the utility.
Click Discovery to find the .
Double-click the switch entry to move it to the Monitor List.
Click the entry in the Monitor List.
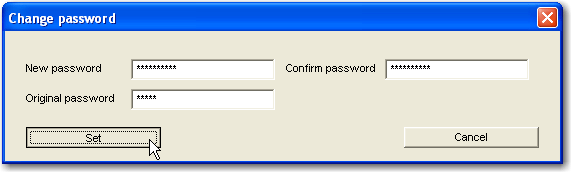
Click Change password.
Enter the current password; then enter the new password in both New password and Confirm password; click Set:
Congratulations! You have successfully completed the installation procedure. Please register your at www.usr.com/productreg.
To assign a new IP address to the switch, you need access to the of the .
Set the IP address on your computer to an address in subnet 192.168.0.0.
Start a Web browser and go to the following address: .
The of the displays the login page:

Enter the password (the default password is
On the menu bar, click System.
The system setting page appears:
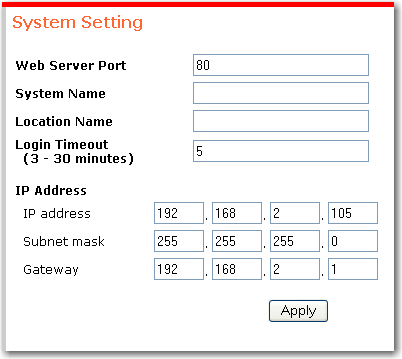
In this step, when you change the IP address of the switch to a different subnet, you will lose connection to the switch from your computer.
Enter the new IP address, Subnet Mask, and Gateway, and click Apply.
USRobotics recommends that you change the password on the switch before you connect it to your network. Changing the password helps to prevent unauthorised access to the . Change the password as follows:
Make sure that the IP address on your computer is in the same subnet as the switch.
Start a Web browser and go to the IP address of the switch.
Enter the password (the default password is
On the menu bar, click Password.
The password setting screen appears:
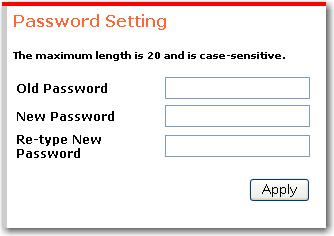
Enter the Old Password (the default password is ).
Type the new password in both New Password and Re-type New Password and click Apply.
Congratulations! You have successfully completed the installation procedure. Please register your at www.usr.com/productreg.