
USR Mini Cam for Skype

Quick Installation Guide
Package Contents
- USR Mini Cam for Skype
- USRobotics Installation CD-ROM
- Headset
- Quick Installation Guide
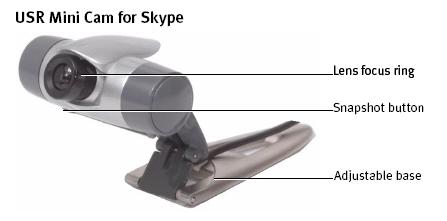
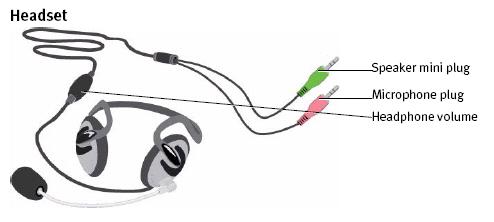
Physical Features
System Requirements
- Mac computer with G4 800 Mhz processor or faster
- Mac OS X v10.3.9 Panther or newer
- 512 MB RAM
- 40 MB free disk space on your hard drive
- CD-ROM or DVD drive
- Broadband Internet connection
- Browser supporting HTML 4.01 specification with JavaScript enabled
Installation Instructions
Important: Do not connect the USR Mini Cam for Skype before installing the software.
Step One: Install the USR Mini Cam for Skype
- Download the USRobotics SN9C201 Series WebCam Driver installation package from the USRobotics website.
Note: If Skype 2.0 or later is already installed on your computer, skip ahead to Step 4.
- Download Skype from their website and install, following the on-screen instructions.
- Create a Skype account and add Skype contacts to your contact list. Click Help in Skype for additional information.
- Navigate to the folder where the webcam driver installation package was downloaded.

- Double click SN9C201 Series WebCam Driver Install.pkg.
The installer's Introduction screen appears.

- Click Continue.
The Read Me screen appears, displaying information to review before continuing.

- Click Continue.
The Select Destination screen appears.

- Select the destination volume where OS X is located and click Continue.
The Installation Type screen appears.

- Click Install.
A prompt appears, asking the user to authenticate. By default, the name displayed will be the account that is logged in.

- Enter password, then click OK.
The Install screen appears, showing the progress as files are copied into the destination volume.

When the installation is successful, the Finish Up screen appears:

- Click Close to finish.
- Connect the USR Mini Cam for Skype directly to your computer (do not use a hub).
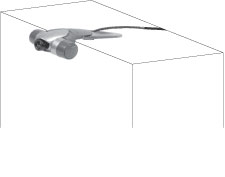
- Position the USR Mini Cam for Skype.
- For a CRT monitor or flat surface
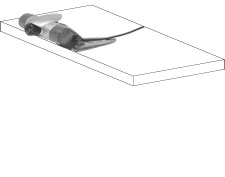
- For an LCD monitor or laptop screen
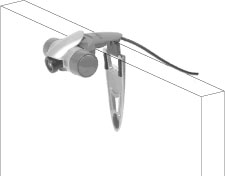
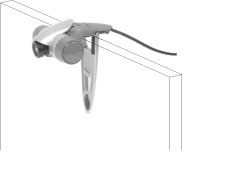
- Insert the microphone plug into the microphone jack and the headphone
plug into the speaker jack on your computer.
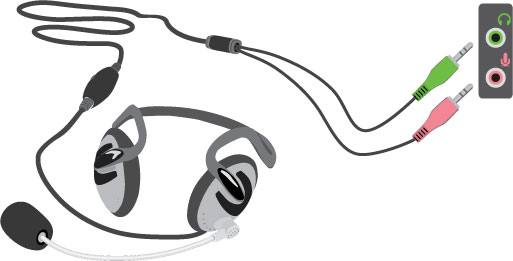
Step Two: Verify the USR Mini Cam for Skype Installation
- If Skype is not running, start Skype.
- In Skype, select Tools > Options.
- Click Video.
- Make sure that under Select Webcam, USR Mini Cam for Skype is selected for use.
- Remove the lens cap from the USR Mini Cam for Skype.
- Click Test Webcam. The camera LED lights when the camera is turned on by a video application.
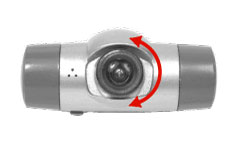
- Rotate the focus ring to make the image clear.
- Click Sound Devices and make sure the correct sound device is selected. If the Windows default device is selected, check the Windows audio control panel to make sure that the correct source is selected as the Windows default device. To use the headset, the audio device that your headset is connected to must be selected.
- Place a call to the Skype Test Call contact (echo123)and follow the spoken instructions. This will test audio only. If you do not hear anything, check your Skype sound devices settings and Windows audio control panel settings to be sure that the correct sound card or Skype phone is being used for Skype audio.
Congratulations. You have successfully completed the installation procedure. Please register your USR Mini Cam for Skype with USRobotics at www.usr.com/productreg/.
Tips
- Avoid having light sources in the picture area. Their presence will darken the rest of the image.
- For better eye contact with the other party, center the USR Mini Cam on your monitor and place the Skype window near the camera.
- Position the USR Mini Cam as horizontally as possible.
- The USR Mini Cam automatically adjusts to lighting conditions. However, very dim lighting will result in a low quality image and jerky motion.
- The USR Mini Cam has a wide angle lens, which captures a broad field of view. You can use the digital zoom feature to show a close-up image.
Troubleshooting
This basic procedure addresses some symptoms that you might experience with your USR Mini Cam for Skype:
- Be sure the lens cap is removed from the USR Mini Cam for Skype.
- Verify that the USB plug is connected to a powered USB port and that the headset plugs are in the correct microphone and speaker ports.
- Be sure that no other video preview program is running.
Windows Hardware Wizard cannot find the USR Mini Cam for Skype.
Solution:
Before you connect the USR Mini Cam for Skype, the software must be installed.
Disconnect the USR Mini Cam for Skype and perform the Installation Procedure.
The video image stopped working or will not display.
Solution:
Make sure that the lens cap is not covering the lens.
Solution:
Quit and restart the application that you are using.
Solution:
Disconnect the USR Mini Cam for Skype from your computer's USB port and re-connect it.
Solution:
Restart your computer.
Additional Information
For troubleshooting and technical support, see:
- The User Guide on the USRobotics Installation CD-ROM.
- The Support section of the USRobotics Web site at
www.usr.com/support/.
Many of the most common difficulties that users experience have been addressed in the FAQ and Troubleshooting Web pages for your USR Mini Cam for Skype. The Support pages also contain current support contact information and documentation.
![]()


