How do I configure Windows' Wireless Zero Configuration Utility to connect to a network using 802.11x (RADIUS server) authentication?
- Double-click the Wireless Network Connection icon in your system tray.

- Select the SSID (name) of the wireless network you wish to connect to and click Connect. The Configuration Utility will try and fail to connect because we have not yet entered the authentication data. However, the network will now appear in your list of preferred networks so that we can make changes to its settings.

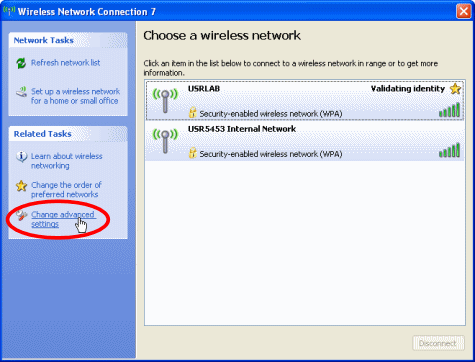
- Wait until the Configuration Utility has finished trying to connect and click Change Advanced Settings.
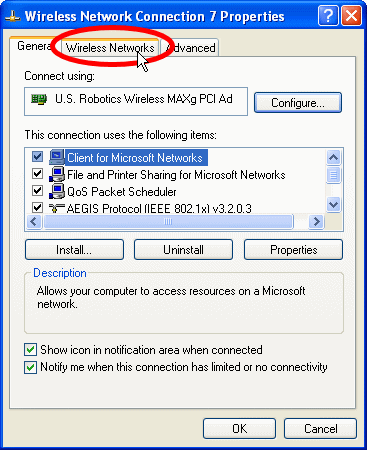
- Click Wireless Networks.
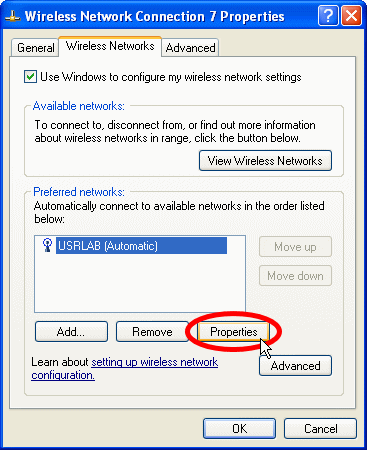
- Select your network in the Preferred Networks window and click Properties.
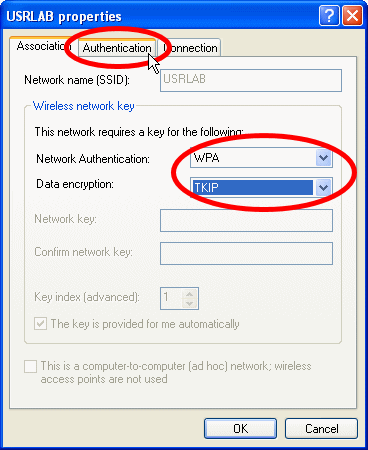
- The value of the Network Authentication and Data encryption drop-down menus will be determined by the network you are trying to connect to. For example, if you are trying to connect to a USR5453 using WPA Enterprise security, you would select WPA for Network Authentication and TKIP for Data encryption. Once you have made your selections, click the Authentication tab.
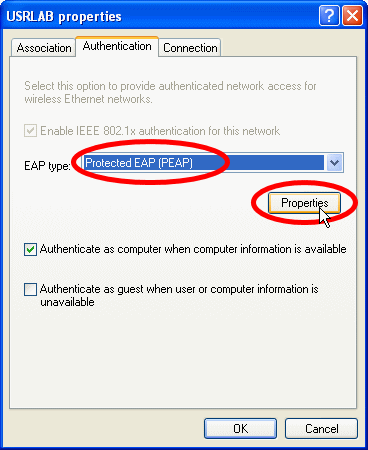
- The value of the EAP type drop-down menu will also depend on the network you wish to connect to. Continuing from the example above, if you wish to connect to a USR5453 you would select Protected EAP (PEAP) and click Properties.
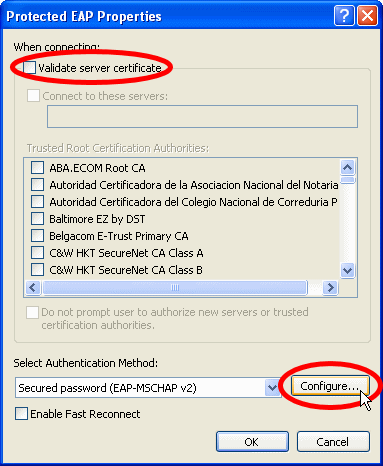
- Uncheck the Validate server certificate checkbox and click Configure.
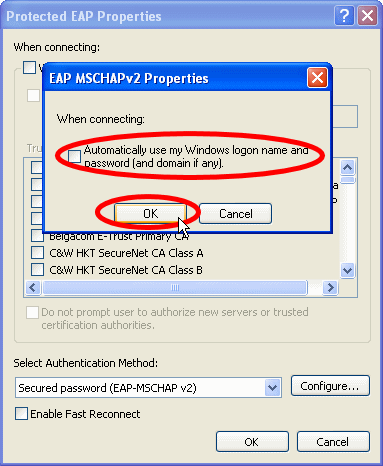
- Uncheck the Automatically use my Windows logon name and password (and domain if any). checkbox and click OK.
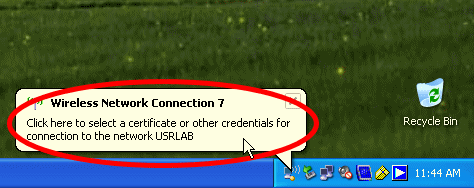
- Click OK to close all the other networking windows we've opened. Once you do this the Configuration Utility will try to connect to the network again. This time, an alert bubble will pop up above your system tray asking you to click here to enter your network credentials. Click there.
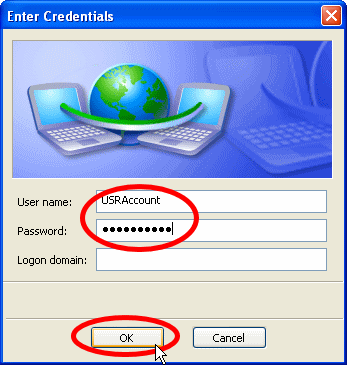
- Enter your RADIUS username and password and click OK. You will only have to do this once and then the Configuration Utility will remember your information.
- The Configuration Utility will take a few seconds to authenticate with the network and acquire an IP address. Once it does you will be connected. You will be able to tell you are connected because the Wireless Network Connection icon in your system tray will no longer have a red "X" over it.

|


