|
|
Contents:Installing the Modem U.S.
Robotics SureConnect ADSL Utility Reconfiguring your ADSL Settings |
|
USRobotics SureConnectADSL USB Modem
User Guide
Windows 98, 2000, Me, and XPInstalling the ModemThank you for purchasing the USRoboticsâ SureConnectä ADSL USB Modem, Model 9000. The following instructions will walk you through the installation of the modem and the USRobotics SureConnect ADSL utility. After the installation is complete, you will have installed the following items:
· USRobotics SureConnect ADSL USB Modem and drivers · USRobotics SureConnect ADSL Utility
Write your serial number in the space provided below. Serial
Number: _________________________ You can also locate your serial number within the USRoboticsâ SureConnectä ADSL USB
Modem utility once the modem is installed. Our Technical Support department will also need your model
number, which is Model 9000, in order to provide you with the best service
possible. Installation Overview & System RequirementsWhat You Need to Know Before You Begin· Who your Internet Service Provider (ISP) is · Your User name and Password assigned by your ISP Your ISP may provide the following values if manual configuration
is required: · VPI/VCI Values · Encapsulation mode – RFC 1483 is now referred to as RFC 2684. RFC 1483 IP over ATM Bridged LLC/SNAP
RFC 1483 IP over ATM Bridged VCMux RFC 1483 IP over ATM Routed LLC/SNAP RFC 1483 IP over ATM Routed VC/Mux RFC 2364 WAN-PPP over ATM LLC/SNAP RFC 2364 WAN-PPP over ATM VCMux RFC 2516 PPP over Ethernet LLC/SNAP RFC 2516 PPP over Ethernet VCMux RFC 2364 PPP over ATM LLC/SNAP RFC 2364 PPP over ATM VCMux · Modulation G.dmt G.lite T1.413 Auto-Sensing
Computer Requirements · A computer running Windows 98, 2000, Me, or XP equipped with a USB port · 32 MB of RAM (64 MB of RAM recommended) and 10 MB of hard disk space (memory intensive applications may require more RAM) · Pentium 200 MHz (minimum) · A host computer that has an open Universal Serial Bus (USB) port
ADSL Network Requirements ADSL service from your local telephone company, local ISP or access to an ADSL DSLAM (Digital Subscriber Line Access Multiplexer).
Power Requirements The USRobotics SureConnect ADSL USB Modem is a bus-powered device, which means a power adapter is not needed as it derives its operating power from the USB connection on your computer.
This USRobotics SureConnect ADSL USB package includes the following items:
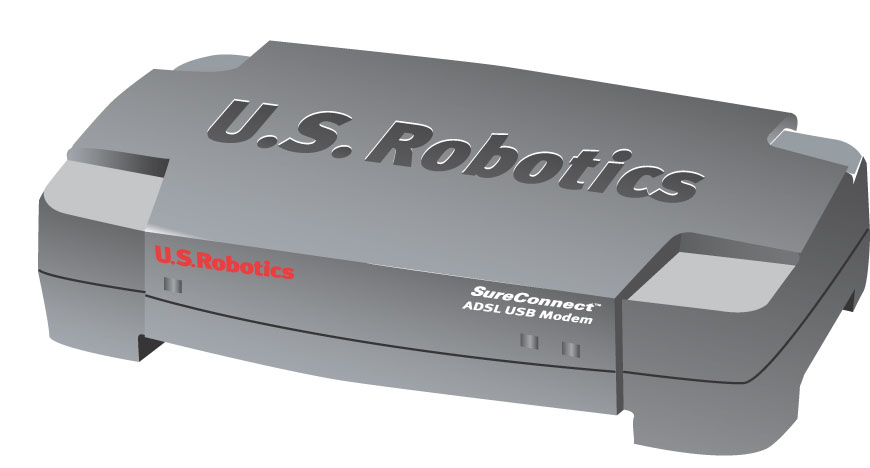
Inform your dealer if there are any incorrect, missing, or damaged parts. LEDs on the ModemThe USRobotics SureConnect ADSL USB Modem contains three LEDs on the front of the modem.The first from the left is the PWR LED, the second is the data transfer USB LED, and the third is the ADSL LED. The operational status of the modem is indicated by the LED conditions listed below.
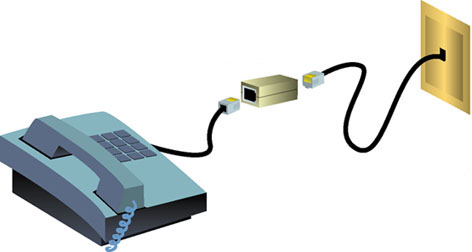
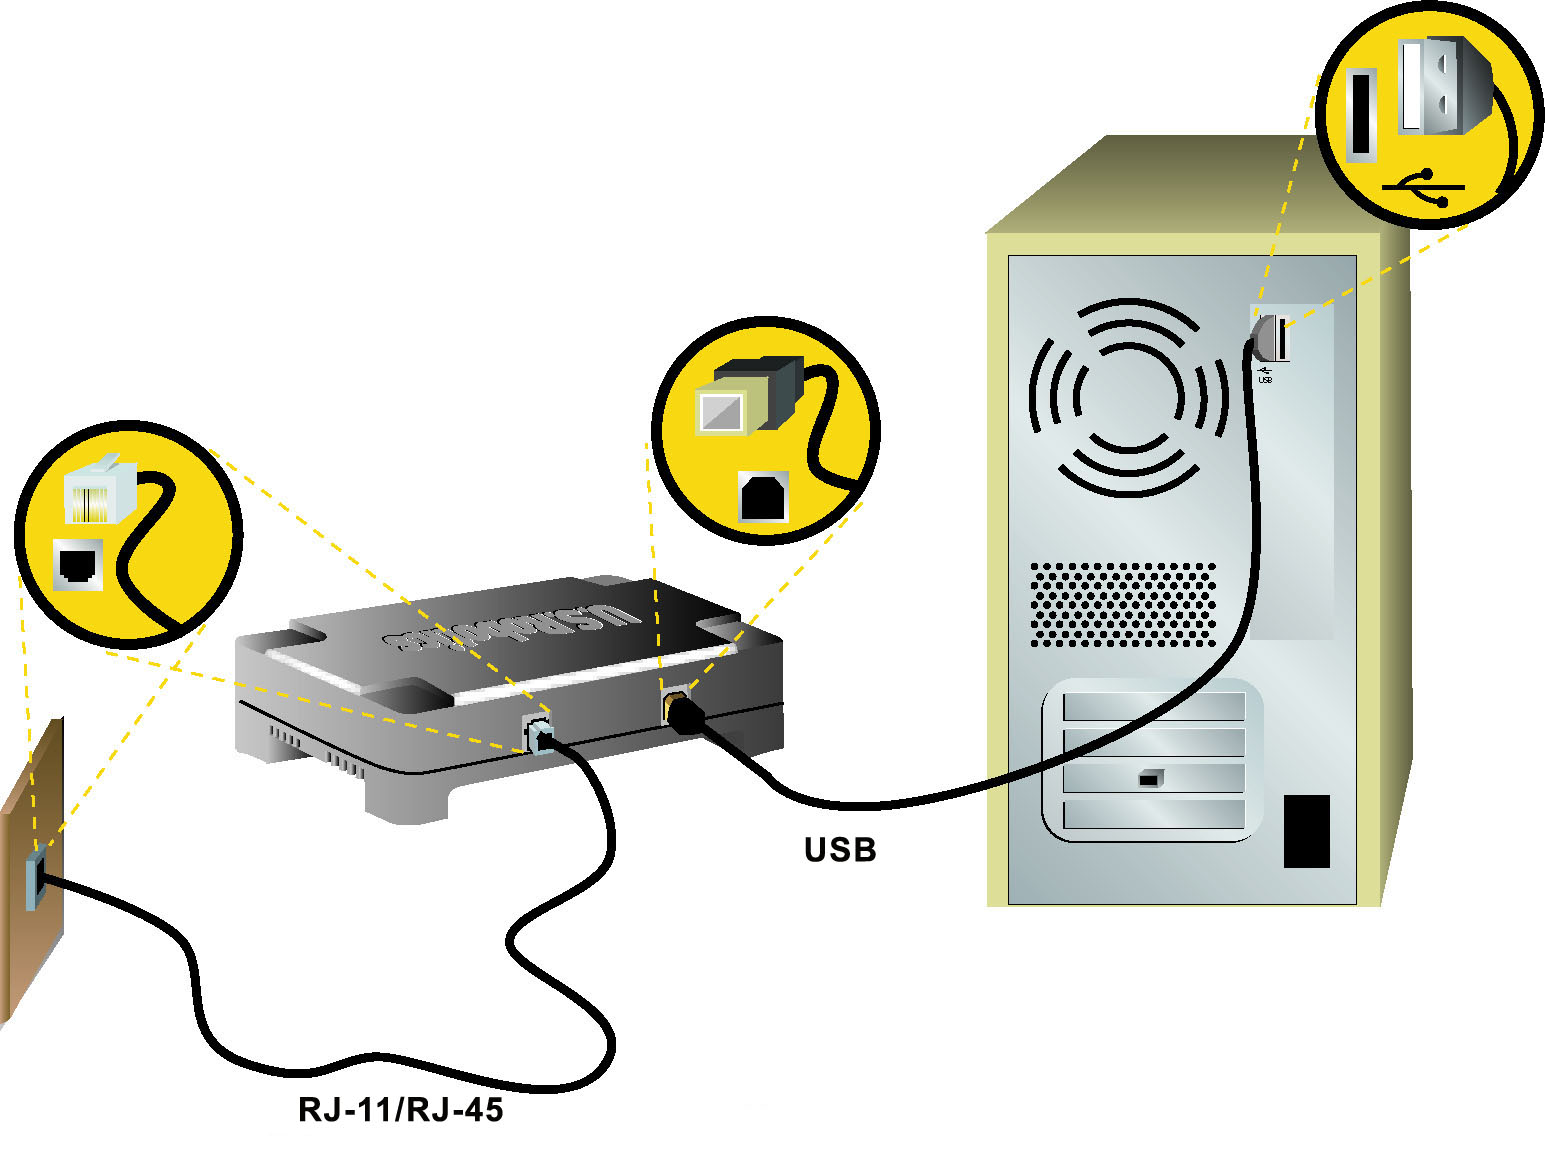
Step 1. Connect Microfilters (If Necessary)If there were no microfilters included in your package and your ISP did not provide any, skip to Step 2 of these installation instructions. If microfilters are required, install one on each telephone device (telephones, answering machines, and fax machines) that shares the same phone line (phone number) as the ADSL signal. A microfilter is a small device used to lessen the amount of interference between ADSL signals and telephone signals. Microfilters only need to be used if the ADSL modem and a telephone device are sharing the same phone line (phone number). If microfilters are not used, background noise may be experienced on your telephone while data is being transmitted. Data transmissions may experience interruption by telephone calls if a microfilter is not used. Connect Microfilters to Telephone DevicesTo install the microfilter, plug the telephone into the microfilter, and then plug the microfilter into the telephone wall jack. Do not install a microfilter on the cable that connects your modem to the telephone jack.
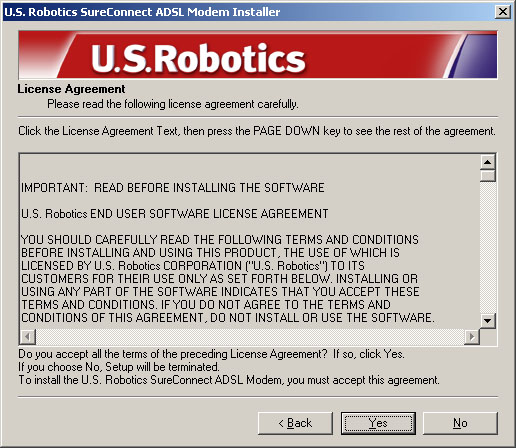
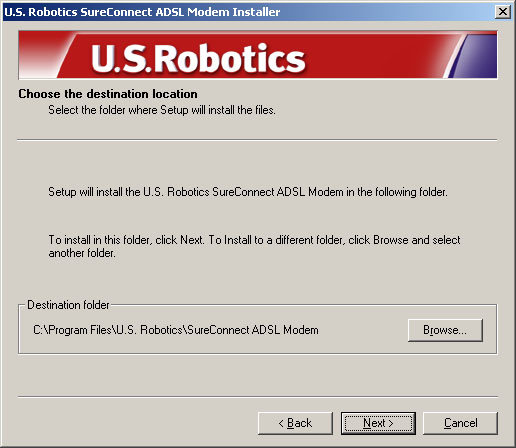
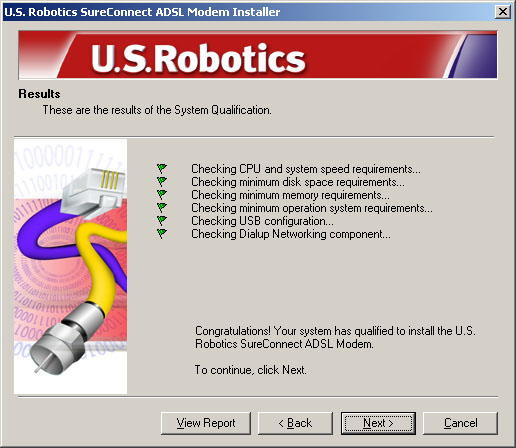
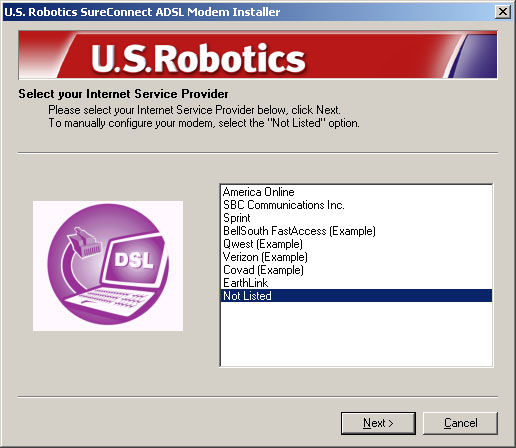
Step 2. Insert the Installation CD-ROMTo install your new modem's software, insert the Installation CD-ROM into the CD-ROM drive of your computer. If the installation does not start automatically, go to your desktop and double-click My Computer, double-click the drive letter associated with your CD-ROM drive, and double-click Setup. · The USRobotics SureConnect ADSL Modem Installer window will display; click Next to continue installing your ADSL USB Modem. · Read the License Agreement and click Yes to accept the terms. If you do not accept the terms of the agreement, click No and the installation will be terminated. · You will then be prompted to select a location to install the files. The default location is C:\Program Files\USRobotics\SureConnect ADSL Modem. If you would like to change the default location, click the Browse button to select a new directory. If you accept the default location, click Next. · A qualification test will run to verify that your system meets the minimum requirements for installation. The Results screen will display those items in your configuration that passed with a green flag and the ones that failed with a red flag. If your system passed the qualification, click Next. If you are notified that your system has failed the qualification test, click the View Report button to identify which component(s) failed. Once you have identified which component(s) failed, refer to the Troubleshooting section of this User Guide for further instructions. · The necessary files will be copied to your system. Select your Internet Service Provider (ISP) from the list and click Next. If your ISP is not listed, select the Not Listed option and click Next. You will then have to manually configure the settings to match your ISP. Refer to the Troubleshooting section of this User Guide to assist you with the manual configuration.
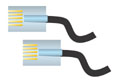
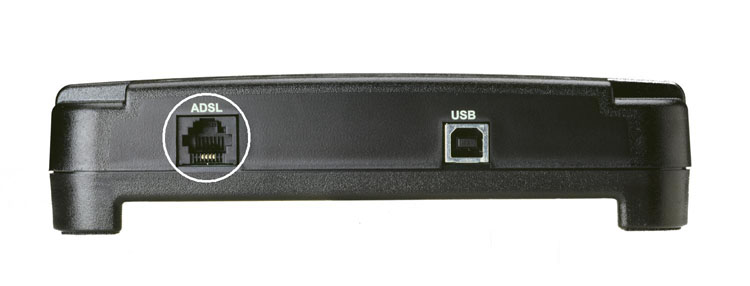
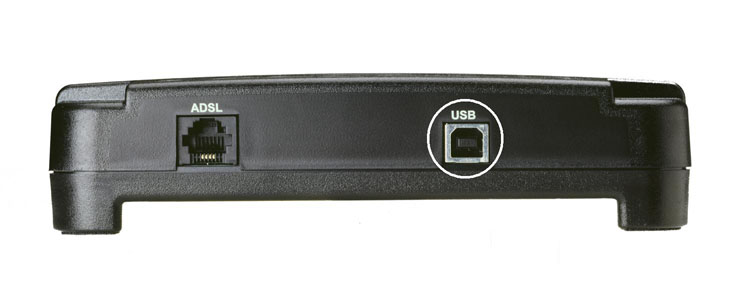
USRobotics has thoroughly tested this driver in conjunction with the supported hardware and has verified compatibility with Windows 2000, XP, and Me. Step 3. Connect the CablesOnce the files have been installed on your system, you will be prompted to plug in the telephone and USB cables. Connect the Telephone CableConnect one end of the included telephone cable to the telephone port on the back of your modem labeled "ADSL" and connect the other end into the telephone jack on the wall. Click Next.
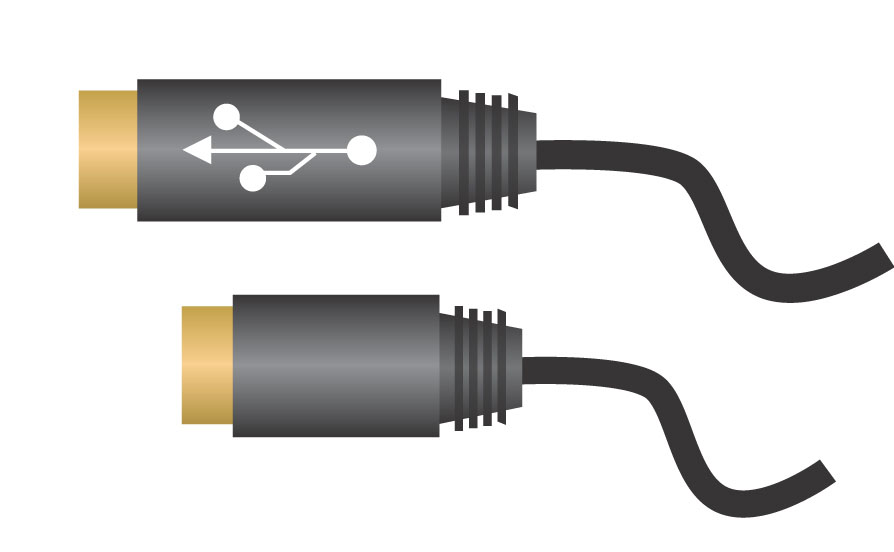
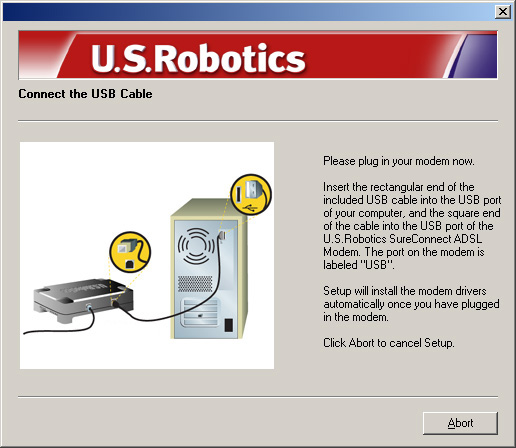
Connect the USB CableInsert the rectangular end of the included USB cable into the USB port of your computer, and the square end of the cable into the USB port of the USRobotics SureConnect ADSL USB Modem. The port on the modem is labeled USB.
Step 4. Install the Modem and SoftwareOnce the cables have been secured, Windows will begin installing the new hardware using the New Hardware Wizard. If the New Hardware Wizard does not display, refer to the Troubleshooting section of this User Guide.
Windows XP Users A Found New Hardware Wizard screen for both the Loader and the Adapter will display. Select the Install Software Automatically option and click Next.
USRobotics has thoroughly tested this driver in conjunction with the supported hardware and has verified compatibility with Windows 2000, XP, and Me. Windows 2000 and XP Users A screen will confirm when each device has been installed. Click Finish to continue to install the software required to operate the modem. Step 5. Restart Your ComputerYou will then be prompted to restart your computer. Select Yes, I want to restart my computer now, and click Finish.
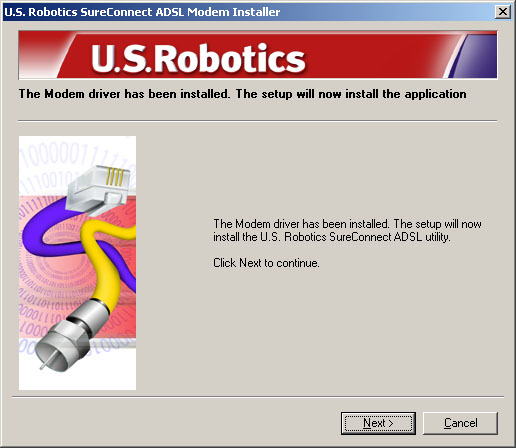
After your computer restarts, you will be notified that the USRobotics SureConnect ADSL USB Modem has been installed. Click Next to begin installing the USRobotics SureConnect ADSL utility.
Setup will begin to install the USRobotics SureConnect ADSL utility. This utility will help monitor the status of your modem as well as the connection. Step 6. Install Software from ISPIf your ISP gave you software to install, do so at this time. Be sure to read and follow all of the installation instructions provided. Once the software is installed, you must establish a dial-up connection in order to access the Internet. Step 7. Establish a Dial-Up ConnectionDouble-click the dial-up networking icon that has just been created. It will be located on your desktop. If the networking icon is not available on your desktop follow the instructions below for your operating system.
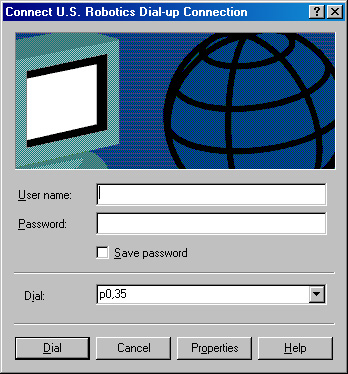
1. Look for your ISP’s dial-up connection icon and double-click it. 2. In the Dial-up Connection screen, enter your User name and Password. Your ISP should have supplied your User name and Password to you. The Save Password option remembers your Password so you won’t have to enter it every time you initiate your dial-up connection.
The characters in the Dial text field are the VPI/VCI values. The VPI/VCI values will automatically display and you should not need to change them unless instructed to do so by your ISP.
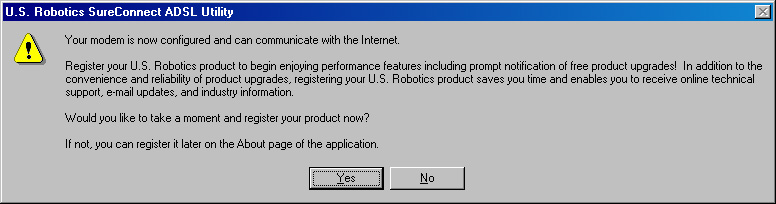
Congratulations! The installation of the USRobotics SureConnect ADSL USB Modem is complete. Remove the CD-ROM from the CD-ROM drive of your computer and test your connection. You can test your connection by registering your modem. Click Yes to register your modem, and you will be brought to the USRobotics Web site.
If the Registration screen does not display, go to the Troubleshooting section of this User Guide and review the Troubleshooting Checklist.
USRobotics SureConnect ADSL Utility To display the USRobotics SureConnect ADSL utility,
click the USRobotics SureConnect ADSL utility icon located on the
Task Bar in the lower, right-hand corner of your screen.
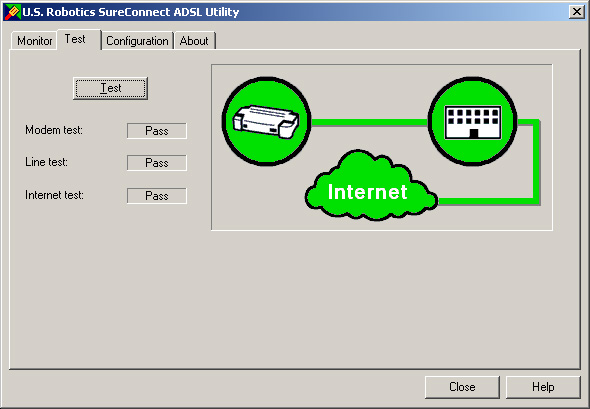
Run A Test To run a test on the modem, open the USRobotics
SureConnect ADSL utility and go to the Test tab. Click the Test
button and the utility will verify the status of the modem. It will
also verify the connection to the telephone company and to the Internet.
If one of these tests fails, follow the on-screen instructions to help
identify and solve the problem. More information about the USRobotics SureConnect
ADSL utility is available by clicking the Help button located
within the utility.
|
||||||||||||||||||||||||||||||||||||||||||||||||||||||||