The Wireless USB Print Server supports AppleTalk (EtherTalk), PAP, ATP, NBP, ZIP and DDP protocols, enabling Macintosh computers on the network to view and use the Wireless USB Print Server as a regular AppleTalk printer. Normally, no special configuration is required.
Software Requirements
System 9.x OS or newer.
AppleTalk Setup
Click the apple icon and choose Control Panel and then AppleTalk.
Ensure that Ethernet is selected under AppleTalk Connection.
Click Chooser. The Chooser panel will open.
Click on either the LaserWriter 8 icon (recommended) or the LaserWriter 7 icon. LaserWriter 8 makes use of the fonts installed in the printer itself, so the printing response time is quicker. LaserWriter 7 uses the fonts installed in the computer, which increases network traffic and takes more printing time.
Choose a PostScript printer from the list.
Click Create and it will search PPD automatically.
Select a printer description from the list.
Click Select.
Configuration is now complete.
Printing
Printing with the Wireless USB Print Server installed in an AppleTalk network is identical to normal printing. Select File and then Print and choose the desired printer.
Advanced Setup and Management
In a mixed Windows computer/Macintosh environment, you can use the BiAdmin Management Utility to configure the Wireless USB Print Server.
Macintosh OS X
If using LPR printing, you need to ensure the Wireless USB Print Server has a valid IP address before configuring your Mac as follows.
LPR printing Setup
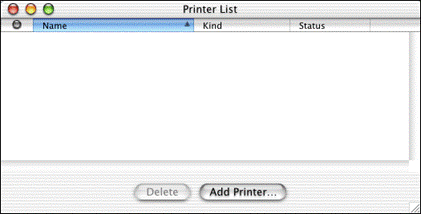
Select the Printer List icon.
Click Add Printer.
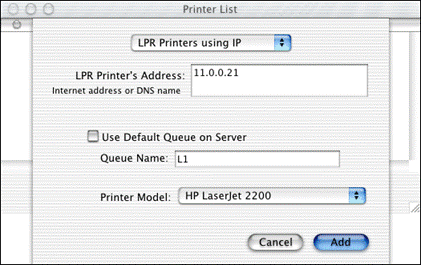
Select LPR Printers Using IP.
Enter the IP address of the Print Server in the LPR Printer's Address field, and enter the Queue Name (L1 for port 1, L2 for port 2 if the Wireless USB Print Server has 2 printer ports.).