Plug each telephony device cable (telephone, fax machine, etc.) into a microfilter.
Connect the microfilter into the telephone wall jack.
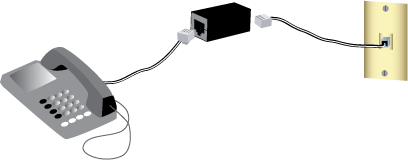
A microfilter removes interference between voice and ADSL signals. If a microfilter was not included with the router, ask your ISP if microfilters are necessary for your telephony devices.
Plug each telephony device cable (telephone, fax machine, etc.) into a microfilter.
Connect the microfilter into the telephone wall jack.

Note: Do not install a microfilter on the cable that will connect your router to the telephone jack unless you have a dual connection microfilter with a connection for both the router and the telephone.
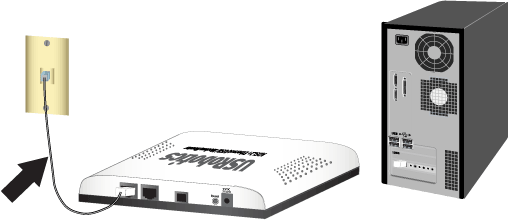
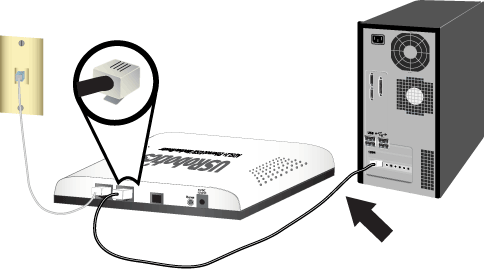
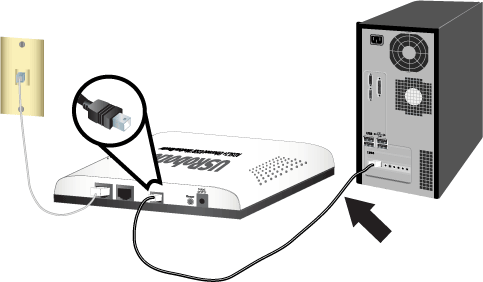
Connect one end of the included phone cable to the ADSL port on the router.
Connect the other end of the phone cable to your wall telephone jack.
Windows users: If the CD doesn't start automatically, start it manually as follows:
Windows Vista: Click Windows Start > Computer.
Windows XP: Click Windows Start > My Computer.
All other Windows operating systems : On the desktop, double-click My Computer.
Double-click the CD drive.
Caution: Do not connect the ADSL2+ Ethernet/USB Modem/Router to your computer until instructed to do so by the installer.
If the CD doesn't start automatically, start it manually as follows:
Windows Vista: Click Windows Start > Computer.
Windows XP: Click Windows Start > My Computer.
All other Windows operating systems : On the desktop, double-click My Computer.
Double-click the CD drive.
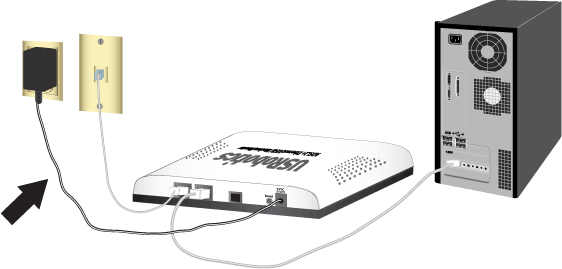
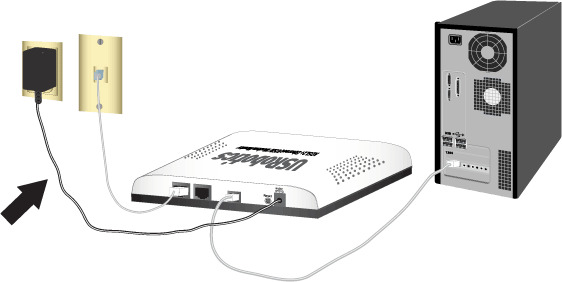
Connect the supplied power adapter to the 9VDC power port on the router and plug the power adapter into a standard power outlet.
Continue the on-screen instructions to complete the installation of the USRobotics ADSL2+ Ethernet/USB Router.
You will need active ADSL and Internet service from your local telephone company or Internet Service Provider (ISP) before you try to go on the Internet. You may need some of the following information from your ISP:
Windows: Click Setup on the USRobotics Installation CD-ROM. It can take up to one minute for EasyConfigurator to start.
Macintosh OS X: Open the CD-ROM and double-click USRobotics EasyConfigurator. It can take up to one minute for EasyConfigurator to start.
Linux: Open the CD-ROM and double-click EasyConfigurator linux-script. It can take up to one minute for EasyConfigurator to start.
Select your country and your Internet Service Provider (ISP) from the drop-down lists on the ADSL page. If your country or ISP does not appear in the list, select Other for the country and manually enter the settings provided by your ISP.
You may need to enter the user name and password for your ADSL connection after making your selections.
Click Save.
The Status tab appears. At the top of the page, a message indicates if your ADSL connection has been established. If the message indicates that there is no ADSL connection, see "Troubleshooting".
Note: The user name admin and the password you enter will be used in the future when you log in to the router.
Close EasyConfigurator.
Having a backup reduces the effort required to reapply your configuration settings should you ever restore your router to its factory default settings. USRobotics recommends that you back up your settings now.
On your computer, start a Web browser.
In the location or address line type 192.168.1.1 and press ENTER to access the router configuration pages. When prompted, enter the user name and password for the router.
Select Back Up Settings from the Device menu.
Click Back Up.
Your system will prompt you to save or open the file. Select Save.
You have successfully completed the installation procedure. Please register your router at www.usr.com/productreg/.