Connect the provided antenna to the back of the router.
Do one of the following:
If your modem connects to your computer with an Ethernet cable: Locate the Ethernet cable that connects your DSL or cable modem to your computer's Ethernet port, and disconnect it from your computer only: do not disconnect the cable from your DSL or cable modem.
If your modem connects to your computer with a USB cable: Disconnect the USB cable from both the modem and your computer. You will need another Ethernet cable in addition to the one provided with the router. Connect one end of the Ethernet cable to the Ethernet port on the back of your DSL or cable modem.
Note: The USB port on the router is for connecting a USB printer only. Do not connect your modem to the USB port on the router. For instructions on connecting a USB printer to your router, see Install a USB Printer.
Connect the free end of the Ethernet cable to the WAN port on the rear of the router.
Connect the router to your computer and wired network devices:
Connect one end of the supplied Ethernet cable to the computer's Ethernet port.
Connect the other end to one of the router's LAN ports.
Note: If you will be installing a Wireless MAXg PC Card, PCI Adapter or USB Adapter on a computer, it does not need to be connected to the router with an Ethernet cable.
Power up the network:
Turn on your modem. Wait until the LEDs stabilize before powering up your router.
Connect the supplied power cord to the 9VDC port on the router.
Plug the power adapter into a standard power outlet.
Note: This product is intended to be supplied by a Listed Direct Plug-in Power
Unit marked Class 2 and rated 9VDC, 1200 mA.
Turn on your computer.
Step Two: Configure the Basic Connection Settings
Start your Web browser.
In the location or address line, type192.168.2.1and press ENTER to access the router configuration pages.
Note: The router's default IP address is 192.168.2.1.
Click Start. The Setup Wizard leads you through the basic router configuration process.
Note: If you see a “Page Not Found” error at any time while using the router configuration pages, press the Back button in your Web browser or refresh the page.
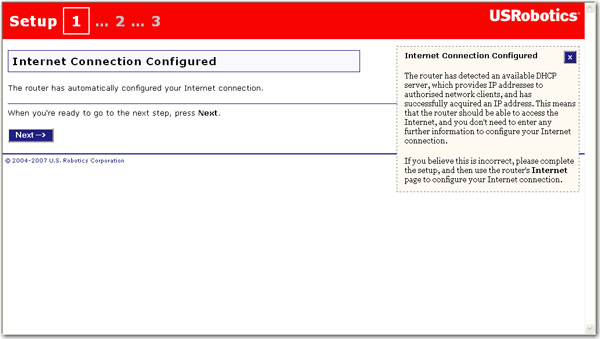
The Setup Wizard will attempt to automatically detect your Internet connection. If prompted, enter the username and password for your Intenet Login (PPoE) connection and click Next.
If the router does not automatically detect your Internet connection, verify the power cord and all the Ethernet cables are connected correctly. This includes the cables connecting the router, the modem, and all the computers in the network. Also, verify your Internet connection is in working order. Then, click Detect Connection until you reach the "Internet Connection Configured" screen.
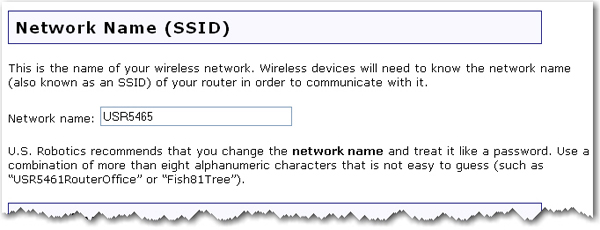
Enter the Network Name (SSID), select a security Method, and enter your wireless security information for the router, then click Next.
Note: For your wireless security settings, it is recommended that you select the WPA2 and WPA (PSK) wireless security method using TKIP and AES encryption for the most secure wireless network.
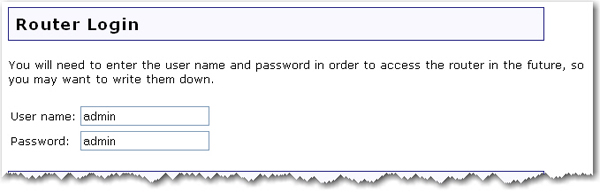
Enter a User name and Password for your router and click Finish.
Note: In this step of the Setup Wizard procedure, you create the user name and password you will use to log on to the router. You will need to use these whenever you log on to the router. The user name and password are case-sensitive.
Password Rules:
You can set a password up to 15 characters long. Secure passwords are usually between 8 and 15 characters long.
The router will allow you to enter a space or other punctuation in your password.
Use a mixture of uppercase (A through Z) and lowercase (a through z) letters.
Adding numbers 0 through 9 to a password increases security.
Use ASCII symbols, such as ~ ! @ # $ % & ^ *, etc, to further increase the security of your password.
After the initial configuration, the router will be directed to the Status page.
If you will be connecting to your network via a wireless connection, you can unplug
the Ethernet cable from the router and your computer, install your wireless adapter,
and connect to your router. For instructions on installing your wireless adapter, see
your wireless adapter’s documentation.
Point-to-Point Tunneling (PPTP) Users
If your ISP uses a PPTP connection, you will need to perform the following additional steps to complete your Installation procedure and create an Internet connection. If you have any questions regarding any of the connection settings, contact your ISP.
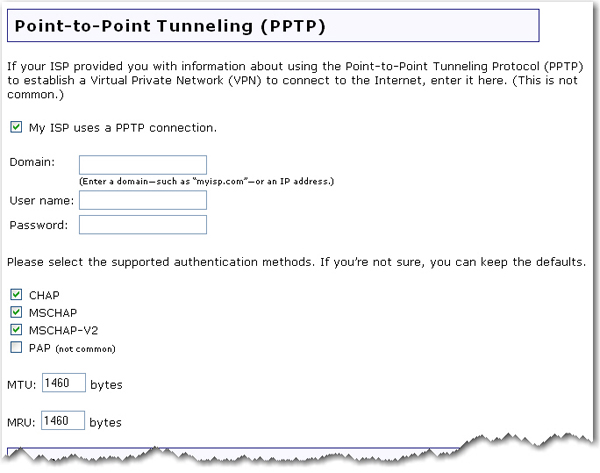
In the router configuration pages, click the Internet tab and scroll down to the Point-to-Point Tunneling (PPTP) section.
Select the My ISP uses a PPTP connection checkbox.
If your ISP uses Point-to-Point Tunneling (PPTP), select My ISP uses a PPTP connection and enter the Domain or IP address of your PPTP server in the Server field, and the User name and Password from your ISP. If your ISP uses a specific authentication method, either select or deselect the appropriate checkboxes.
When you are finished, click Save. The router will restart and you should then have an Internet connection. You can go to the Status page to view your connection information.
Backing Up Your Configuration Settings
Having a backup reduces the effort required in reapplying your configuration settings should you ever restore your router to its factory default settings. USRobotics recommends that you back up your settings now.
In the router configuration pages, click the Device tab, and scroll down to Back Up Settings.
Select Back Up.
Your system will prompt you to save or open the file. Click Save.
You have successfully completed the installation procedure. Please register your router
at www.usr.com/productreg/.