Contents:
Network Configuration and Planning
Adapter Installation and Configuration for Windows 98 SE/2000/Me/XP
22 Mbps Wireless Configuration Utilities
Product Specifications for 22 Mbps Wireless PC Card and PCI Adapter
Product Specifications for 22 Mbps Wireless Access Point
22 Mbps Wireless PC Card, PCI Adapter, PCI Adapter (with detachable antenna), and Access Point User Guide
Adapter Installation and Configuration for Windows 98 SE/2000/Me/XP
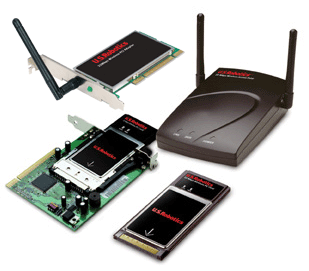
Select your product above or scroll down for the appropriate instructions.
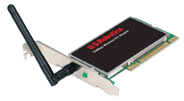
22 Mbps Wireless PCI Adapter (with detachable antenna) Installation
Prepare for installation
Note: Your product number is 2216. It is very important that you have your serial number written down before you install the 22 Mbps Wireless PCI Adapter. You can find your serial number on the label of the 22 Mbps Wireless PCI Adapter and on the side of the package. If you ever need to contact our Technical Support department, you will need this number to receive assistance.
Note: Be sure to find out what letter your CD-ROM drive uses before you begin installing your new product. You will need to know this to properly install your software.
Note: During the Installation procedure, you may be prompted for your Windows Operating System CD-ROM. Make sure you have that available in case you need it.
1. Install your software and drivers*
Turn on your computer. Insert the Installation CD into your CD-ROM drive.
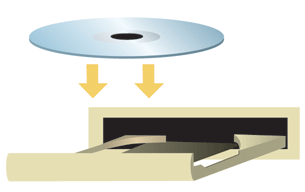
Note: If the Choose Setup Language window appears, select your preferred language and click OK. If your CD-ROM does not automatically launch, click Windows Start, Run, type D:\setup (or the appropriate letter of your CD-ROM drive), and click OK.
Read the License Agreement and click Yes to accept the terms. If you do not accept the terms of the agreement, click No and the software installation will be terminated.
Note: You will need to install this Installation CD-ROM on all the PCs you plan to wirelessly network together.
Click Software and then click Install Wireless Card Utility and Drivers. Follow the on-screen instructions. When you are prompted to reboot your computer, select No, I will restart my computer later and click Finish. Close the Installation CD Graphic User Interface (GUI). When your desktop returns, shut down your computer.
*A “Digital Signature Not Found” screen may appear during your driver installation. Click Yes. Windows will verify that your network device is properly installed.
2. Install the 22 Mbps Wireless PCI Adapter
Make sure your computer is turned off. Remove the computer’s cover. With the computer turned off, locate an available PCI slot and remove the slot cover screw or clip. Remove the slot cover and insert the PCI Adapter. PCI slots are typically white plastic lined with metal and are 3.5 inches long. Secure the PCI Adapter with the previously removed screw or clip. Replace the computer’s cover and turn on your computer.
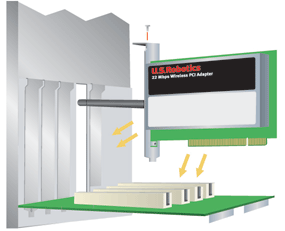
Note: It can be tricky getting the PCI Adapter into the PCI slot. You may need to remove the antenna in order to place the PCI Adapter into the PCI slot. Use firm pressure to seat the PCI Adapter properly. If you experience any problems inserting the PCI Adapter, try inserting it in a different PCI slot.
Note: If you are prompted at any time for your Windows Operating System CD-ROM, remove the USRobotics Installation CD-ROM and insert your Windows CD-ROM into the CD-ROM drive. When all of the files are copied, remove the Windows CD-ROM, and reinsert the USRobotics Installation CD-ROM.
3. Configure the basic connection settings
Congratulations! You have finished installing your hardware and your software! The 22 Mbps Wireless PCI Adapter is set to Auto Detect mode by default, which allows it to scan for and connect to an existing wireless network or other wireless networking products in the area.
You should now see a small icon for the Configuration Utility in the system tray by your clock. The Configuration Utility is used to change or verify the configuration information that relates to your 22 Mbps Wireless PCI Adapter. The Configuration Utility icon will be colored to indicate the status of your wireless network: red for disconnected, yellow for connected with poor quality, and green for connected with good quality.
![]()
![]()
![]()
You must now configure each computer that has a 22 Mbps Wireless PCI Adapter in order to share Internet connectivity, files, and a printer. Double-click the utility icon to launch the Configuration Utility. Refer to the “22 Mbps Wireless Configuration Utilities” section in the User Guide on the Installation CD-ROM for detailed configuration information.
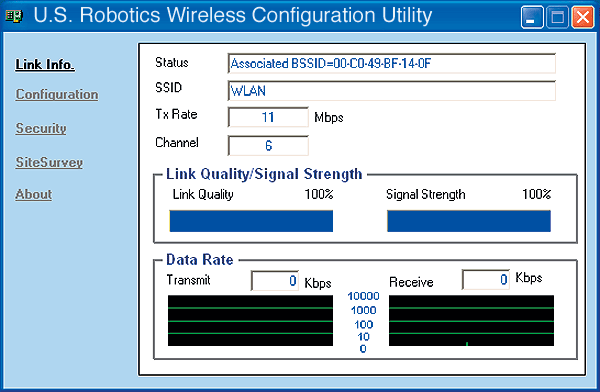
802.11b ad hoc mode is used for peer-to-peer network configurations. Infrastructure mode is used to add a Wireless Access Point to the wireless network configuration for extended range and increased number of computers that can join the network. Auto Detect mode allows the Configuration Utility to search for a wireless network and automatically connect to it. Each wireless product in the wireless network must have the same mode selected within the Configuration Utility. The 22 Mbps Wireless PCI Adapters are set to Auto Detect by default.
 Register your
product
- At the Installation CD-ROM interface, click the Support link. Follow the on-screen instructions to register your modem and to view the warranty information. If the Installation CD-ROM interface does not run automatically, click Windows Start and then click Run. In the “Run” dialog box, type D:\setup.exe. If your CD-ROM drive uses a different letter, type that letter in place of “D.”
- Or register your product online at http://www.usr.com/productreg
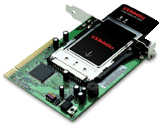
22 Mbps Wireless PCI Adapter Installation
Prepare for installation
Note: Your product number is 2215. It is very important that you have your serial number written down before you install the 22 Mbps Wireless PCI Adapter. You can find your serial number on the back label of the 22 Mbps Wireless PC Card and on the side of the package. If you ever need to call our Technical Support department, you will need this number to receive assistance.
Note: Be sure to find out what letter your CD-ROM drives uses before you begin installing your new product. You will need to know this to properly install your software.
Note: During the Installation procedure, you may be prompted for your Windows Operating System CD-ROM. Make sure you have that available in case you need it.
1. Install your software and drivers*
Turn on your computer. Insert the Installation CD into your CD-ROM drive.

Note: If the Choose Setup Language window appears, select your preferred language and click OK. If your CD-ROM does not automatically launch, click Windows Start, Run, type D:\setup (or the appropriate letter of your CD-ROM drive), and click OK.
Read the License Agreement and click Yes to accept the terms. If you do not accept the terms of the agreement, click No and the software installation will be terminated.
Note: You will need to install this Installation CD-ROM on all the PCs you plan to wirelessly network together.
Click Software and then click Install Wireless Card Utility and Drivers. Follow the on-screen instructions. When you are prompted to reboot your computer, select No, I will restart my computer later and click Finish. Close the Installation CD Graphic User Interface (GUI). When your desktop returns, shut down your computer.
*A “Digital Signature Not Found” screen may appear during your driver installation. Click Yes. Windows will verify that your network device is properly installed.
2. Install the PCI Adapter
Remove the Wireless PC Card from the PCI Adapter.
![]() Attention!
Note the way the Wireless PC Card is positioned in the PCI Adapter, since
it will need to be reinserted in the same position.
Attention!
Note the way the Wireless PC Card is positioned in the PCI Adapter, since
it will need to be reinserted in the same position.
Locate an available PCI slot and remove the slot cover screw or clip. Remove the slot cover and insert the PCI Adapter. PCI slots are typically white plastic lined with metal and are 3.5 inches long. Replace the computer’s cover and turn on your computer.
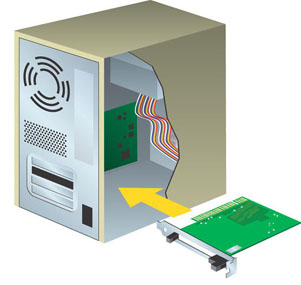
Note: It can be tricky getting the PCI Adapter into the PCI slot. Use firm pressure to seat the PCI Adapter properly.
Note: If you experience any problems installing the 22 Mbps Wireless PCI Adapter, try installing it in a different PCI slot.
3. Insert the Wireless PC Card into the Adapter
Insert the Wireless PC Card into the PCI Adapter.
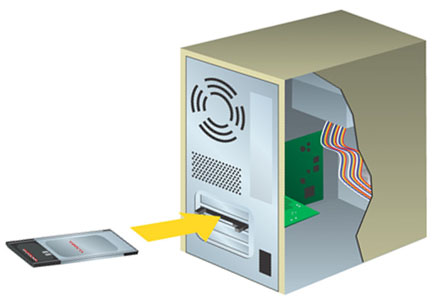
![]() Attention!
Proper insertion of the 22 Mbps Wireless PC Card into the PCI Adapter
will require minimal force. When you insert the 22 Mbps Wireless PC Card
into the PCI Adapter, the black release lever on the PCI Adapter should
be pushed out as the 22 Mbps Wireless PC Card goes in. If the release
lever is not being pushed out, the 22 Mbps Wireless PC Card is not being
inserted properly. Remove the 22 Mbps Wireless PC Card and try inserting
it facing the opposite way.
Attention!
Proper insertion of the 22 Mbps Wireless PC Card into the PCI Adapter
will require minimal force. When you insert the 22 Mbps Wireless PC Card
into the PCI Adapter, the black release lever on the PCI Adapter should
be pushed out as the 22 Mbps Wireless PC Card goes in. If the release
lever is not being pushed out, the 22 Mbps Wireless PC Card is not being
inserted properly. Remove the 22 Mbps Wireless PC Card and try inserting
it facing the opposite way.
Turn on your computer. You should hear a beep when the 22 Mbps Wireless PC Card is fully inserted and detected. When Windows detects the new hardware, click Next. Follow the on-screen instructions to complete the installation procedure. If you are prompted, reboot your computer.
Note: If you are prompted at any time for your Windows Operating System CD-ROM, remove the USRobotics Installation CD-ROM and insert your Windows CD-ROM into the CD-ROM drive. When all of the files are copied, remove the Windows CD-ROM, and reinsert the USRobotics Installation CD-ROM.
Congratulations! You have finished installing your hardware and your software! The 22 Mbps Wireless PCI Adapter is set to Auto Detect mode by default, which allows it to scan for and connect to an existing wireless network or other wireless networking products in the area.
You should now see a small icon for the Configuration Utility in the system tray by your clock. The Configuration Utility is used to change or verify the configuration information that relates to your 22 Mbps Wireless PCI Adapter. The Configuration Utility icon will be colored to indicate the status of your wireless network: red for disconnected, yellow for connected with poor quality, and green for connected with good quality.
![]()
![]()
![]()
You must now configure each computer that has a 22 Mbps Wireless PCI Adapter in order to share Internet connectivity, files, and a printer. Double-click the utility icon to launch the Configuration Utility. Refer to the “22 Mbps Wireless Configuration Utilities” section in the User Guide on the Installation CD-ROM for detailed configuration information.

802.11b ad hoc mode is used for peer-to-peer network configurations. Infrastructure mode is used to add a Wireless Access Point to the wireless network configuration for extended range and increased number of computers that can join the network. Auto Detect mode allows the Configuration Utility to search for a wireless network and automatically connect to it. Each wireless product in the wireless network must have the same mode selected within the Configuration Utility. The 22 Mbps Wireless PCI Adapters are set to Auto Detect by default.
*A "Digital Signature Not Found" screen may appear. Click Yes. Windows 2000 and Me will verify that your network device is properly installed.
22 Mbps Wireless PC Card Installation
Prepare for software installation
Turn on your laptop computer. Type your password if you are prompted to do so.
Note: Your product number is 2210. It is very important that you have your serial number written down before you install the PC Card. You can find your serial number on the back label of the 22 Mbps Wireless PC Card and on the side of the package. If you ever need to call our Technical Support department, you will need this number to receive assistance.
Note: Be sure to find out what letter your CD-ROM drives uses before you begin installing your new product. You will need to know this to properly install your software.
Note: During the Installation procedure, you may be prompted for your Windows Operating System CD-ROM. Make sure you have that available in case you need it.
1. Install your software and drivers*
Turn on your computer. Insert the Installation CD into your CD-ROM drive.

Note: If the Choose Setup Language window appears, select your preferred language and click OK. If your CD-ROM does not automatically launch, click Windows Start, Run, type D:\setup (or the appropriate letter of your CD-ROM drive), and click OK.
Read the License Agreement and click Yes to accept the terms. If you do not accept the terms of the agreement, click No and the software installation will be terminated.
Note: You will need to install this Installation CD-ROM on all the PCs you plan to wirelessly network together.
Click Software and then click Install Wireless Card Utility and Drivers. Follow the on-screen instructions. When you are prompted to reboot your computer, select No, I will restart my computer later and click Finish. Close the Installation CD Graphic User Interface (GUI). When your desktop returns, shut down your computer.
*A “Digital Signature Not Found” screen may appear during your driver installation. Click Yes. Windows will verify that your network device is properly installed.
2. Insert the 22 Mbps Wireless PC Card into your computer
Locate an available PC Card slot and fully insert the PC Card. PC Card slots are typically on the side of laptops. You should hear a beep when the PC Card is fully inserted and detected.
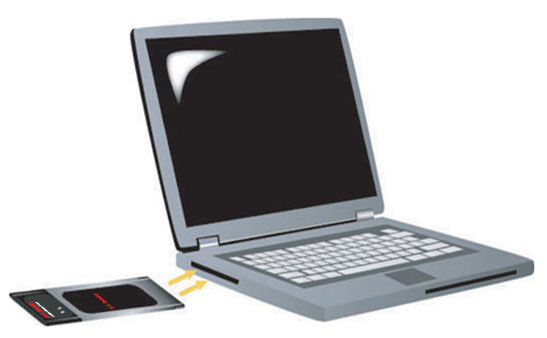
When Windows detects the new hardware, click Next. Follow the on-screen instructions to complete the installation procedure. If you are prompted, reboot your computer.
Note: If you are prompted at any time for your Windows Operating System CD-ROM, remove the USRobotics Installation CD-ROM and insert your Windows CD-ROM into the CD-ROM drive. When all of the files are copied, remove the Windows CD-ROM, and reinsert the USRobotics Installation CD-ROM.
Congratulations! You have finished installing your hardware and your drivers! The 22 Mbps Wireless PCI Adapter is set to Auto Detect mode by default, which allows it to scan for and connect to an existing wireless network or other wireless networking products in the area.
You should now see a small icon for the Configuration Utility in the system tray by your clock. The Configuration Utility is used to change or verify the configuration information that relates to your 22 Mbps Wireless PC Card or PCI Adapter. The Configuration Utility icon will be colored to indicate the status of your wireless network: red for disconnected, yellow for connected with poor quality, and green for connected with good quality.
![]()
![]()
![]()
You must now configure each computer that has a 22 Mbps Wireless PC Card or PCI Adapter in order to share Internet connectivity, files, and a printer. Refer to the User Guide on the Installation CD for this information.
802.11b AdHoc mode is used for peer-to-peer network configurations. Infrastructure mode is used to add a Wireless Access Point to the wireless network configuration for extended range and increased number of computers that can join the network. Auto Detect mode allows the Configuration Utility to search for a wireless network and automatically connect to it. Each 22 Mbps Wireless PC Card or PCI Adapter in the wireless network must have the correct mode selected within the Configuration Utility. The 22 Mbps Wireless Cards and PCI Adapters are set to Auto Detect by default.
For troubleshooting and technical support information, refer to the Companion Reference Guide or to the USRobotics website at www.usr.com.
*A "Digital Signature Not Found" screen may appear. Click Yes.
Windows 2000 and Me will verify that your network device is properly installed.
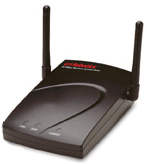
22 Mbps Wireless Access Point Installation
Prepare for installation
Turn on your desktop or laptop computer. Type your password if you are prompted to do so.
Note: Your product number is 2249. It is very important that you have your serial number written down before you install the 22 Mbps Wireless Access Point. You can find your serial number on the bottom of the 22 Mbps Wireless Access Point and on the side of the package. If you ever need to call our Technical Support department, you will need this number to receive assistance.
Note: Be sure to find out what letter your CD-ROM drives uses before you begin installing your new product. You will need to know this to properly install your software.
Note: During the Installation procedure, you may be prompted for your Windows Operating System CD-ROM. Make sure you have that available in case you need it.
1. Install your software
Note: You will need to install this
software on all the PCs or laptops you plan to wirelessly network together.
Insert your USRobotics Installation CD-ROM into your CD-ROM drive.
Note: If the Choose Setup Language window appears, select your preferred language and click OK.
Note: If your CD-ROM does not automatically launch, click Windows Start, Run, and type D:\setup (or the appropriate letter of your CD-ROM drive) and click OK.
Some files will be copied to your system, and then you will be asked to read the license agreement. Read the agreement and click Yes.
The Installation CD Graphic User Interface (GUI) will appear on your screen. Click Software.
Click Install Access Point Software.
Follow the on-screen instructions and wait for some files to be copied to your hard drive. A window will appear showing you the files that are being loaded onto your system. When you are prompted to reboot your computer, select Yes, I want to restart my computer now and click Finish. After your computer reboots, the program window with the Configuration Utility icons may appear. Close this window. When the Menu screen of the U.S. Robotics Installation CD-ROM returns, close it.
Remove the Installation CD-ROM and prepare to install your hardware.
2. Connect the 22 Mbps Wireless Access Point
- Use the Ethernet port and an RJ-45 cable to connect the Wireless Access Point to one of the following devices: a cable or DSL modem with routing capabilities, a hub, a bridge, an existing Ethernet LAN, or a router.
- Attach the power supply to the Wireless Access Point and to a power outlet.
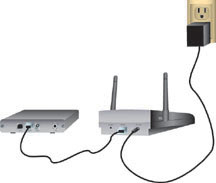
The Wireless Access Point has three LED status indicators, LINK, DATA, and POWER. When the Wireless Access Point is plugged in, the PWR LED will illuminate. When a network connection is established, the LINK LED will be green. When there is network activity, the DATA LED will be yellow.
3. Verify detection of the 22 Mbps Wireless Access Point
After the Wireless Access Point is installed, double-click the icon for the Configuration Utility on your desktop.
![]()
If the 22 Mbps Wireless Access Point is correctly installed, the configuration information will be displayed.
To verify that you are connecting to the correct Wireless Access Point, check the MAC address. The MAC address is located on the bottom of the 22 Mbps Wireless Access Point case and in the Link Information option of the Configuration Utility.
When you have identified the correct Wireless Access Point, note the IP address that is listed. Launch a Web browser on the computer that is physically connected to the 22 Mbps Wireless Access Point. Enter the IP address for your Wireless Access Point. This will open the Web Configuration Utility. There is no default username or password, so just click OK when you are prompted.
When the Web Configuration Utility launches, you can change the information about your wireless network. For more information about both Configuration Utilities for the 22 Mbps Wireless Access Point, refer to the User Guide on the Installation CD-ROM.
Note: If you need to reset the Wireless Access Point at any time, perform the following steps. Press in and hold the RESET button. While holding in the RESET button, unplug the power adapter from the Wireless Access Point and then plug it back in. Continue to hold the RESET button for about five seconds to restore the factory default settings. When this is performed, the PWR LED will blink.
![]() Attention!
If you reset the Wireless Access Point, you will lose your custom settings.
Attention!
If you reset the Wireless Access Point, you will lose your custom settings.
Congratulations! You have finished installing your hardware and the necessary software. You should now be able to connect your Wireless Access PC Cards and PCI Adapters to the Wireless Access Point.
The Wireless Access Point has three LED status indicators, LINK, DATA,
and POWER. When the Wireless Access Point is plugged in, the PWR LED will
illuminate. When a network connection is established, the LINK LED will
be green. When there is network activity, the DATA LED will be yellow
Enabling file and print sharing.
Windows 98SE/Me Users: Click Windows Start, Settings, and then Control Panel. Double-click Network and then click the File and Print Sharing button. Select both boxes in the File and Print Sharing window and then click OK. File and print sharing is now enabled.
Note: If your computer is connected directly to the Internet, there is a security risk if you are not using a firewall program or some form of hardware firewall.
Windows 2000/XP Users:
Note: After the wireless network card is installed in Windows NT, you should run the Service Pack that came with Windows NT. You will need to restart your computer.
File and print sharing are automatically enabled in Windows 2000 and XP.
Enabling Internet sharing.
Windows 98 SE Users: Click Windows Start, Settings, and then Control Panel. Double-click Add/Remove Programs and then click the Windows Setup tab. Select Internet Tools and then click Details. Select Internet Connection Sharing and click OK. Click Apply, and the Internet Connection Sharing Wizard will launch. Click Next, select the network adapter to connect to the Internet and click Next. Click Next to create a Client Configuration Disk, insert a blank disk into the 3.5 inch disk drive, and click OK. This disk will be used to configure Internet sharing in Window 98SE. Click Finish to complete the configuration of Internet Sharing. You will need to restart your computer.
Windows 2000 Users: There must be two NIC cards installed in order to use Internet sharing. Click Windows Start, Settings, and then Network and Dial-up Connections. Right-click the LAN connection and click Properties. Click the Sharing tab. Click the box in this window to enable Internet sharing and click Apply. Right-click the LAN connection in the list and click Properties. Select Internet Protocol and click Properties. Click the DNS tab, write down the DNS address that is listed, and return to the Networking and Dial-up Connections window. Right-click the wireless adapter in the list and click Properties. Select Internet Protocol and click Properties. Click the DNS tab and enter the same DNS address as the one listed under the LAN connection.
Windows Me Users: Click Windows Start, Settings, and then Control Panel. Double-click Add/Remove Programs and then click the Windows Setup tab. Select Communications and then click Details. Select Internet Connection Sharing and click OK. Click Apply and the Home Networking Wizard will launch. Click Next then select Yes this computer uses the following:. Select the direct connection to the Internet from the drop-down menu and click Next. When prompted, create a Home Networking Setup disk to be used for the configuration of Internet sharing in Windows 98SE, and Me. After you have created the disk, click Next. Click Finish to complete the configuration of Home Networking. You will need to restart your computer.
