Before performing client configuration, the Wireless USB Print Server must be installed on your LAN, and configured as described in the Wireless USB Print Server Installation section. Both the Wireless USB Print Server and the attached printer must be powered ON.
Note: You may need the Installation CD-ROM that came with your printer.
Follow the on-screen instructions to complete the client installation.
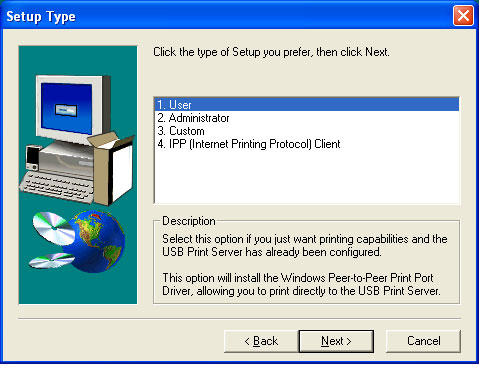
User
User is the most common option that the majority of network clients will want to choose. This should be selected if the Wireless USB Print Server has already been configured and you just need printing capabilities on this computer.
Click User and then click Next and follow the on-screen instructions.
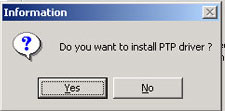
You will then be prompted to install the PTP (Peer-to-Peer) driver. Click Yes.
Follow the on-screen instructions to select the location and install the PTP (Peer-to-Peer) driver.
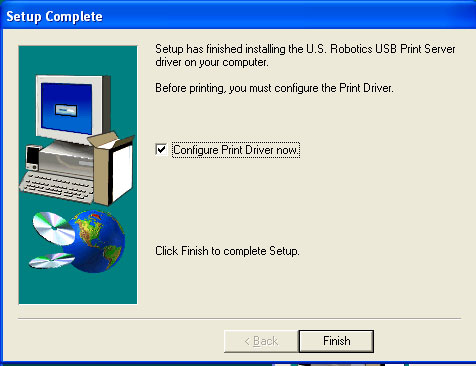
When that is completed, make sure the Configure Print Driver now checkbox is selected and click Finish.
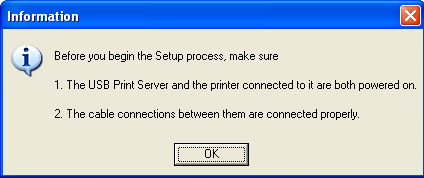
Click OK in the Information screen that appears. It may be necessary to minimize the Print Server Utility screen in order to see the Information screen.
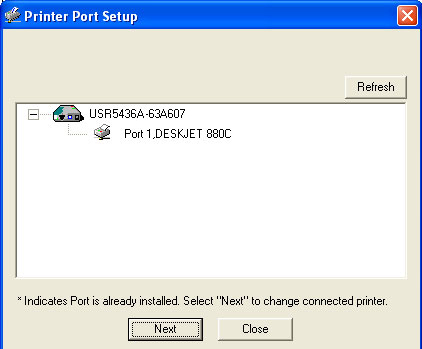
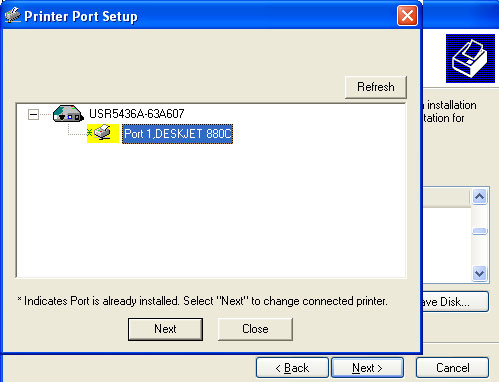
In the Printer Port Setup, select the port and click Next.
If you do not see the printer, click Refresh until the port name appears.
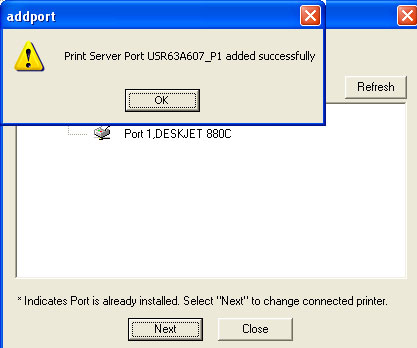
Click OK on the message that appears.
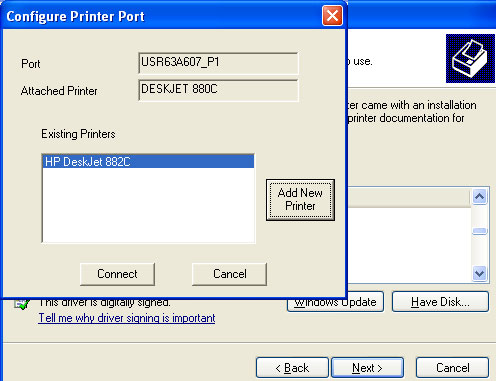
Select the printer from the Existing Printers list.
If the printer doesn’t appear, click Add New Printer and follow the onscreen instructions.
Click Connect.
If you do not see an asterisk next to the port name in the Printer Port Setup screen, click Refresh. If it still doesn’t appear, see Troubleshooting.
Click Close.
Repeat this step on each computer.
You will now be able to use your USB printer from this computer. To validate your setup, you can print a test page.
Administrator
Administrator will install the necessary tools for initial configuration, as well as the BiAdmin Management Utility. This should only be chosen by more advanced network clients.
Select Administrator from the list and click Next.
Click Next.
Click Next and then Finish.
This will add the BiAdmin Management Utility to your computer. Click the icon on your desktop or the program menu link to launch the BiAdmin Management Utility. You can use the BiAdmin Management Utility to configure the settings of the Wireless USB Print Server.
Custom
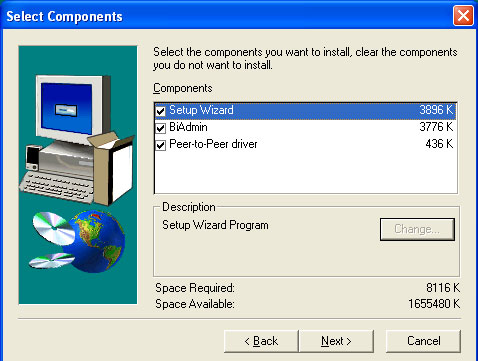
Custom allows the network client to select the options that will be installed from any combination of the BiAdmin Management Utility, the Setup Wizard, and the Peer-to-Peer Print Port driver. This should only be chosen by more advanced network clients.
Select Custom from the list and click Next.
Select the options that you want to install: Setup Wizard, BiAdmin, and Peer-to-Peer Driver. Click Next.
Click Next.
Click Next and then Finish.
The selected options are now installed.
IPP Client
IPP (Internet Printing Protocol) Client is required if you want to print to any IPP servers, either on the local network or accessed remotely over the Internet. This should only be chosen by more advanced network clients.
For these platforms, IPP Client software is supplied on the CD-ROM. You can also distribute the setup program (IPP_CLIENT.EXE) to users vial E-mail.
Installing from the Installation CD-ROM
Select IPP (Internet Printing Protocol) Client from the list and click Next.
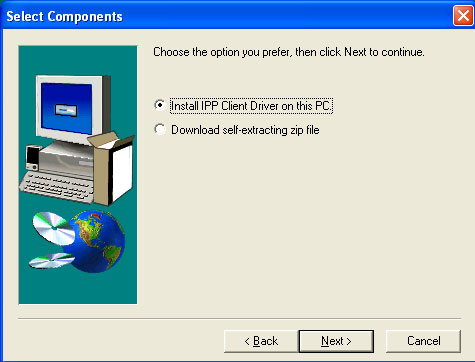
Select either Install IPP Client Driver on this PC or Download self-extracting zip file and click Next.