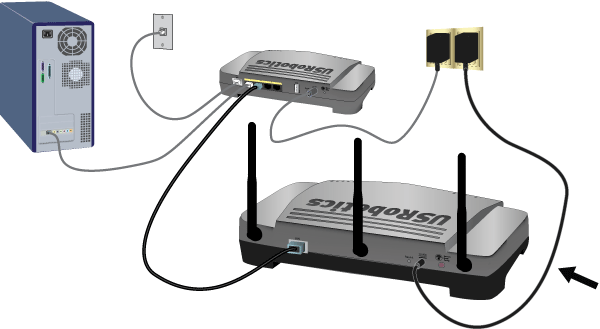
Look at the label on the bottom of the access point and note its LAN MAC address. You may need it to distinguish the access point from other devices on your network.
Connect the provided antennas to the back of the access point.
Use the supplied Ethernet cable to connect the LAN port on the access point to a LAN port on your networking device.
Supply power to the access point as follows:
Note to UK Users: With the power adapter unplugged, connect the appropriate power plug for your country on to the power adapter.
Apply enough pressure to cause a click and firmly seat the plug.
Connect the supplied power adapter to the 15VDC port on the access point.
Plug the power adapter into a standard power outlet.
Note: This product is intended to be supplied by a Listed Direct Plug-in Power Unit marked Class 2 and rated 15VDC, 1200 mA.
Step Two: Start the Setup Wizard
The setup wizard makes it easy for you perform basic setup of the access point. To start the wizard using an operating system other than Windows, go to
Setup Wizard for Non-Windows Users.
Setup Wizard for Windows Users
If you are using a Windows operating system, you can use the setup program on
the USRobotics Installation CD-ROM to install and run the Network Device
Locator and configure basic settings in one easy, continuous process:
Insert the USRobotics Installation CD-ROM into the CD-ROM or DVD drive.
If the CD doesn't start automatically, start it manually as follows:
Windows Vista: Click Windows Start > Computer.
Windows XP: Click Windows Start > My Computer.
Windows 2000: On the desktop, double-click My Computer.
Double-click the CD drive.
Follow the on-screen instructions to install the locator.
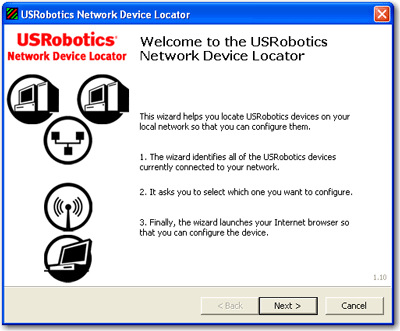
When the locator is installed, it starts automatically:
Click Next.
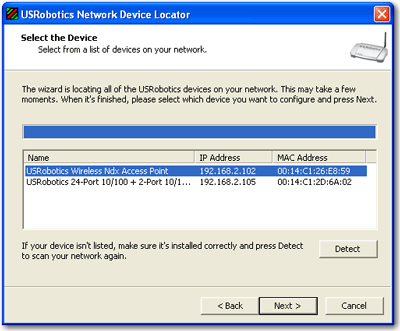
The locator lists the access point as well as any other USRobotics devices that were found:
Select the device whose MAC address matches the LAN MAC address on the bottom of the access point, and click Next.
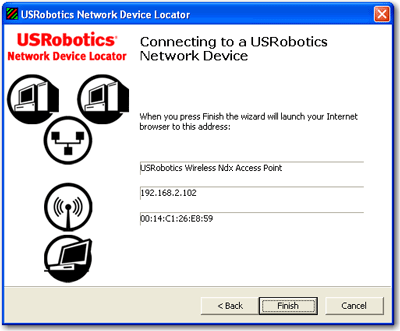
The locator displays the name, IP address, and LAN MAC address of the access point:
Click Finish.
The locator launches the setup wizard for the access point:
If you are using an operating system other than Windows, you first need to find the IP address of the access point. Then you can start the setup wizard to configure the basic settings of the access point.
Find the IP Address of the Access Point
The networking device to which you connected the access point assigns IP addresses on your local network. To find the IP address of the access point:
Access the configuration program or configuration pages of the networking device. For detailed instructions, consult the documentation for the networking device.
Find the list of clients associated with the networking device.
On the client list, find the LAN MAC address of the access point.
You can find the LAN MAC address of the access point on the label on the bottom of the access point.
Note the IP address associated with the LAN MAC address of the access point.
Run the Setup Wizard
Start your Web browser.
In the location or address line, type the IP address of the access point and press ENTER.
The wizard displays its welcome page:
Step Three: Configure Basic Settings
In the setup wizard, follow the on-screen instructions to complete the initial setup of the access point as follows:
Note: If you see a “Page Not Found” error at any time while using the setup wizard, press the Back button in your Web browser or refresh the page.
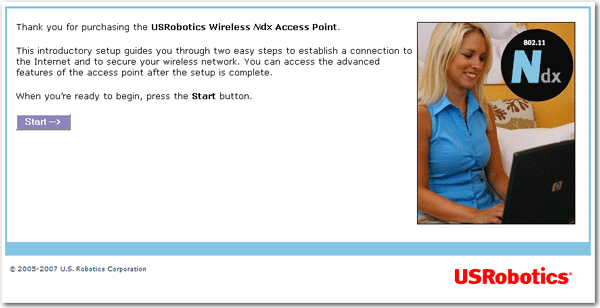
Click Start.
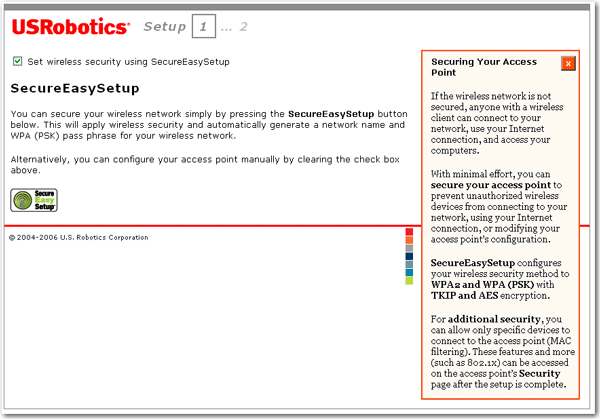
The setup wizard displays the SecureEasySetup page:
Do one of the following:
To use SecureEasySetup to set your wireless security:
Select Set wireless security using SecureEasySetup and click *
Wait for setup to complete, then click Continue.
OR
To set your wireless security information manually:
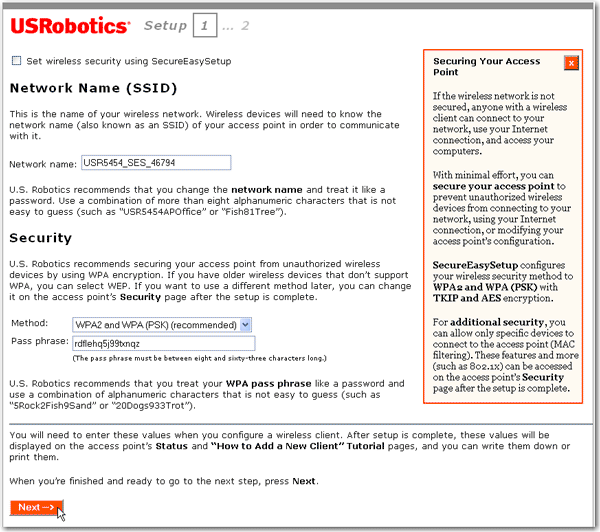
Clear the Set wireless security using SecureEasySetup checkbox.
The setup page displays wireless security settings.
Enter a Network Name (SSID), select a security Method, and enter your pass phrase. For more information about pass phrases, see wireless security information.
Note: For your wireless security settings, it is recommended that you select the WPA2 and WPA (PSK) wireless security method using TKIP and AES encryption for the most secure wireless network.
Click Next.
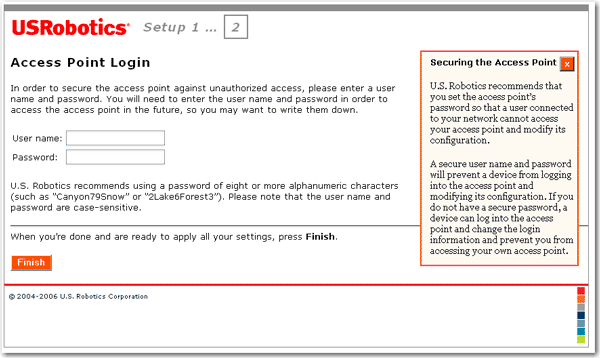
When your security settings are complete, the setup wizard displays the login setup page:
Enter a User name and Password and click Finish.
Note: Remember the user name and password that you enter. You will need it whenever you access the configuration pages of the access point.
The access point displays its statuspage. If you intend to connect wireless devices to the access point manually, you will need the information on the status page. Consider bookmarking the page for easy access to the required information.
You have successfully completed the installation procedure.
You can verify your network connection by registering your at www.usr.com/productreg/.
Having a backup reduces the effort required in reapplying your configuration settings should you ever restore your access point to its factory default settings. USRobotics recommends that you back up your settings now.
In the configuration pages, click the Device tab, and scroll down to Back Up Settings.
Click Back Up.
Your system prompts you to save or open the file.
Click Save.
* By default, SecureEasySetup is ready to be used on your access point. If you change the wireless
settings, be aware that for SecureEasySetup to be ready on your access point, it must be set with
WPA2 and WPA (PSK) wireless security, with TKIP and AES encryption, and a pass phrase
(which is also commonly called a Network key, WPA key, or WPA Pre-shared key). You can configure
the settings manually on the Wireless configuration page of the access point or automatically by
pressing the SecureEasySetup button on the back of the access point.