The networking device I am using does not have a DHCP server.
The can be connected to a networking device that does not have a DHCP server. By default, the access point is configured to obtain an IP address from a DHCP server, but you can manually set the IP address of the access point from the configuration pages.
If your networking device does not have DHCP and cannot assign an IP address to the access point, you can install the access point using a static IP address by connecting the access point directly to a computer.
Connect the provided antennas to the back of the access point.
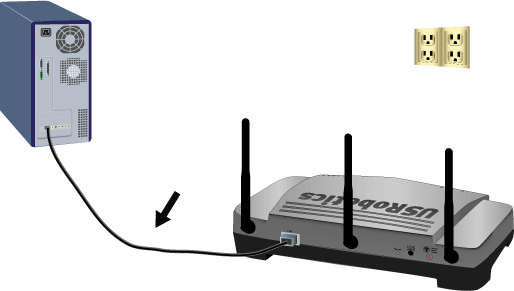
Use the supplied Ethernet cable to connect the LAN port on the access point to a LAN port on your computer.
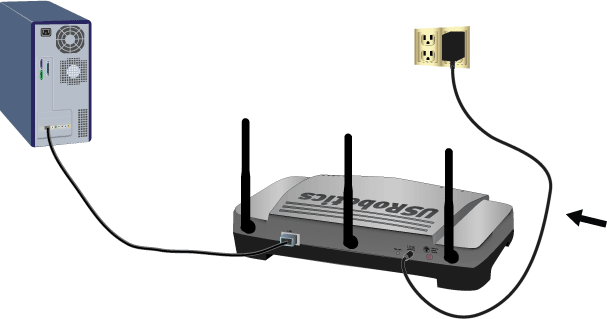
Supply power to the access point as follows:
Note to UK Users: With the power adapter unplugged, connect the appropriate power plug for your country on to the power adapter. Apply enough pressure to cause a click and firmly seat the plug.
Connect the supplied power adapter to the 15VDC port on the access point.
Plug the power adapter into a standard power outlet.
Note: This product is intended to be supplied by a Listed Direct Plug-in Power Unit marked Class 2 and rated 15VDC, 1200 mA.
Power up your computer.
Assign a static IP address within the 192.168.1.x range (example: 192.168.1.100) to your computer. For information on assigning a static IP address to your computer, see the documentation for your operating system.
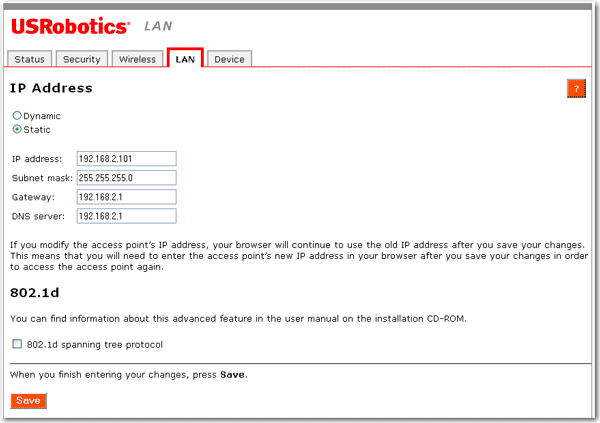
After you have configured the basic settings, click the LAN tab on the configuration pages.
Select Static and enter the IP address for the access point, then enter the Gateway, DNS server, and Subnet mask of the networking device.
Click Save at the bottom of the page.
When you have finished the installation of the access point, you can disconnect the Ethernet cable from the computer and connect your access point to your networking device. You do not need to perform the configuration steps of the installation procedure again.
I have installed my access point but need to connect it to a different networking device.
If you've already installed your access point and then need to connect the access point to a networking device that does not have a DHCP server, you can log in to the access point's configuration pages and assign a static IP address within the range of the new networking device before you move the access point.
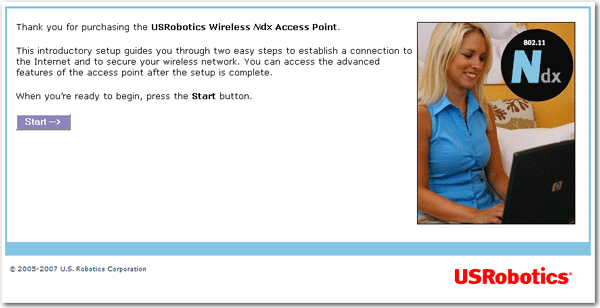
Start your Web browser.
In the location or address line, type the IP address of the access point, and press ENTER.