
Contents:
About the Wireless USB Print Server
Wireless USB Print Server Installation
Client PC Printer Setup (Additional Installs)
Navigating the Web User Interface >
IPP (Internet Printing Protocol)
Product Specifications for Wireless USB Print Server
Wireless USB Print Server
User Guide
Navigating the Web User Interface
The following section describes the various functions of the Web User Interface. This utility provides quick access to all the settings of the Wireless USB Print Server.
You can access the Web User Interface by opening a Web browser and typing the IP address of the Wireless USB Print Server. If you do not know the IP address of the Wireless USB Print Server, open the Bi-Admin Management Utility. The IP address, along with other information about the print server, is displayed on the first screen of the utility. Refer to the Bi-Admin Management Utility section in this User Guide for more information. You could also run the Setup Wizard from the Installation CD-ROM and write down the IP address when it is displayed or print a copy of the diagnostic page. The IP address is among the information provided in the diagnostic page.
When the Web User Interface has opened, you will see menu options on the left-hand side. There are nine options:
 |
Server Status |
| Printer Status | |
| Configure Server | |
| Logical Printers | |
| Wireless Basic | |
| Wireless Security | |
| AppleTalk | |
| NetBEUI | |
| TCP/IP |
Server Status
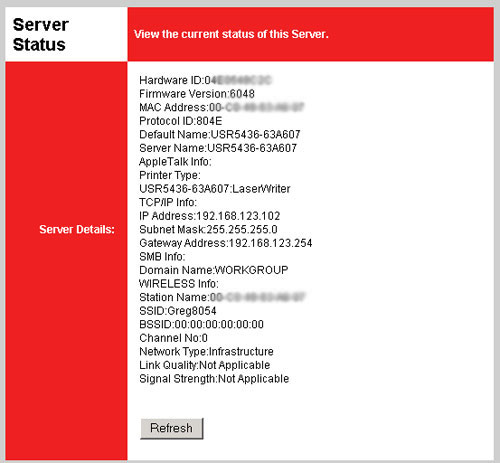
Within the Server Status area, you can view the network information for the Wireless USB Print Server. Included in this information is the Default Name, the Server Name, the IP address, the Domain Name, etc.
Printer Status
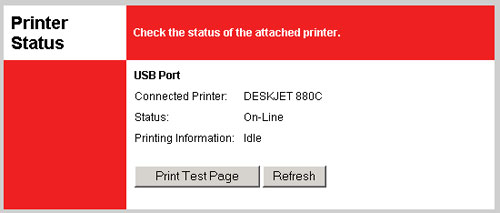
Within the Printer Status page, you can see the type of printer that is attached to the Wireless USB Print Server, the status of the printer, and the activity information of the printer. At the bottom of this page you can also click Print Test Page to verify that communication is being passed to and from your printer.
Configure Server
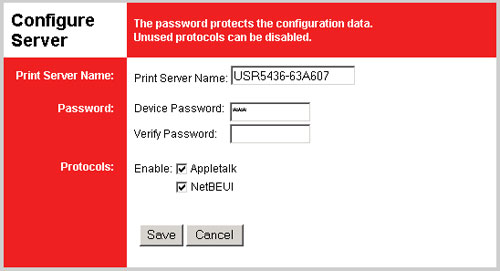
In the Configure Server page, you can modify the settings of the Wireless USB Print Server. If you make any changes in this area, you must click Save at the bottom of the page in order for the changes to take effect.
The first thing you can change is the Print Server Name of the Wireless USB Print Server. The new name cannot contain any blank spaces.
Next, you can click the Change Password checkbox to either enable or change the password. If you enable or change the password, you will need to enter the password in the Change Password field and in the Verify Password field.
The last thing you can do on this page is click the checkboxes to either enable or disable AppleTalk and NetBEUI. If the boxes are checked, these features will be enabled.
Logical Printers
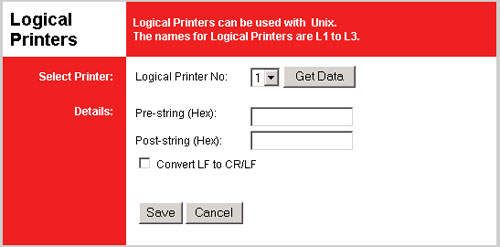
The Wireless USB Print Server can be used with Netware and Unix if the printer is set up as a logical printer.
Select a Logical Printer No. This corresponds with the logical printer port that you wish to configure. You can choose either L1, L2, or L3. Click the Get Data button to show the current data for the selected logical printer.
Pre-string is the printer control string in hexadecimal characters to be sent to the printer before each print job. This string cannot exceed 15 characters.
Post-string is the printer control string in hexadecimal characters to be sent to the printer after each print job. This string cannot exceed 15 characters.
If the Convert LF to CR/LF checkbox is selected, LF (line feed) characters are changed to CR+LF (carriage return + line feed) characters.
Wireless Basic
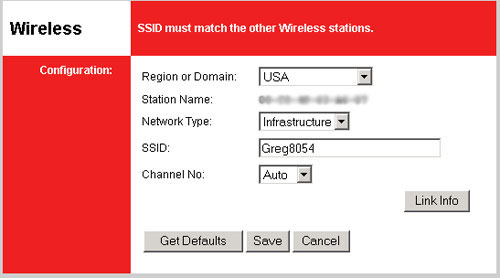
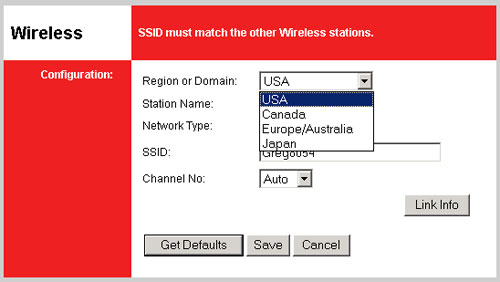
The first thing you can select in the Basic page is the Domain. Your choices are USA, Canada, Europe/Australia, and Japan. If it is not already selected, you should select the region where you will be using the Wireless USB Print Server. Depending on the region you select and the regulatory restrictions for that region, the selected Domain will affect what channels are available to transmit on wirelessly.
Next you will see a listing for Station Name. This is the MAC address of the Wireless USB Print Server. You may want to write this number down since this can be used to identify the print server in a client list on a network.

You can select the Network Type of the wireless network to which you will be connecting by selecting either Infrastucture or Ad Hoc. If you use a wireless router or access point in your wireless network, you need to select Infrastructure. If you do not use a wireless router or access point, you need to select Ad Hoc.

In the SSID field, you need to enter the SSID of the wireless router or access point to which you will be connecting the Wireless USB Print Server. If you do not enter the correct SSID, you will not be able to connect to your wireless router or access point.
For Channel No., the available channels will be affected by the Network Type you have selected. If you are in Infrastructure mode, you will only see Auto as an option. If you are in Ad Hoc mode, you can select a specific channel that your wireless network is transmitting on and that is within the acceptable range for your region.

If you click Link Info, you can view current information for the wireless connection of the Wireless USB Print Server.
If you make any changes in this area, you must click Save at the bottom of the page in order for the changes to take effect.
Wireless Security
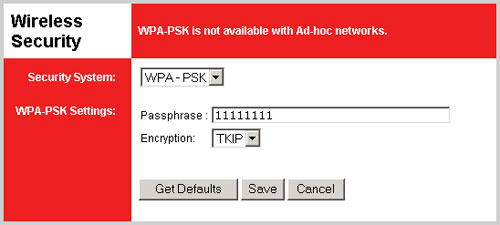
For Security System, there are three options: WPA-PSK, WEP, and Disable.
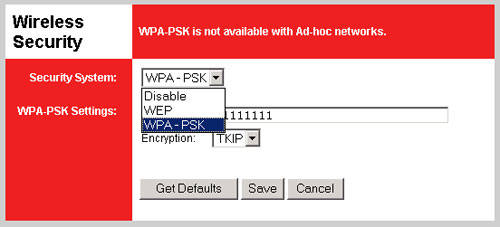
WPA-PSK
If you select WPA-PSK, you will need to enter the Passphrase for your wireless network. Some wireless products also refer to this as a Key or a Network Key. This must be at least eight characters long.

TKIP is the only form of WPA Encryption supported by the Wireless USB Print Server.
WEP
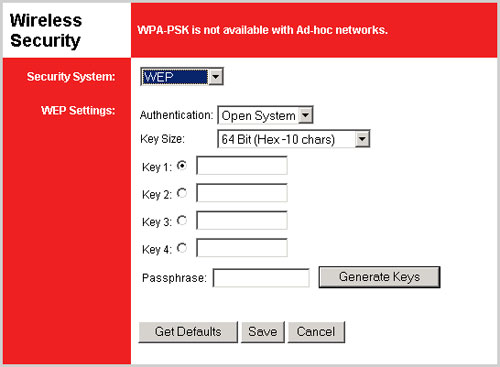
If you select WEP, you will need to choose a form of Authentication: either Open System or Shared Key.
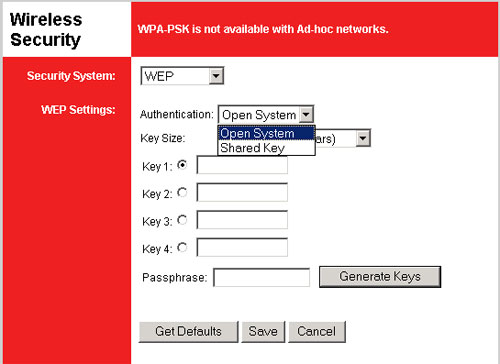
If you enable WEP Open System or WEP Shared Key, you will need to select the Key Size from 128-bit (ASCII - 13 chars), 128-bit (Hex - 26 chars), 64-bit (ASCII - 5 chars), or 64-bit (Hex - 10 chars).
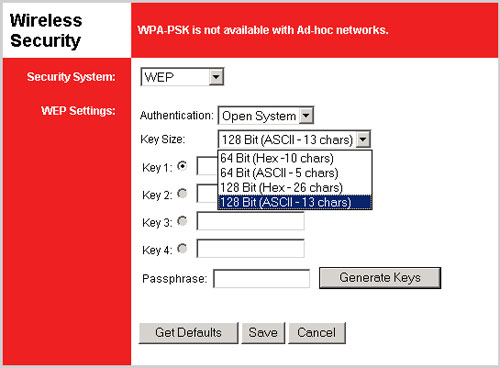
The Key type options provide the different levels of WEP security for your network, 64-bit being the lowest and 128-bit being the highest. Hex values are defined as A-F and 0-9 while ASCII uses all characters.
If you enable WEP, you are allowed to store up to four Keys. You must select the one to use in the Current key dropdown menu. The following table details the necessary length of characters that must be input for each WEP key that is activated.
| Hex | ASCII | |
|---|---|---|
| 64-bit | 10 characters | 5 characters |
| 128-bit | 26 characters | 13 characters |
You can also click Generate Keys to have keys automatically created and entered in the Key lines. If you want to use this option, you will need to enter a phrase into the Passphrase field. Anything can be entered here. You can enter several different phrases and click Generate Keys after each one to create different keys. If you repeat any of the phrases, the Key that was created the first time the phrase was used will be repeated. For 64 bit keys, four keys fields will be generated. For 128 bit keys, only the selected WEP key will be generated.
Disable
If the wireless network you are connecting to does not have any security enabled, choose Disable and no security features will be used.

AppleTalk
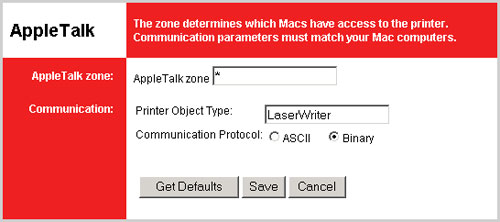
In this area you can determine what Apple systems can access the printer by entering them in the AppleTalk zone.
You can also view and change the Printer Object Type, which describes the printer driver that is used for the established printer port.
The last thing you can change in this area is the Communication Protocol. You can select either ASCII or Binary. Binary is the default.
If you make any changes in this area, you must click Save at the bottom of the page in order for the changes to take effect. You can also click Retrieve Defaults to restore the default settings for this area.
NetBEUI
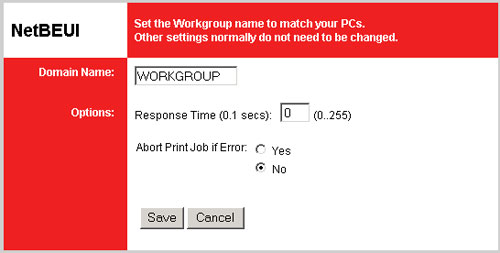
In the NetBEUI area, you can enter the Domain Name for your network.
You can set the Response Time for between 0 and 255 seconds. This determines how fast print jobs are sent to the printer.
You can also select Yes or No for Abort Print Job if Error. This will set whether or not a print job will be cancelled if any errors are encountered.
If you make any changes in this area, you must click Save at the bottom of the page in order for the changes to take effect.
TCP/IP
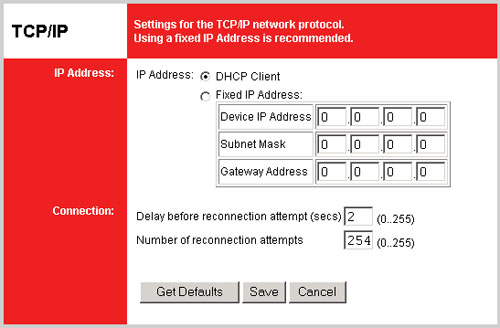
In this area, you can select either DHCP Client or Fixed IP Address. Select DHCP Client if you are connecting the Wireless USB Print Server to a network device that can assign IP addresses. If you need to manually assign an IP address for the Wireless USB Print Server, select Fixed IP Address and then enter the information for the IP Address, the Subnet Mask, and the Gateway Address.
You can also modify the Connection information. You can set the Delay before reconnection attempt (secs) to a value between 0 and 255 seconds. This will determine how long the Wireless USB Print Server will wait before attempting to reconnect to a lost TCP/IP connection.
You can set the Number of reconnection attempts to a value between 0 and 255. This will determine how many times the Wireless USB Print Server will attempt to reconnect to a lost TCP/IP connection.