Contents:
Overview of the Web-based Management
Web Filtering >
USR8200 Firewall/VPN/NAS User Guide
Web Filtering
The abundance of harmful information on the Internet is posing a serious challenge for employers and parents alike - How can I regulate what my employee/child does on the net? The USR8200 Firewall/VPN/NAS's Web-filtering allows parents and employers to regulate, control, and monitor Internet access. By classifying and categorizing online content, it is possible to create numerous Internet access policies, and easily apply them to your home network computers. As a result, you may keep your children from harm's way by limiting access to adult and violent material, or increase employee productivity by regulating access to non work-related Internet content.
Concepts
To effectively filter web content one must first have a good idea of the kind of information that is available on the Internet. It is necessary to formulate a landscape of the accessible content, categorize and classify themes and subjects that may be considered inappropriate.
The USR8200 Firewall/VPN/NAS's Web-filtering categorization methodology provides an easy and straightforward method for fine-grained content filtering. The web-filtering module is constantly updated with URL-based information classified according to the following categories:
- Child protection
- Recreation and Entertainment
- Personal business
- Bandwidth control
- Advertisements
- Chat
- Remote Proxies and Hosting Sites (Possibly untrusted sources)
- Other
Each category can be expanded into subcategories for better content control. For instance, the Recreation and Entertainment category is comprised of subcategories such as:
- Arts and Entertainment
- Education
- Games
- Hobbies and Recreation
Activating the Filtering Service
1. Click the Web-Filtering icon on the sidebar. If you haven't subscribed yet or your subscription has expired, the Activation page is displayed. Otherwise, click the Activation tab.
2. If the Enable Web Content Filtering checkbox in the Activate section is not selected, select it and click Apply. The Subscribe and Status sections will then be displayed.
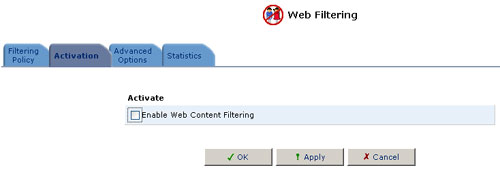
3. Click Click Here to initiate and manage your Subscription in the Subscribe section.
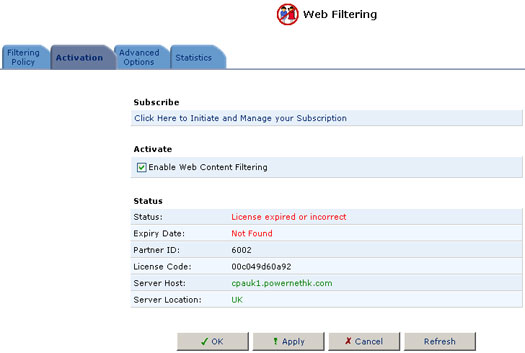
4. The Web Filtering subscription site will then be displayed in a new browser window. Follow the instructions on the site and subscribe or enroll for a free trial. You will be sent a verification email. Click on the link in the verification email. About 20 seconds after clicking on the verification link your subscription will be activated.
5. Return to the USR8200 Firewall/VPN/NAS's Management Console and click the Web-Filtering icon on the sidebar. The Filtering Policy page should be displayed with the subscription expiration date at the top. If this is not the case, click the Advanced Options tab and then Refresh Servers. Wait a few seconds and repeat this step.
To enable or disable the USR8200 Firewall/VPN/NAS's web-content filtering, perform the following steps:
1. Click the Web-Filtering icon on the sidebar.
2. Click the Activation tab.
3. Select the Enable Web Content Filtering check box.
4. Click OK.

Creating a Filtering Policy
1. Click the Web-Filtering icon on the sidebar.
2. Click the Filtering Policy tab.
3. Click Add a policy.

4. Type in a name for the new policy in the Policy Name field.
5. Type in a description of the new policy in the Description field.
6. Select the content filtering check boxes that represent content that you wish to block.
7. Click OK.
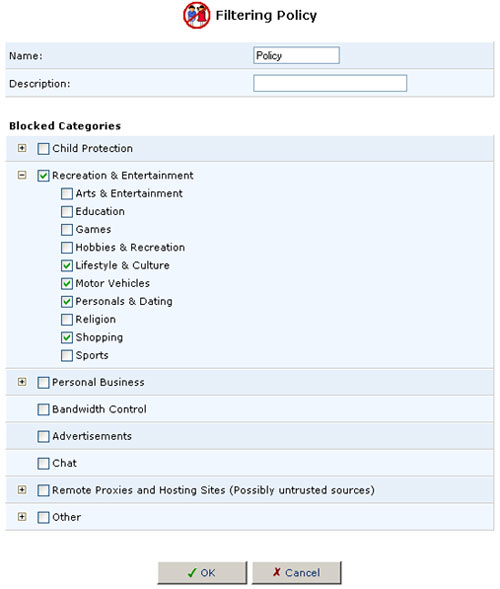
If you want to make a more refined selection of filtering options, click the + next to each category to display a list of its subcategories. Click the - to return the category to the previous display. This will only happen if all the subcategories are checked or unchecked.
Applying a Filtering Policy
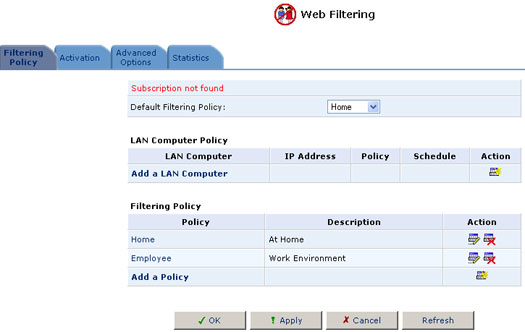
You can define a default filtering policy that will apply to all of your home network devices or apply different policies to individual devices separately.
To select a default filtering policy, select the policy name from the Default Policy combo-box located in the Filtering Policy tab.
To apply separate policies to individual home network devices, perform the following:
1. Click the Filtering Policy tab. Click Add a LAN Computer.

The Add LAN Computer screen will appear.
2. Type in the name or IP of the LAN computer you to which you wish to apply a policy.
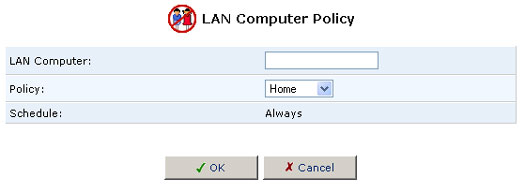
3. Select the policy you wish to apply from the Policy combo-box.
4. You can specify when this policy will be active by selecting the schedule you wish to apply from the Schedule combo-box or by clicking New on the Schedule line and creating a new schedule. Schedules may be edited by clicking the Scheduler Rules icon in the Advanced screen.
5. Click OK.
6. In the Filtering Policy tab, select the checkbox next to the computer name in order to apply the changes.
7. Click OK.
Filtering Options
In order to decide whether to allow or block a specific site, the filter service provider is consulted about the site's category. In case an error occurs consulting the provider, you can decide whether to block or allow access to all sites.
1. Click the Web-Filtering icon on the sidebar.
2. Click the Advanced Options tab.
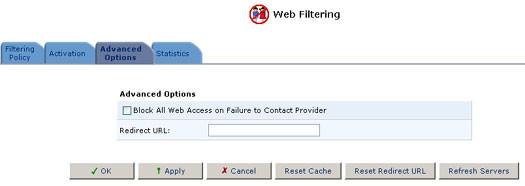
3. Select the Block on Error checkbox.
4. Click OK.
Redirect URL
When a site is blocked a simple page is displayed instead, specifying the original URL and the reason it was blocked. You can specify an alternative page to be displayed when a site is blocked. This is done by putting the URL of the alternative page in the Redirect URL text box.
Filtering Statistics
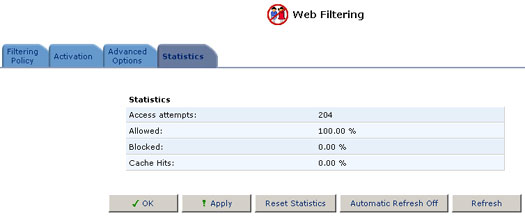
You can use the Web-based Management to monitor content filtering statistics. Statistics include a record of:
- Access attempts
- Accessed URLs
- Blocked URLs
- URLs that were accessed from cache
To view content filtering statistics, perform the following:
1. Click the Web-Filtering icon on the sidebar.
2. Click the Statistics tab.
