
![]()
Contents:
USRobotics SureConnect ADSL USB/Ethernet Modem
Installing the Modem
SureConnect Utility
Monitor Tab
Test Tab
Configuration
& About
Upgrade Tab
Configure the Static IP Address
USRobotics SureConnect ADSL USB/Ethernet Modem User Guide
Windows 95, 98, 2000, Me, XP, NT 4.0 or later, Macintosh, and Linux
Installing the Modem
For current product support and contact information, go to the following Web site: http://www.usr.com/broadbandsupport
Thank you for purchasing the USRobotics SureConnect ADSL USB/Ethernet Modem, Model 9002. The following instructions will walk you through the installation of the modem and the USRobotics SureConnect ADSL Utility. After the installation is complete, you will have installed the following items:
- USRobotics SureConnect ADSL USB/Ethernet Modem
- USRobotics SureConnect ADSL Utility
NOTE: It is important that you have your serial number written down for future reference. If you ever need to call our Technical Support department, you will need this number to receive assistance. You can find your 12-character serial number on a bar code sticker located on the bottom of the modem and also on the box. You will also need your model number; 9002.
Installation Overview & System Requirements
What You Need Before You Begin
- ADSL and Internet service from your local telephone company or Internet Service Provider (ISP) or access to an ADSL DSLAM (Digital Subscriber Line Access Multiplexer).
- A microfilter may be required for each telephone device (telephones, answering machines, and fax machines) that shares the same phone line as the ADSL signal. Make sure there isn't a microfilter installed between the ADSL modem and the telephone wall jack, unless your microfilter has a connection for both the telephone and the DSL device.
- Your user name and password if they were assigned by your ISP.
Computer Requirements
Minimum System Requirements - Ethernet Port
- Pentium or faster compatible CPU
- Any computer with an Ethernet 10/100 RJ-45 interface
- 32 MB RAM
- 10 MB hard disk space
- Internet Explorer or Netscape Navigator 4.0 or later Web browser
- A host computer running Windows 95 (With Service Pack 2 installed), 98, NT 4.0, 2000, Me, XP (or later), Linux, or a Macintosh OS 8.6 - 9.x computer
- Any operating system that supports an Ethernet connection with an IP stack
- SureConnect Installation CD-ROM requires Windows 95, 98, Me, NT4.0, 2000, or XP. Computers running Windows 95 or NT 4.0 are required to have Internet Explorer 4.0 or later installed. After Internet Explorer is installed, Netscape Navigator can be used.
Minimum System Requirements - USB Port
- Pentium 200 MHz or faster compatible CPU
- Host PC with Universal Serial Bus (USB) support
- A host computer running Windows 98, 2000, Me, XP (or later), Macintosh OS 8.6 - 9.x, or Linux
- 32 MB RAM
- 10 MB hard disk space
- Internet Explorer or Netscape Navigator 4.0 or later Web browser
- SureConnect Installation CD-ROM requires Windows 98, Me, 2000, XP, Linux or Macintosh OS 8.6 - 9.x
Power Requirements
The USRobotics SureConnect ADSL USB/Ethernet Modem obtains power from the included AC power adapter. Be sure to only use the included power adapter when operating this device. The power adapter must be connected in order for the modem to function properly.
Windows 95 and Windows NT 4.0 Users: If you are installing the USRobotics SureConnect ADSL USB/Ethernet Modem and have a PC running Windows 95 or NT 4.0, you will have to install the modem using the Ethernet option.
NOTE: Be sure that your computer is on and you have your operating system CD-ROM readily available. If you are installing via the USB port, be sure to install the software first.
This USRobotics SureConnect ADSL USB/Ethernet Modem package includes the following items:
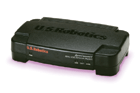 |
USRobotics SureConnect ADSL USB/Ethernet Modem Model 9002 |
 |
RJ-11 Phone Cord (4 wire)(26 AWG) |
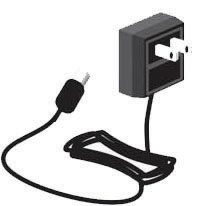 |
AC Power Adapter |
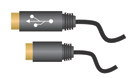 |
USB Cable (3 ft/1.5 m) |
 |
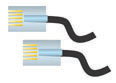
Ethernet Cable (6 ft/1.8 m) |
 |
Quick Installation Guide |
 |
USRobotics SureConnect Installation CD-ROM with User Guide |
| Optional Components | |
 |
In some models there may be a microfilter included in the box, or a microfilter may be supplied by your ISP. Check with your ISP to see if a microfilter is needed. If you are required to install a microfilter, the next section discusses installation. |
Inform your dealer if there are any incorrect, missing, or damaged parts.
Macintosh and Linux Users: Refer to the installation instructions specific to your operating system in this User's Guide.
Should You Connect via Ethernet or USB?
The USRobotics ADSL USB/Ethernet Modem gives you the option to connect through a USB or an Ethernet port. Selecting how to connect your modem is mostly a matter of preference and also depends on what ports are available on your computer.
Windows Installation
Step 1. Connect Microfilters (If Necessary)
If there are no microfilters included in your package and your ISP did not provide any, skip to Step 2 of these installation instructions.
If microfilters are required, install one on each telephone device (telephones, answering machines, and fax machines) that shares the same phone line as the ADSL signal.
A microfilter is a small device used to lessen the amount of interference between ADSL signals and telephone signals. Microfilters only need to be used if the ADSL modem and a telephone device are sharing the same phone line. If microfilters are not used, you may experience background noise on your telephone while data is being transmitted. Data transmissions may experience interruption by telephone calls if a microfilter is not used.
Connect Microfilters to Telephone Devices
To install the microfilter, plug the phone into the microfilter, and then plug the microfilter into the telephone wall jack. Do not install a microfilter on the cable that connects your modem to the telephone jack unless your microfilter has a connection for both the telephone and the ADSL device.
Step 2. Install the ADSL USB/Ethernet Modem
To install the USRobotics SureConnect ADSL USB/Ethernet Modem, insert the Installation CD-ROM into the CD-ROM drive of your computer. If the installation does not start automatically, go to your desktop and double-click My Computer, double-click the drive letter associated with your CD-ROM drive, and then double-click Setup.
The USRobotics SureConnect ADSL USB/Ethernet Modem Installer Welcome window will display; click Next to continue installing the USRobotics SureConnect ADSL USB/Ethernet Modem.

- Select the connection type (USB or Ethernet) you will be utilizing to connect the modem to your computer; click Next. If you are running Windows 95 or NT 4.0 you will not have the option to select. In those operating systems you must connect via Ethernet.

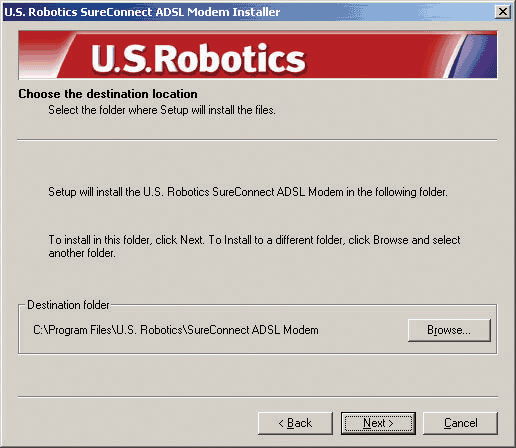
- You will then be prompted to select a location to install the files. If you would like to change the default location, click Browse to select a new folder. If you accept the default location, click Next.
- A qualification test will run to verify that your system meets the minimum requirements for installation. The Results screen will display those items in your configuration that passed with a green flag and the ones that failed with a red flag. If your system passed the qualification, click Next and the necessary files will be copied to your system.
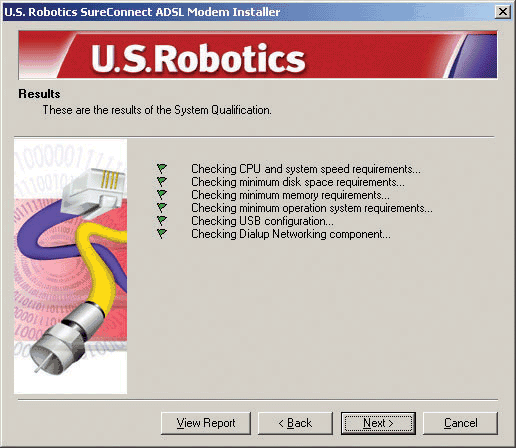
If you are notified that your system has failed the qualification test, click the View Report button to identify which component(s) failed. Once you have identified which component(s) failed, refer to the "Troubleshooting" section of this User's Guide for further instructions.
Windows 95: Some Windows 95 users may require a necessary Windows component (Winsock 2) to be installed at this time. Click Next to launch the installation of this component, and follow the on-screen instructions. Once the installation is complete, you will need to restart the USRobotics SureConnect ADSL USB/Ethernet Modem installation.
For USB Users only:
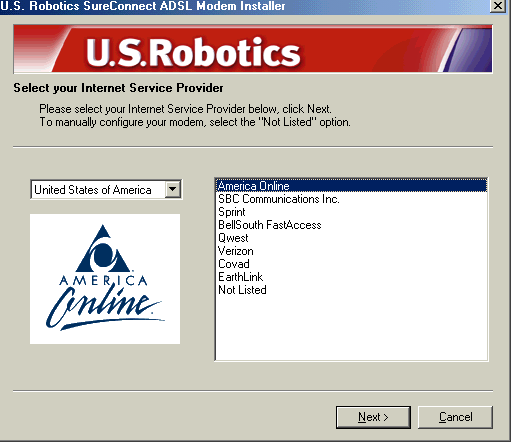
The necessary files will be copied to your system. Select your Internet Service Provider (ISP) from the list and click Next.
Step 3. Connect the Cables
Connect the Power Adapter
Be sure to only use the included power supply. Connect the power adapter cord to the "10VDC" jack at the rear of the modem. Connect the power adapter to a standard wall outlet. Click Next.
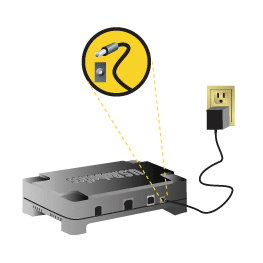
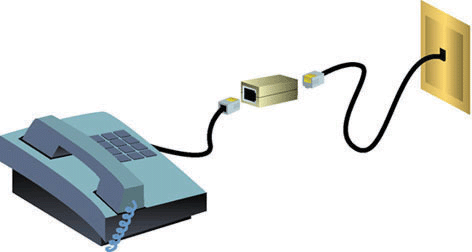
Connect the Telephone Cable
Connect one end of the included telephone cable to the telephone port on the back of your modem labeled "ADSL" and connect the other end into the telephone jack. Click Next.

Connect the Ethernet or USB Cable
Follow the instructions below for the connection type (Ethernet or USB) you selected in Step 2.
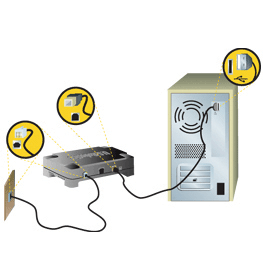
Ethernet
- Insert one end of the Ethernet cable to the "ENET" port on the back of the USRobotics SureConnect ADSL USB/Ethernet Modem. Connect the other end of the Ethernet cable to the Ethernet port on your computer's 10/100 network interface card.
- The modem will begin an initialization sequence. This may take a minute.
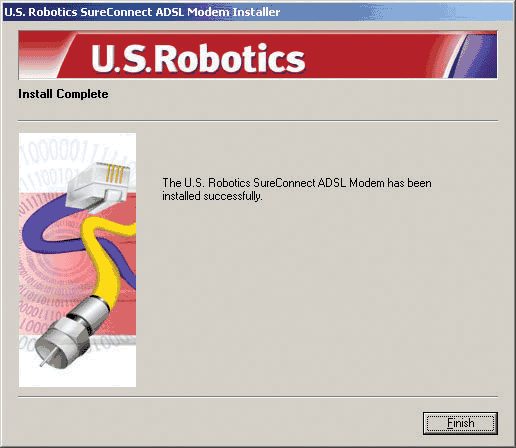
- The installation of the USRobotics SureConnect ADSL USB/Ethernet Modem is complete. Click Finish, and remove the CD-ROM from the CD-ROM drive of your computer.
NOTE: If your ISP gave you software to install, do so at this time. Be sure to read and follow all of the installation instructions provided. Once the software is installed, you may need to establish a dial-up connection in order to access the Internet. If your ISP gave you software to install, a user name and password should have also been assigned.
NOTE: Some Internet Service Providers require additional software be installed for optimum performance. If your ISP requires additional software, it will be installed when you click Finish.
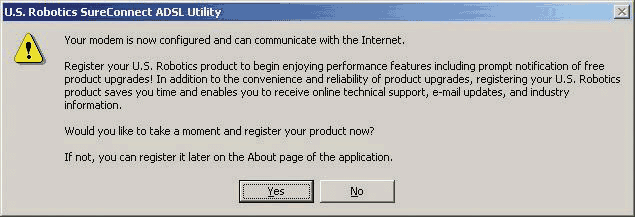
The Registration screen displays once you have established a connection. You can test your connection by registering your modem. Click Yes to register your modem, and you will be brought to the USRobotics Web site.
USB
- If you have chosen to connect via the USB port, insert the rectangular end of the included USB cable into the USB port of the computer, and the square end of the cable into the port labeled "USB" on the USRobotics SureConnect ADSL USB/Ethernet Modem.
- The Found New Hardware Wizard will display, and the new hardware will begin to install. Follow the New Hardware Wizard's on-screen instructions to complete the installation of the hardware. If the New Hardware Wizard does not display, refer to the "Troubleshooting" section of this Quick Installation Guide.
Windows XP, 2000, & Me:
Windows XP
A software installation warning will display stating that the software you are installing has not passed the Windows logo testing. Click the Continue Anyway button.Windows 2000 and Me
A Digital Signature Not Found screen may appear. Click Yes to continue with the installation.USRobotics has thoroughly tested this driver in conjunction with the support hardware and has verified compatibility with Windows XP, 2000, & Me.
NOTE in Windows 2000: A screen will confirm when each device has been installed. Click finish to continue to install the software required to operate the modem.
Windows XP
A Found New Hardware Wizard screen for both the Loader and the Adapter will display. Select the Install Software Automatically option and click Next.
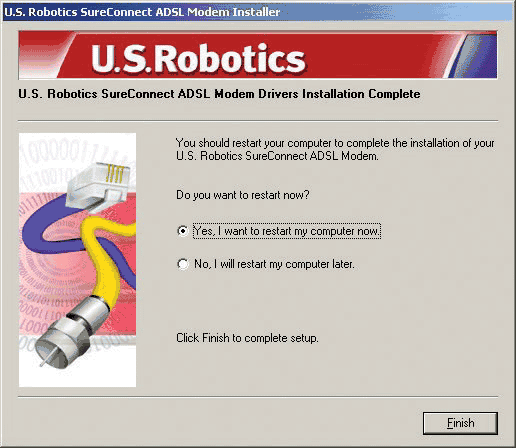
- After the modem is detected, you will need to restart your computer. Select Yes, I would like to restart my computer now then click Finish.
- A window will display confirming that the modem driver has been installed, click Next.
- The installation of the USRobotics SureConnect ADSL USB/Ethernet Modem is complete. Click Finish and remove the CD-ROM from the CD-ROM drive of your computer.
NOTE: If your ISP gave you software to install, do so at this time. Be sure to read and follow all of the installation instructions provided. Once the software is installed, you may need to establish a dial-up connection in order to access the Internet. If your ISP gave you software to install, a user name and password should have also been assigned.
NOTE: Some Internet Service Providers require additional software be installed for optimum performance. If your ISP requires additional software, it will be installed when you click Finish.
Establish a Dial-up Connection
Double-click the dial-up networking icon that has just been created. It will be located on your desktop. If the networking icon is not available on your desktop, follow the instructions below for your operating system in order to locate the networking icon.
| Windows 2000 | Click Start, select Settings, and then double-click Network and Dial Up Connections. |
| Windows 98 and Windows Me | Double-click My Computer and then double-click Dial Up Networking. |
| Windows XP | Click Start, click Control Panel, and then double-click Network Connections. |
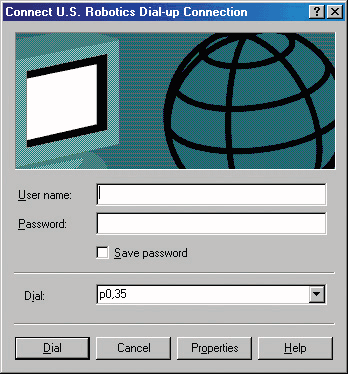
- Look for your ISP's dial-up connection icon and double-click it.
- In the Dial-up Connection screen, enter your user name and password. Your ISP should have supplied your user name and password to you. The Save password option remembers your password so you won't have to enter it every time you initiate your dial-up connection. The characters in the Dial text field are the VPI/VCI values. The VPI/VCI values will automatically display and you should not need to change them unless instructed to do so by your ISP.
- Click the Dial button to initiate your connection. The Registration screen displays once you have established a connection. You can test your connection by registering your modem. Click Yes to register your modem, and you will be brought to the USRobotics Web site.
Macintosh OS 8.6 - 9.x Installation (USB Only)
Step 1: Install the Drivers
1.Insert the Installation CD-ROM into the CD-ROM drive of the Macintosh. The Macintosh will recognize the CD-ROM and place an icon called Combo ADSL 1.1 on the desktop.
![]()
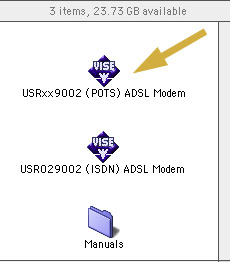
2. Double-click the Combo ADSL 1.1 icon. A window will display; if you are using ADSL Annex A, which works over a standard telephone line, double-click USRxx9002 (POTS) ADSL Modem.
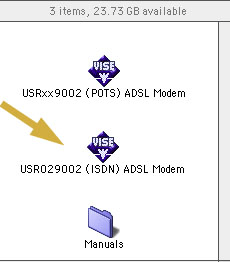
If you are using ADSL Annex B, which works over an ISDN line, double-click USR029002 (ISDN) ADSL Modem.
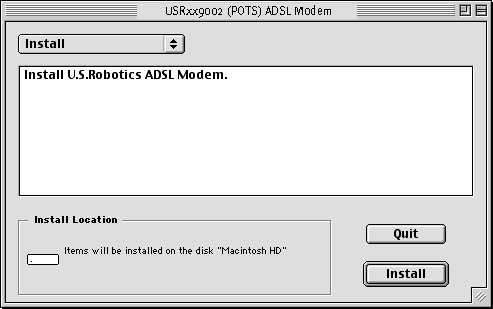
3. The Installation window will display; click the Install button.
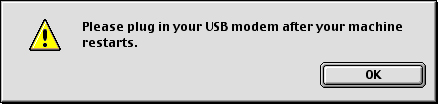
4. A prompt will display to remind you to plug in the USB cable when the computer restarts; click OK.
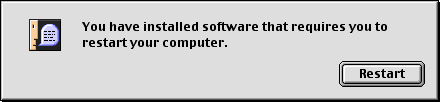
5. Once the modem has been installed, you will need to restart your computer; click Restart.
Step 2: Connecting the Cables
Connect the USB Cable
- Plug the flat end of the provided USB cable into an available USB port on your Macintosh.
- Plug the square end of the USB cable into the port of the modem labeled USB.
Connect the Telephone Cable
- Plug one end of the provided RJ-11 telephone cable into the telephone jack or the ADSL splitter box provided by your Internet Service Provider.
- Plug the other end of the RJ-11 telephone cable into the ADSL port of the USRobotics SureConnect ADSL USB/Ethernet Modem.
Once you have connected both the USB and the RJ-11, your Macintosh will detect the modem and load the installed software. This will enable you to use your new high-speed USRobotics SureConnect ADSL USB/Ethernet Modem.
Step 3: Configuring the Modem
In most cases, you will not have to change the ADSL-specific configuration parameters for your modem. Your ISP will have customized the software so that the modem installs with the defaults required for connecting to their own equipment. If the ADSL parameters need to be changed, they can be changed on the Configuration page of USRobotics Monitor.
USRobotics Monitor
Each parameter setting is specific to your ISP's network configuration; therefore, either keep the default settings or obtain alternate settings from your ISP. The settings that can be changed on the Configuration page of USRobotics Monitor are:
- ATM Channel VPI
- ATM Channel VCI
- Encapsulation Type
- ADSL Standard

- To access the USRobotics Monitor, go to the Desktop and double-click the USR ADSL Modem icon.
- The USRobotics Monitor will display; click the Configuration tab.
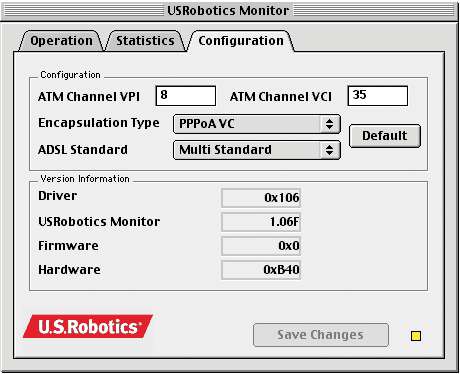
The value that you choose for Encapsulation Type will determine whether your modem is exposed to the operating system as a network-type device or as a modem-type device. The choices that begin with PPP will cause the operating system to view your modem as a modem-type device, and the remaining options will cause the operating system to view your modem as an Ethernet-type device.
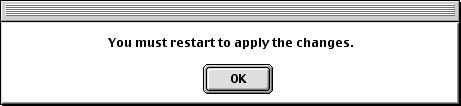
NOTE: If you change any settings on the Configuration page of the USRobotics Monitor, click Save Changes. You must then restart the computer to apply the changes.
Step 4: Configuring the Operating System
Once the modem has been properly configured, the Macintosh OS 8.6 -9.X operating system must also be configured so that it knows how to properly communicate with your modem's software. You should configure the system software based on whether your ISP expects your modem to communicate as an Ethernet device or as a "regular" modem.
The Encapsulation Type you selected will dictate which components need to be configured. Use the table below to help you identify which components you will need to configure, and how you will need to configure them, depending on your Encapsulation and Connection Type.
|
Encapsulation Type
|
TCP/IP
|
Remote Access
|
Communication Mode
|
Connect Via
|
Configure
|
|
Bridged LLC SNAP
|
X
|
-
|
Ethernet
|
ADSL USB Modem
|
Manually, Using Boot Server, Using
DHCP Server, Using RARP Server
|
|
Bridged VC MUX
|
X
|
-
|
Ethernet
|
ADSL USB Modem
|
Manually, Using Boot Server, Using
DHCP Server, Using RARP Server
|
|
Routed LLC SNAP
|
X
|
-
|
Ethernet
|
ADSL USB Modem
|
Manually, Using Boot Server, Using
DHCP Server, Using RARP Server
|
|
Routed VC MUX
|
X
|
-
|
Ethernet
|
ADSL USB Modem
|
Manually, Using Boot Server, Using
DHCP Server, Using RARP Server
|
|
PPPoA LLC
|
X
|
X
|
Modem
|
PPP
|
Manually, Using PPP Server, Using
BootP Server, Using DHCP Server
|
|
PPPoA VC
|
X
|
X
|
Modem
|
PPP
|
Manually, Using PPP Server, Using
BootP Server, Using DHCP Server
|
|
PPPoE LLC
|
X
|
X
|
Modem
|
PPP
|
Manually, Using PPP Server, Using
BootP Server or Using DHCP Server
|
|
PPPoE VC
|
X
|
X
|
Modem
|
PPP
|
Manually, Using PPP Server, Using
BootP Server or Using DHCP Server
|
Configuring TCP/IP
The most commonly used language, or protocol, used to communicate over the Internet is called TCP/IP (Transmission Control Protocol / Internet Protocol).
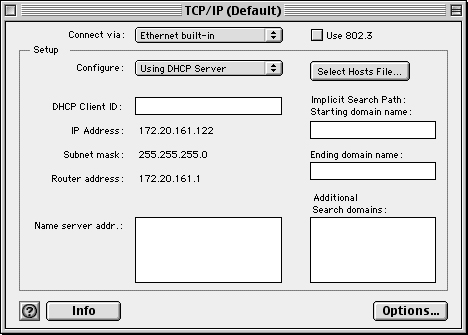
- Go to the Control Panels submenu of the Apple menu. Click TCP/IP in the menu to display the Connect Via pull-down menu. The TCP/IP screen will display.
- From the Connect Via pull-down menu, click ADSL USB Modem for Ethernet Mode, or select PPP for Modem Mode. Most ISPs will offer DHCP (Dynamic Host Configuration Protocol) as their IP Address. DHCP will automatically set up the proper IP Address when your connection is established.
- Select Using DHCP Server from the Configure pull-down menu for Ethernet Mode and Using PPP Server for PPP Mode. If your ISP requires you to use a specific IP address, select Manually from the Configure pull-down menu, and then enter the IP Address provided by your ISP.
- Once you have selected the above options, close the window by clicking the small square in the upper-left corner, then click Save.
Remote Access
When the Macintosh operating system is configured for Modem mode, it actually views your ADSL modem as a "regular" modem. This does not affect the performance of your high-speed Internet connection; however, it does affect the way you configure the operating system to complete the connection setup. Because the operating system thinks that you have a "regular" modem attached to your computer, you must configure the Apple Remote Access Dialer application to connect to the Internet.
1. Go to the Control Panels submenu of the Apple menu.
2. Click the Remote Access icon on the Control Panels menu.
3. Click the Options button to access the Remote Access options dialog box. In the Options dialog box, click the Protocol tab and select the following Protocol options:
- Connect automatically when starting TCP/IP applications.
- Use TCP header compression
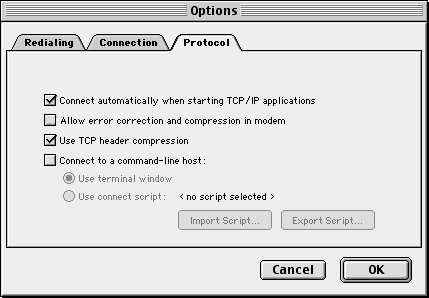
4. Click OK to save the options and return to the Remote Access Options dialog box.
5. With the current window open, go to the Remote Access menu located at the top of the screen and click Modem. You can only access this menu if you are in the Remote Access window. The Modem screen will display. Select the following options:
- Select ADSL USB Modem from the Connect Via: pull-down menu.
- Select ADSL USB Modem in the Modem: pull-down menu.
- Confirm the Sound option is set to On.
- Confirm the Dialing option is set to Tone.
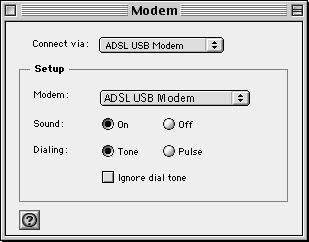
NOTE: It is critical that these settings be correct in order for the USRobotics SureConnect ADSL USB/Ethernet Modem to work correctly.
Once you have selected the above options, close the window by clicking the small square in the upper-left corner, then click Save. This will return you to the Remote Access setup screen.
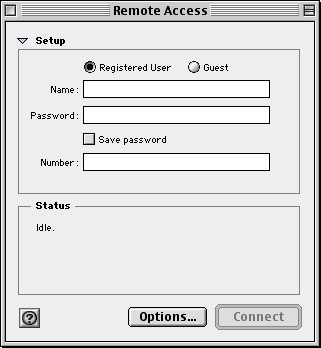
6. Enter the following information in the Remote Access screen:
- Select the Registered User option.
- Enter your user name and password as provided by your ISP.
- Enter a numeric value of "1" in the Number box. The driver does not dial the number "1," but the dialer needs to see a number there in order for the dialing process to work.
Once you have verified that all of the information is correct, click the square in the upper-left corner, then click Save to save the configuration.
Operating the Modem
Your system should now be ready to connect to the Internet. If you have not already done so, make sure that you have properly configured your ADSL settings and Macintosh system software.
Ethernet Mode
If you are configured to operate in Ethernet mode, you should already be connected to the Internet. Open your Web browser to confirm proper network operation.
Modem Mode - PPPoE or PPPoA
As mentioned previously, when configured to operate in Modem mode, the system software expects you to dial a phone number to connect to your Internet provider. Because you are connecting via ADSL, no dialing actually takes place; you just have to go through the steps of dialing to get connected to the Internet.
- To connect to your ADSL provider, select Remote Access from the Control Panels menu. Your Remote Access parameters should have already been configured.
- Complete any missing information on the main Remote Access setup page, then click the Connect button. The status portion of the window will give you feedback as to whether or not the connection is progressing successfully.
- Once the status indicates that the connection is complete, you may proceed with opening your Web browser and surfing the Web!
Linux Installation (USB Only)
Step 1: Compile and Install the Modem Driver
The following installation supports the encapsulations listed below:
- RFC1483 (LAN driver)
- RFC2516 (PPP Over Ethernet)
- RFC2364 (PPP Over ATM)
The package that you have contains the driver source codes and some script files for compiling, installing, and using the USRobotics SureConnect ADSL USB Modem. The driver will be installed as an Ethernet driver and the interface name will be called ADIModem.
NOTE: This driver should work with 2.4.x and 2.5.x kernels with USB and hot plug support installed. For instance, it should work with other distributions of Linux, such as Red Hat 7.x, Mandrake 8.x, Suse 7.x, and Slackware 8.x.
- Log on as root.
- Create a new directory.
- Copy the tarball file into the new directory (if you are using ADSL Annex A, which works over a standard telephone line, use the tarball file 9002_POTS.tgz. If you are using ADSL Annex B, which works over an ISDN line, use the tarball file 9002_ISDN.tgz.)
- Unzip the tarball file.
The figure below shows how to create the USR_USB directory, and copy the file 9002_POTS.tgz into that directory from the CD-ROM drive and then unzip the file. This is assuming you have already mounted the CD-ROM into /mnt/cdrom directory.
The commands are as follows:
- cd /usr
- mkdir USR_USB
- cd USR_USB
- cp /mnt/cdrom/Linux/9002_POTS.tgz
- tar xvzf 9002_POTS.tgz

5. Run ./inst_mod KernelSrcDirectory. KernelSrcDirectory is the directory where this script can find the kernel source codes. This directory is normally under the /usr/src directory. If the kernel source code is not installed by default with your Linux distribution, you have to install it first. Refer to your distribution manuals for more information.
For instance, under RedHat 7.2, the source directory is /usr/src/linux-2.4.7-10, the install command is then:
USR_USB/./inst_mod linux-2.4.7-10
The following figure shows how to compile the driver under RedHat 7.2.

NOTE: DSP firmware files will be located in the /etc/analog directory. Each time you plug in in the USB cable, the kernel will call the application in /etc/hotplug/usb/adiusbadsl to set up your modem.
At this point, you have built the driver that supports RFC1483 (LAN) and also RFC2516 (PPPoE).
Step 2: Configuring the Modem Parameters
/etc/analog/adiusbadsl.conf

There are a number of parameters that the modem needs to have configured in order to initiate a connection when the USB cable is plugged in. These parameters are in a file called adiusbadsl.conf. In order for the modem to be operational, these values must be modified in the file using an editor such as pico, vi, or joe.
Setting the VPI/VCI and Encapsulation Type Parameters
VPI and VCI values are used to identify your Virtual Path Connection (VP) and your Virtual Circuit Connection (VC). Your ISP should have provided you with VPI, VCI, and Encapsulation-type parameters. The VPI/VCI values are in hexadecimal format, an example is below:
- VPI=00000008
- VCI=00000023
NOTE: Whenever you change anything in the adiusbadsl.conf file, unplug the USB cable from the modem, and then plug it back in. This will reset the modem to use the new values.
Encapsulation Type
Encapsulation is a technique used by layered protocols where the data set is wrapped in a protocol header. This technique helps to bridge different networks. When a protocol data unit (PDU) is sent, a layer will add header information to that unit from the layer above. For example, a packet contains a protocol header from the physical layer. Then the network layer (IP) adds a protocol header. Finally, the transport layer (TCP) adds a protocol header, followed by the application protocol data.
The encapsulation type depends on the type of interface your ISP provides to you. Your ISP should be able to provide you with the appropriate values for their system.
Example: Encapsulation = 00000006 (PPPoA-VC)
Step 3: Set Up the ADSL USB/Ethernet Modem for Use
PPPoE Interface
After completing the first two steps, you will have built the driver that supports RFC1483 (LAN) and also RFC2516 (PPPoE).
NOTE: Since this package supports PPPoE encapsulation, you can use any PPPoE client software that you choose. An example of a PPPoE client is Roaring Penguin, which you can get from http://www.roaring penguin.com. You will not need to change anything in the package to be able to use PPPoE. You will just need to install the LAN driver and the desired PPPoE client software.
As soon as you install the package on your system, you can connect the USRobotics SureConnect ADSL USB/Ethernet Modem to your computer using the included USB cable. Once the modem is connected, the driver and module will be loaded automatically.
When the modem is detected, the PWR LED on the front left panel of the modem, will begin to blink. The driver will create an Ethernet interface called ADIModem. Although the interface is created, it is not yet configured. To confirm the interface has been created, run the following command:
ifconfig -a
A list will display all interfaces on your system. Locate the ADIModem interface. Once the interface is located, you can configure it using either one of the following methods:
- DHCP
- Static IP Address
Configure Interface Using DHCP
- Confirm that your server provides a DHCP server.
- If it does, then run the following script:USR_USB/ADI_PPPOE/./godhcp
- To confirm the interface is operational and it has an IP address assigned, run the following script:ifconfig
Configure Interface Using a Static IP Address
- Run the following script to configure the interface using a Static IP Address:
- USR_USB/ADI_PPPOE/./gostatic ADIModem IPAddress Netmask
- route add default gw ipaddress (this is the gateway provided by your ISP)
- pico /etc/resolv.conf
| nameserver ipaddress (insert your DNS Address as provided by your ISP). |
- Run the following command to confirm the interface is operational and an IP address has been assigned: ifconfig
Once the interface is properly configured, you can start sending and receiving data.
NOTE: Whenever you unplug the USB cable, you need to run one of the above scripts. If you want to bring down the interface and bring it back up, run the USR_USB/ADI_PPPOE/./stopip. Use one of the above script files to configure the interface again.
PPPoA Interface
1. After you have built the driver, run the following script: USR_USB/./inst_pppoa
2. The script will compile, build, and install the PPPoA module. Upon completion, the script will copy the needed scripts and configuration files into the /usr/sbin and /etc/ppp directories.

3. If you are using ADSL Annex A, confirm that the VPI/VCI and Encapsulation type parameters located in the /etc/analog/usradslpots.conf are the same as the ones provided to you by your ISP. If you are using ADSL Annex B, which works over an ISDN line, confirm that the VPI/VCI and Encapsulation type parameters located in the /etc/analog/usradslisdn.conf are the same as the ones provided to you by your ISP.
4. Plug the USB cable into the modem and computer.
5. Modify the user name and password in pap-secrets, chap-secrets, and options files in /etc/ppp directory with the values provided by your ISP. For example, the format of the pap_secrets and chap_secrets files:
| * Secrets for authentication using CHAP | |||
| * Client | server | secret | IP addresses |
| ISP username | * | ISP password | * |
In the options file, you need to change the user "**********" with the username provided by your ISP.
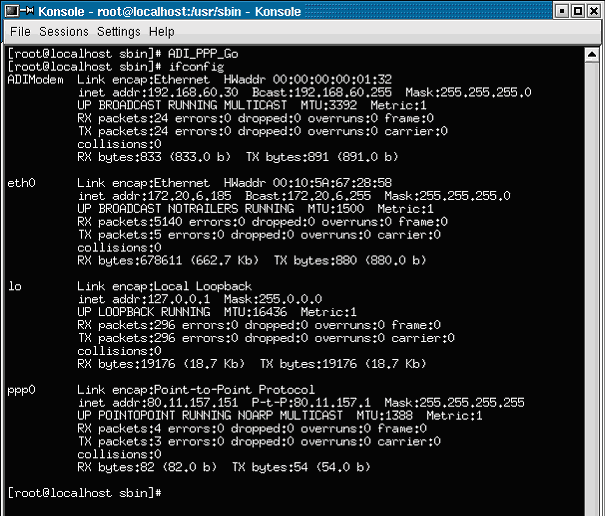
6. Go into /usr/sbin directory and run the following script: ADI_PPP_Go
7. Once the script has completed, run ifconfig and confirm that you are connected to your provider. PPP will create an interface called "ppp0" whenever it connects to a server.
8. To disconnect from the server, run ADI_PPP_Stop at the same directory and PPP will disconnect from the server.
The graphic on the following page shows the USRobotics SureConnect ADSL USB/Ethernet Modem connected to an ISP. The ADIModem interface is loaded (local IP 192.168.60.30), and the ppp0 interface is up and running with an IP address (80.11.157.151) and a gateway (80.11.157.1).
Modem Status
To view various statistics about the modem and the connection, run the following script:
USR_USB/ADI_PPPOE/./showstat
The statistical information will be available through ADIModem in /proc directory.
| This feature is available as soon as you plug the USB cable in. |
![]()